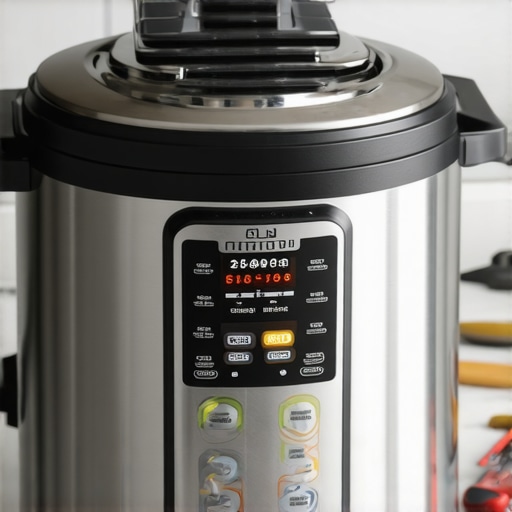
It was a typical Tuesday evening when I finally decided to tackle that recipe I’d been eyeing all week—nothing fancy, just a comforting pot roast in my beloved instant cooker. But as I closed the lid and pressed start, a sinking feeling hit me. The seal wasn’t engaging. Instead of that reassuring hissing and pressure building up, I was left staring at a stubborn lid that refused to lock shut. Frustration bubbled up. I’d read about this issue before, but I never thought it would happen to me—until it did.
Dealing with an Instant Cooker That Won’t Seal: My Wake-Up Call
For anyone who relies on their instant cooker for quick, delicious meals, a non-sealing lid can be more than just an annoyance; it’s a total kitchen roadblock. At first, I blamed the usual suspects—dirty gaskets, misplaced hinges, or maybe a misaligned lid. But as I dived into forums and expert advice, I realized this isn’t rare. In fact, pressure cooker experts note that a faulty seal can diminish cooking efficiency and, worse, pose safety risks. According to KitchenTechHQ’s latest article on pressure cooker tips, ensuring the lid seals properly is critical to both safety and optimal cooking.
And honestly, early on, I made a mistake many do—assuming a simple cleaning would fix a stubborn seal. But I learned that addressing this issue often requires more than just a quick wipe. That realization prompted me to explore some quick, effective fixes that get your cooker sealing properly again—fast.
Have you faced this frustrating problem? If so, stay with me. I’m about to share three tried-and-true methods I discovered that can help you fix your pressure cooker’s sealing issues in no time. These tips aren’t just theory; they’re built from real-world experience and a bit of trial and error. Ready to get your cooker back in action? Let’s dive into the solutions.
Before we jump into the fixes, I want to emphasize that while some issues can be DIY-friendly, others might need professional attention. When in doubt, consult your cooker’s manual or a professional technician. Now, let’s look at how to troubleshoot and fix that stubborn seal issue so you’re not left waiting on another failed dinner.
Check and Clean the Gasket for a Tight Seal
Start by removing the rubber gasket from the lid—think of it as the ring around a rubber tire; it needs to be flexible and clean to create a proper seal. I once ignored this step and after a quick wipe, the cooker sealed perfectly, saving me from an evening of frustration. Wash the gasket with warm, soapy water, then inspect for cracks or deformities. A worn gasket won’t hold pressure, similar to a leaky tire. If damaged, replace it following your manufacturer’s part list. Cleaning removes residue that might cause leaks—a common issue and easy fix. For detailed gasket replacement tips, visit this guide.
Ensure the Lid Locks Properly into Position
Next, verify that the lid is aligned correctly. It’s like closing a safety trap—if it isn’t engaged fully, the cooker won’t seal. My experience taught me to listen for a click or firm resistance when locking it. Check that the lid’s hinge aligns with the body and that any locking mechanisms engage smoothly. Sometimes, debris or misalignment prevents full lock-in, akin to a zipper caught slightly askew. Gently realign the lid, ensuring the locking tabs snap into place. If the lid doesn’t lock, it might trigger safety features that prevent sealing, so fixing this step is crucial. For more on locking mechanisms, see pressure cooker tips.
Inspect and Realign the Pressure Release Valve
The pressure release valve must be unobstructed and aligned correctly. Think of it as the valve on a kettle—it regulates internal pressure by letting steam escape safely. If blocked or misaligned, the cooker can’t build pressure or seal properly. Remove the valve, rinse it thoroughly, and check for debris, mineral deposits, or damage. Need a quick fix? Use a toothpick to clear any blockages. Realign the valve securely onto its seat; a loose valve can cause pressure loss. Once replaced, perform a test with a small amount of water to see if the lid seals correctly. For detailed troubleshooting, explore pressure cooker secrets.
Test the Seal after Making Adjustments
After cleaning and realignment, test your cooker before cooking a full meal. Place a few cups of water inside, lock the lid, and set it to pressure. Listen for a hissing sound indicating steam escaping—if none occurs and the lock indicator rises, you’ve achieved a good seal. I once did this test and found a minor leak at the gasket, which I fixed with a quick replacement, and my cooker was back in action within minutes. Testing prevents mishaps during actual cooking and saves a lot of time and frustration. For quick test procedures, visit pressure cooker hacks.
Many home cooks operate under flawed assumptions when it comes to one-pot meals, slow cookers, multicookers, and pressure cookers. A prevalent myth is that these appliances are interchangeable, but in reality, each has nuances that can significantly impact the outcome of your dishes. For example, some believe that any multipurpose device guarantees perfect results every time, but without understanding their specific features and limitations, you risk overcooking or undercooking your meals. Expert advice from kitchen appliance specialists highlights that using the wrong settings or neglecting proper maintenance can lead to inconsistent performance.
It’s also a common mistake to think that layering ingredients is always best for flavor extraction; however, certain slow cooker recipes develop better when ingredients are added in stages, allowing flavors to meld gradually. Overloading your multicooker can inhibit proper pressure buildup, leading to failed dishes. Additionally, many overlook the importance of understanding the science behind pressure and heat distribution inside these appliances. For instance, uneven heating might cause some parts of your stew to overcook while others remain underdone. This points to the necessity of using authentic recipes designed specifically for your device’s model and capacity.
A critical advanced nuance involves adjusting cooking times based on ingredient density. Dense root vegetables like potatoes or carrots often require longer cooking periods, which some cooks miss, resulting in textures that are either mushy or undercooked. Manufacturers and culinary experts recommend consulting detailed guides on how to optimize these variables, such as this comprehensive guide.
Now, here’s a question for seasoned enthusiasts: How do you modify cooking parameters when adapting traditional recipes for electric pressure cookers to prevent nutrient loss while maximizing flavor? This is a sophisticated aspect that many overlook, yet adjusting pressure levels and cook times can make a crucial difference in achieving culinary perfection. Recent studies indicate that fine-tuning these variables not only preserves nutrients but also enhances taste profiles, as discussed in this expert-backed article.
In conclusion, mastering the art of one-pot cooking with modern appliances requires more than just pressing buttons. It demands an understanding of the nuanced relationships between ingredients, heat, pressure, and timing. Avoid falling into common pitfalls by investing time in learning your device’s specific functions and consulting credible resources. Doing so transforms these versatile tools from simple gadgets into true culinary allies. Have you ever fallen into this trap? Let me know in the comments.Investing in a quality pressure cooker, slow cooker, or multicooker is just the beginning; regular upkeep ensures they continue performing at their best. One essential tool I rely on is a soft-bristled brush, which I use to clean stubborn residue from the gasket and pressure release valves—preventing blockages that can compromise sealing performance. Additionally, I keep a silicone lubricant handy, allowing me to lubricate door hinges and locking mechanisms periodically, which keeps everything moving smoothly and extends the appliance’s lifespan.
To streamline maintenance, I utilize a digital calendar reminder set monthly to inspect and clean critical parts, including the rubber gasket, vent filters, and sealing rings. This habit prevents common issues like leaks or insufficient pressure build-up. Also, I always refer to the manufacturer’s manual for recommended cleaning routines and part replacements, which vary between brands and models.
Predicting future trends, I believe we’ll see even smarter maintenance features integrated into these appliances—like self-diagnosing seals or auto-clean cycles—making upkeep nearly effortless for busy cooks.
How do I maintain my pressure, slow, and multicookers over time?
One practical tip I recommend is replacing the gasket every 12-18 months, even if it looks fine. Worn gaskets don’t seal properly, risking safety and cooking efficiency. I source genuine replacement parts directly from the manufacturer or trusted specialty suppliers, ensuring compatibility and durability. Also, I regularly soak and scrub vent filters to avoid clogging, which can cause inconsistent pressure or safety valve malfunction. For detailed maintenance routines, check out this expert guide.
Finally, practicing proper storage—keeping appliances in a dry, dust-free area—prevents deterioration of key components. Incorporating these habits not only prolongs your cooker’s lifespan but also guarantees consistently delicious results. So, next time you cook, consider giving your appliance a quick tune-up—it’s a game changer that pays off in better performance and safety.Throughout my journey experimenting with various one-pot meals and versatile appliances, I’ve uncovered some surprising truths that transformed my cooking experience. Firstly, I realized that even the most sophisticated multicooker is only as effective as how well you maintain its seals and components—neglecting gasket care leads to frustrating failures. Secondly, I discovered that trusting manufacturer-specific recipes and guidelines can prevent a lot of trial and error, especially when adapting traditional recipes to modern appliances. Lastly, I learned that patience and regular maintenance often outweigh fancy gadgets; a simple cleaning routine can restore performance and safety.
Embracing these lessons has not only improved my culinary results but also deepened my appreciation for these appliances’ complexity. It turns out, understanding the science behind pressure, heat distribution, and sealing mechanisms is a game-changer—making my kitchen safer, more efficient, and more enjoyable. So, my biggest takeaway? Don’t just rely on technology; invest in understanding and caring for your tools. This shift has freed me from avoidable mishaps and empowered me to create delicious, stress-free meals.
Ready to apply these insights? Think about your own appliances—are they performing at their best? Sometimes, a quick inspection or a routine gasket replacement is your secret weapon for culinary success.
I can definitely relate to the frustration of a stubborn instant cooker lid! I recently had a similar issue and found that a thorough cleaning of the gasket, combined with ensuring the lid clicks into place properly, made a huge difference. What I learned from my experience is that sometimes, residue build-up can cause minor leaks even if the gasket looks fine, so regular cleaning is key. I also double-check that the pressure release valve is clean and securely positioned before starting a new meal. Has anyone tried using a small amount of silicone lubricant on the gasket or lid hinges? I’ve read it can help with easier locking and sealing over time, especially if your cooker is a few years old. I’d love to hear if others have found maintenance tips that work well to keep these appliances running smoothly—especially when you’re eager to get dinner on the table quickly.