Picture this: It’s 6:30 PM, and I just realized I forgot to plan dinner. The kids are hungry, I’m exhausted, and the thought of juggling multiple pots and pans feels overwhelming. I’ve been there—rushing against the clock, hoping for a meal that’s both satisfying and quick. That lightbulb moment hit me hard: what if I could harness the power of my pressure cooker to whip up delicious, one-pot dinners in no time? The good news is, I did it, and now I want to share these secrets with you. Today, we’re diving into proven tactics that turn your pressure cooker into your best kitchen ally, especially in busy times. No more frantic last-minute cooking or settling for takeout. Instead, you’ll learn how to make hearty, flavorful meals that come together fast—saving you time, effort, and stress.
Why Quick & Tasty Dinners Matter in 2024
Life moves fast, and no matter how much we love to cook, there are days when time just isn’t on our side. Between work, family commitments, and everything in between, the last thing we need is a complicated dinner prep. That’s where the magic of the pressure cooker shines. It’s not just about speed—though it’s definitely a huge plus—it’s about making wholesome, satisfying meals with minimal fuss. Over the years, I’ve learned that mastering a few essential pressure cooker secrets can transform your dinner routine entirely. You get to enjoy home-cooked goodness without sacrificing hours in the kitchen. Plus, a well-chosen pressure cooker can handle everything from tender stews to flavorful rice dishes, all in one pot. If you’re skeptical, I get it. I once made the mistake of overfilling my cooker or not adjusting cooking times properly, which led to less-than-stellar results. But once I cracked the code, my dinner game changed forever.
Could It Really Be That Simple?
Absolutely. The key is knowing the right techniques, ingredient prep, and timing. Today, I’ll guide you through these tried-and-true secrets so you can confidently turn your pressure cooker into a dinner-making powerhouse. Curious? Keep reading, and I’ll show you how to avoid the common pitfalls and unlock the full potential of your kitchen gadget. And if you’re wondering whether this approach is worth the hype, trust me—once you see how much time and stress it saves, you’ll wonder why you didn’t start sooner. For starters, I used to think I needed multiple pots and a mountain of prep to make a decent meal. Now, I simply toss everything into my pressure cooker, set it, and relax. Want to see how it’s done? I’ll walk you through the core principles and share some of my favorite recipes that prove this method works every time. Ready to reclaim your evenings? Let’s get started with the fundamentals of making quick, tasty, one-pot dinners in your pressure cooker for 2024.
Prep Ingredients Smartly
Start by gathering all your ingredients before you turn on the pressure cooker. Chopping vegetables uniformly ensures even cooking, preventing mushy or undercooked spots. For example, I once tossed in potatoes and carrots without prepping, only to find some pieces overcooked and others still firm. To avoid that, I now spend 5 minutes chopping everything beforehand, which streamlines the entire process and guarantees consistent results. For quick recipes, choose ingredients that cook quickly or can be cut into smaller pieces. Check out this guide for ideas on fast, hearty ingredients perfect for pressure cooking.
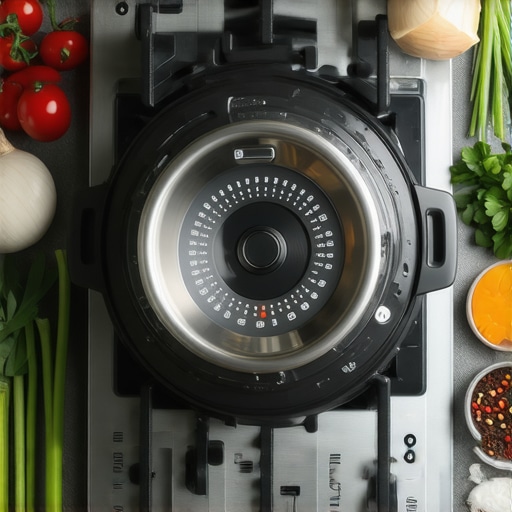
Master the Timing and Pressure Settings
Understanding your pressure cooker’s specific settings is critical. For most meats and stews, high pressure for 20-30 minutes works well, but overdoing it can lead to mushy textures. I once set my cooker for 40 minutes on high, expecting tender beef, but ended up with shredded meat. Now, I set a timer for the right duration and release pressure naturally or quickly, depending on the dish. To get it right every time, refer to this expert guide for pressure and timing tips tailored to different meal types. Remember, less is often more; undercooking is easier to fix than overcooking.
Layer Flavors with Ingredients
Layering ingredients ensures depth of flavor. Start with aromatics like onions and garlic at the bottom, then add your proteins and vegetables. I once made a beef stew where I threw everything in at once, resulting in bland meat. Now, I sauté onions and garlic first, then add browned beef and liquids. This step unlocks richer flavors. Use spices wisely—adding them early can deepen taste, but some are better added after pressure cooking. For quick inspiration, browse this collection of recipes designed for busy weeknights that maximize flavor in minimal time.
Utilize Natural and Quick Pressure Releases
Pressure release method affects texture and cooking time. For delicate foods like seafood or rice, release pressure quickly to prevent overcooking. For tougher cuts, let the pressure decrease naturally; it continues tenderizing. I once hurried the pressure release on a pot of beans, only to find that they turned to mush. Now, I judge by the recipe—if it’s a stew, I wait; if it’s rice, I quick-release. This simple step preserves the integrity of your ingredients and cuts down overall cooking time. Check out this guide for more pressure release strategies that fit various dishes.
Finish with Fresh Touches
Once the pressure cooker has done its job, add fresh herbs or a squeeze of lemon to brighten flavors. This final step elevates your dish from good to restaurant-quality. I remember making a beef stroganoff where I added fresh parsley after pressure cooking, which made all the difference. Keep a stash of herbs in your fridge for quick garnishing. For more tips on finishing dishes quickly without sacrificing flavor, visit this resource. Now, your pressure cooker isn’t just a time-saver—it’s your secret weapon for delicious, nutritious dinners every night of the week.
Many home cooks assume that using a pressure cooker is straightforward, but there are subtle nuances and common pitfalls that can sabotage your efforts. Let’s dig deeper into what most people get wrong about pressure cooking and how to avoid these costly mistakes, so you can consistently create flavorful, perfectly cooked meals.
What’s the biggest misconception about pressure cooker timing?
A prevalent myth is that longer cooking times always mean better results. In reality, overestimating the time leads to mushy textures and loss of flavor. Many assume that if 20 minutes works for beef stew, then 30 or 40 minutes will make it better. But the truth is, most ingredients have an optimal pressure cooking window—exceeding it can break down proteins, vegetables, and grains, turning your meal into a bland, unappetizing mess. To master timing, I recommend consulting expert guides like this comprehensive resource, which emphasizes precise timing based on ingredient type and cut.
Another misconception is the idea that all pressure cookers are created equal. In fact, different models and brands have varying pressure levels and safety features, which directly impact cooking times and results. For example, some cookers operate at 10 psi, while others go to 15 psi, affecting how quickly ingredients reach the desired tenderness. Knowing your specific device’s settings is essential; otherwise, you risk under- or overcooking your dishes. Check your user manual or visit this expert guide for detailed insights on your model’s capabilities.
Why rushing pressure release can ruin your meal
Many cooks rush to release pressure immediately after cooking, thinking it saves time. However, quick pressure release can sometimes lead to uneven textures or ingredients falling apart. For delicate foods like seafood or rice, a quick release is ideal, but for tougher cuts of meat or stews, a natural pressure release allows residual heat and pressure to tenderize ingredients further. I once hurried a batch of beans and ended up with mushy, overcooked legumes. Now, I assess each dish and choose the appropriate pressure release method, following detailed advice from this detailed guide. This nuanced step preserves the integrity of your ingredients and enhances flavors.
Have you ever fallen into this trap? Let me know in the comments. Mastering these subtleties makes all the difference between a good pressure-cooked meal and a fantastic one. Remember, patience and understanding your device are your best tools for culinary success. So, next time you cook under pressure, think twice about timing and pressure release—your taste buds will thank you.
To keep your pressure cooker functioning flawlessly for years to come, investing in the right tools and adhering to a solid maintenance routine is crucial. My personal approach involves using high-quality silicone sealing rings, which I replace every 12-18 months to prevent leaks and ensure optimal pressure buildup. Additionally, I rely on a soft-bristle brush to clean the valves and lid gasket thoroughly after each use, preventing food residue buildup that can impair performance. A digital thermometer helps me monitor the internal temperature during cooking, ensuring precise results and preventing overcooking or undercooking. These tools, when used consistently, extend the lifespan of your appliance and maintain safety standards.
Regularly inspecting the pressure release valves and gasket for signs of wear or damage is another essential practice. I perform this check monthly, replacing parts immediately if I notice cracks, warping, or disfigurement. Keeping the lid and sealing components dry and stored separately when not in use prevents mold and degradation. For deep cleaning, I recommend following the manufacturer’s instructions, which usually involve washing removable parts with warm, soapy water and avoiding abrasive cleaners that can damage the surfaces. This routine keeps your cooker in top shape and ready for quick meals at any time.
Looking ahead, I believe the trend will shift towards more durable, self-maintaining pressure cookers equipped with smart sensors that monitor gasket integrity and pressure levels in real-time. This innovation could minimize maintenance efforts and improve safety. To ensure your current model stays in prime condition, consider investing in a maintenance kit that includes replacement gaskets, valves, and cleaning brushes—these are often available directly from the manufacturer or trusted third-party providers.
How do I maintain my pressure cooker over time? I stick to a simple routine: inspect and replace worn parts regularly, clean after every use, and store it in a dry, cool place. This proactive approach prevents issues before they arise and guarantees consistent, delicious results every time you use it. If you haven’t already, try replacing your gasket with a high-quality silicone version—it’s an upgrade that offers better longevity and heat resistance. For comprehensive guidance, check out this expert maintenance guide to keep your pressure cooker performing like new. Remember, a well-maintained cooker is the backbone of effortless, flavorful meals, so take a few minutes each month to care for your investment. Your future self will thank you for it.
The Toughest Lessons I Learned About Pressure Cooking
One of the biggest lessons I learned is that overestimating cooking times can ruin your meal. I used to set my pressure cooker for 40 minutes expecting fall-apart tender meat, only to end up with mush. Now, I stick to recommended timings and trust my instincts.
Another insight is that not all pressure cookers are created equal. Some operate at different psi levels, which affects how quickly ingredients cook. Knowing your specific model’s settings makes all the difference.
Finally, rushing the pressure release process can be a disaster. Quick releases are great for delicate foods, but for hearty stews, natural release locks in flavor and tenderness. Once I mastered these lessons, my pressure cooker became my favorite kitchen tool.
This post really hits the nail on the head for busy families trying to get dinner on the table quickly without sacrificing quality. I’ve personally found that prepping ingredients ahead of time, even just a few minutes to chop everything, makes a huge difference in how smoothly the meal goes. I used to overcook meats because I wasn’t paying attention to timing, but now I stick to recommended pressure times — it’s amazing how much better everything turns out! Also, I’ve learned that natural pressure release often results in more tender and flavorful meat, especially for bigger cuts. Have you noticed any specific recipes where the timing or pressure release method made a big difference for you? I’d love to hear what dishes worked best in your experience.
I really appreciate how this post emphasizes the importance of ingredient prep and timing in pressure cooking. It’s true that even a few extra minutes chopping vegetables and understanding your cooker’s specific settings can make a huge difference in meal quality. I’ve found that experimenting with natural versus quick pressure releases can be a game-changer for different dishes. For example, I always do a natural release for tougher cuts of meat like brisket or pork shoulder, which really helps tenderize the meat further and enhance flavor. I wonder, what about you? Have you noticed a significant difference when applying these pressure release methods to specific recipes? I also think that investing in a good quality pressure cooker with adjustable pressure settings can give even more control. It’s amazing how a little bit of knowledge can turn this appliance into your best kitchen ally, especially when time is tight. Would love to hear more tips on avoiding common pitfalls, especially for newbies who might feel overwhelmed at first.
I totally relate to the stress of realizing dinner at 6:30 PM! Over the years, I’ve learned that organizing ingredients beforehand really saves the day. Chopping everything in advance minimizes guesswork during busy nights, and I agree with the post — sticking to recommended cooking times preserves texture and flavor. One trick I found helpful is to mark timers based on the dish and cut of meat; it takes the guesswork out of timing.
Regarding pressure release, I’ve noticed that a natural release tends to deepen flavors and tenderize tougher cuts, especially with stew meats. Do others prefer quick releases for certain dishes, or do you usually stick with natural? I’d love to hear some of your favorite pressure cooker recipes that turned out stunning using these secrets. It’s amazing how these small tweaks can elevate weeknight meals to a whole new level, isn’t it? Would love to hear your tips for avoiding overcooking or undercooking when using a pressure cooker.
Your post really resonates with me, especially the part about ingredient prep and understanding timing. I’ve found that meal planning on the weekends not only eases the weekday pressure but also helps me match the right ingredients with the proper pressure settings. For example, I’ve experimented with both natural and quick releases, and I agree that natural release is usually better for tougher cuts like beef brisket or pork shoulder because it enhances tenderness and flavor. A question I have is, how do others decide when to do a quick release versus natural? Sometimes I worry about undercooking delicate items like rice or seafood, yet I also want to avoid overcooking tougher cuts. Also, investing in a good pressure cooker with adjustable settings has been a game changer for me—it gives more control over textures and flavors. Do you think that model quality makes a big difference in these outcomes, or is mastering technique more important? I’d love to hear more about your experiences with different pressure settings and recipes that turned out especially well.
I really relate to this post and the challenges of whipping up a quick yet flavorful dinner after a busy day. Over the years, I’ve also found that ingredient prep makes all the difference—chopping vegetables beforehand and having your proteins ready to go helps streamline the whole process. One thing I’d add is that experimenting with different pressure settings and timing can be a game-changer, especially when adapting recipes to your specific cooker model. I’ve had great success with hearty chicken and rice dishes by adjusting pressure and using natural releases, which helps lock in moisture and flavor. My question is, how do others manage recipes that require different pressure times? Do you find switching between high and low pressure settings on your cooker useful for various dishes? I believe mastering those little nuances can truly elevate your pressure cooker meals, making weeknights much less stressful.
I absolutely agree with the importance of ingredient prep and timing. One thing I’ve found helpful is using a digital pressure cooker that allows you to manually set the pressure level — it offers more control, especially when adapting recipes. I’ve had good results with switching between high and low pressure depending on whether I’m cooking delicate items like fish or tougher cuts. Also, I’ve started keeping a small notebook with my most successful timings and pressure settings, which saves a lot of guesswork. Does anyone have recommended resources or apps that help with perfect timing and pressure adjustments? I’d love to hear more about how others fine-tune their process for different dishes. Overall, mastering these details has really turned my pressure cooker into my go-to for quick, flavorful meals, even after a hectic day.
Reading this post really made me think about how important ingredient prep is, especially in quick meals. I used to rush through chopping, only to find that uneven pieces made some parts overcooked while others were still raw. Now, I spend those few extra minutes prepping everything in advance, and it truly makes a difference in texture and flavor. I’ve also found that understanding the pressure and time settings for specific ingredients can be tricky—especially when trying new recipes. Have others experimented with different pressure levels for the same dish to see how it affects tenderness? I’d love to hear about your experiences and any tips for mastering timing to avoid mushy or undercooked results.