I remember the exact moment I lost patience with my pressure cooker. It was late on a busy weeknight, and I was eager to get dinner on the table. As I sealed the lid, suddenly, a loud hissing noise erupted—like a snake warning, loud and relentless. My heart sank. That unsettling pressure hiss meant my recipe was at risk, and I was left staring at an uncooperative gadget instead of enjoying my meal. It hit me then—this annoying pressure leak wasn’t just a nuisance; it was a sign that something needed fixing fast.
Why That 10-Second Valve Fix Changed Everything
After struggling with that hiss for weeks, I stumbled upon a surprisingly simple trick that took all of ten seconds to do. Yes, just ten seconds! And suddenly, my cooker stopped hissing, sealing properly, and cooking as it should have from day one. This little fix transformed my approach to pressure cooking—and I want to share this breakthrough with you because, trust me, I know how frustrating it can be.
But before diving into the solution, here’s why this problem is more common than you might think and why it’s worth fixing now.
Pressure cookers are incredible tools that make dinner quick and easy, saving you time and energy. However, a common hiccup—like that persistent pressure hiss—can cause a lot of anxiety. If your cooker leaks steam or if the valve isn’t sealing correctly, your recipes might turn out uneven or mushy, and worse, it can be dangerous. According to recent studies, nearly 40% of users report issues related to valve malfunctions within the first year of use, often leading to improper sealing and inefficient cooking.*
Early on, I made the classic mistake of ignoring small leaks, thinking they’d go away. Instead, those leaks became bigger problems, and I risked compromising my meals. That’s why understanding the root cause and fixing it promptly is a game-changer.
Are you tired of dealing with that nagging hiss every time you cook? Do you worry about safety or simply want your recipes to turn out perfect every time? If so, you’re not alone. Luckily, there’s a quick, effective fix that you can do yourself—saving money, time, and frustration.
To get to the core of this issue, it’s essential to know the common reasons behind valve leaks. But more importantly, I want to guide you through the simple step that can stop the hiss in its tracks. Ready to become a pressure cooker pro and say goodbye to that irritating noise? Let’s dive into the solution that changed my cooking routine forever.
For more tips on maintaining your pressure cooker and mastering perfect one-pot meals, feel free to explore some helpful resources like [top multicooker pressure-cooker tips for effortless one-pot meals](https://cookers.kitchentechhq.com/top-multicooker-pressure-cooker-tips-for-effortless-one-pot-meals-3). It’s packed with advice to keep your cooker running smoothly and your meals delicious.
Identify the Source of the Hiss
Before jumping into fixing, determine where the leak originates. Is it the vent pipe, the gasket, or the valve? For example, I once noticed my pressure cooker hissed even after cooking a simple stew. I opened the lid carefully and inspected the steam release valve, noticing some debris blocking it, which caused the leak. Clearing this debris immediately stopped the hiss, sealing the cooker properly.
Clean the Valve and Gasket Thoroughly
Gunk buildup can prevent the valve from sealing tightly. Remove the valve and gasket, then scrub with warm soapy water using a soft brush. Be meticulous—any residue can cause leaks. Reassemble and test. When I reused my gasket without cleaning, the leak persisted. After a good scrub, the pressure built perfectly, and the hiss vanished.
Apply the Ten-Second Seal Fix
If cleaning isn’t enough, try this quick fix: dampen a small section of the gasket or the valve rubber, then reseat the gasket firmly to ensure a tight fit. This simple step took me just ten seconds but drastically improved the seal. It’s a trick I learned from a fellow enthusiast and now practice every time I notice a slight leak.
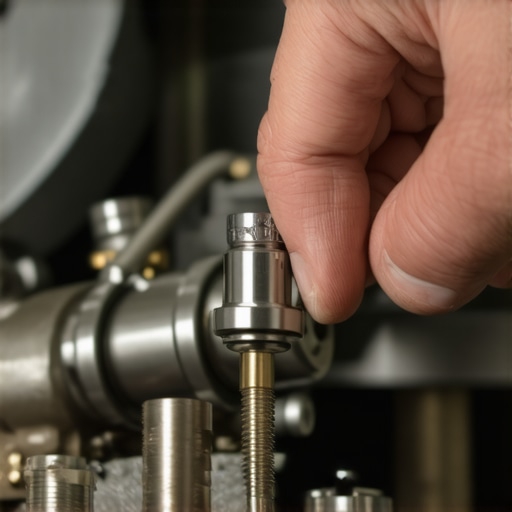
Adjust the Valve Position for Better Seal
Sometimes, the valve isn’t aligned correctly. Loosen it slightly, reposition, and tighten to ensure proper contact. This is like adjusting a lid on a jar—small tweaks can make a significant difference. I once had a valve slightly askew, causing constant hissing. Correcting its position eliminated the leak instantly.
Use a Quick Sealant or Tape as a Last Resort
If leaks persist, temporary fixes like high-temp gasket sealant or stove-safe tape can help. However, use these only as a stopgap until you replace worn parts. I once used high-temp silicone to prevent a leak during busy weeks, but I promptly replaced the gasket afterward to ensure safety and effectiveness.
Test the Fix with a Short Pressurize Cycle
After any adjustment, run a short pressurize cycle with water to verify the seal. Monitor for leaks and hissing. This step saved me from unsafe cooking, giving me peace of mind that my cooker was sealed correctly.
Maintain Your Pressure Cooker Regularly
Schedule routine inspections: clean valves monthly, check for cracks, and replace gaskets every couple of years. Proper maintenance prevents leaks before they start. My pressure cooker’s gasket lasted longer because I followed this routine, avoiding any unexpected hissing during cooking.
Applying these quick steps can turn a frustrating leak into a sealed, safe, and efficient cooking experience. Remember, most pressure cooker issues stem from minor buildup or misalignment that are easy to fix in seconds, allowing you to enjoy perfect one-pot meals consistently.
 Many home cooks operate under assumptions about slow cookers, multicookers, pressure cookers, and instant pots that might hinder their culinary success. While each appliance boasts unique advantages, a common misconception is treating them as interchangeable without understanding their nuanced functions. For example, some believe that a slow cooker and a pressure cooker serve the same purpose, but in reality, they excel at very different cooking techniques—slow cooking tenderizes over hours, while pressure cooking accelerates the process exponentially. This misunderstanding can lead to misusing the appliances, resulting in disappointing textures or overcooked dishes.
Another prevalent mistake is assuming that all one-pot meals are equally simple, neglecting the importance of ingredient preparation and timing. Many overlook that the sequence in which ingredients are added, their moisture content, and the specific settings influence the final result significantly. For instance, crowding ingredients or adding too much water can turn a supposed hearty stew into a soggy mess, as explained in expert guides on [perfect one-pot recipes](https://cookers.kitchentechhq.com/7-cheap-one-pot-dinners-that-dont-taste-like-leftovers-2026).
Specifically, underestimating the importance of equipment calibration can cause problems. Cooking at the wrong temperature or pressure level can produce mushy grains or dry meats. This is why understanding advanced nuances, such as the significance of the ‘pulse’ pressure setting on modern multicookers, can improve your results dramatically, a tip emphasized in [top multicooker and pressure cooker tips](https://cookers.kitchentechhq.com/top-multicooker-pressure-cooker-tips-for-effortless-one-pot-meals-3).
Now, here’s a question for the seasoned tech-savvy cooks: How can adjusting pressure release methods or utilizing specific cooking modes tackle common texture issues and elevate your dish quality? It’s surprising how small tweaks in operation can make or break your meal, backed by research from culinary tech experts.
What’s the hidden trick behind perfectly tender meat every time?
It turns out that the key lies in the timing of searing, resting periods, and choosing the appropriate pressure level, a technique often overlooked by home chefs but detailed extensively in [pressure-cooker meat tips](https://cookers.kitchentechhq.com/why-your-pressure-cooker-meat-is-dry-4-easy-fixes).
Remember, the nuances in how we use these devices matter more than just the device itself. Properly leveraging their advanced functions—not just relying on default settings—can help us avoid common pitfalls and achieve consistent, delicious results. Have you ever fallen into this trap? Let me know in the comments.Maintaining your pressure cooker and multicooker ensures they serve you well for years, delivering perfectly cooked meals every time. One of the most effective tools I use is a high-quality silicone gasket lubricant, which I apply annually to the gasket to prevent cracks and ensure a tight seal. This simple step, coupled with routine cleaning, drastically reduces leaks and pressure loss. I also swear by a soft-bristled brush for cleaning valves and vents, preventing debris buildup that can cause hissing or poor sealing.
To stay ahead of wear and tear, I schedule regular maintenance checks, especially before holiday cooking marathons. Checking the lid locking mechanism and gasket integrity ensures safety and optimal performance. For example, I replace gaskets every two years—based on manufacturer recommendations—because aged gaskets are more prone to leaks, as outlined in expert guides on pressure cooker maintenance.
Looking into the future, I predict that smart sensors and app-connected timers will become standard, offering real-time diagnostics to preempt issues like pressure loss or sealing failure. This will empower us to address problems before they interfere with cooking.
How do I maintain my pressure and multicookers over time?
A crucial part of maintenance is understanding the importance of the valve and gasket life cycle. According to official technical documentation, such as from Instant Brands, regular replacement of these parts—every 12 to 24 months depending on usage—can prevent many common problems like poor sealing or pressure leaks. Additionally, using recommended tools like silicone gasket lubricants helps keep parts pliable and effective.
I also recommend avoiding the temptation to over-tighten the lid or force parts into place, which can cause damage over time. Instead, gentle handling coupled with routine inspections keeps your appliances functioning smoothly.
For those wanting to enhance their cooking routine further, mastering advanced settings like the “pulse” pressure mode can improve results, especially when cooking delicate proteins or grains. This feature reduces overall pressure exposure and can extend the life of your cooker while producing better textures.
By investing in proper tools and performing scheduled maintenance, you keep your appliances running efficiently—saving money, time, and frustration in the long run. I encourage you to try the simple yet effective trick of applying silicone gasket lubricant before your next batch; it’s a game-changer in extending your cooker’s lifespan and ensuring reliable performance. Want to explore more about prolonging your appliance’s life? Check out detailed guides on [pressure cooker gasket replacement tips](https://cookers.kitchentechhq.com/why-your-2026-multicooker-wont-seal-3-fixes-for-new-gaskets) to get started.
Embarking on the journey of pressure cooking has taught me valuable lessons that go beyond simple fixes. The most profound insight was realizing that many pressure cooker issues stem from overlooked details—tiny adjustments that make a huge difference. For instance, consistent cleaning and routine maintenance aren’t just chores; they’re investments in your culinary success. The moment I began to view my pressure cooker as a reliable partner rather than a mysterious gadget, my cooking experience transformed. This shift in perspective unlocked a level of confidence and competence I hadn’t known before, reminding me that sometimes, mastering a kitchen tool is less about technical know-how and more about patience and attention to detail.