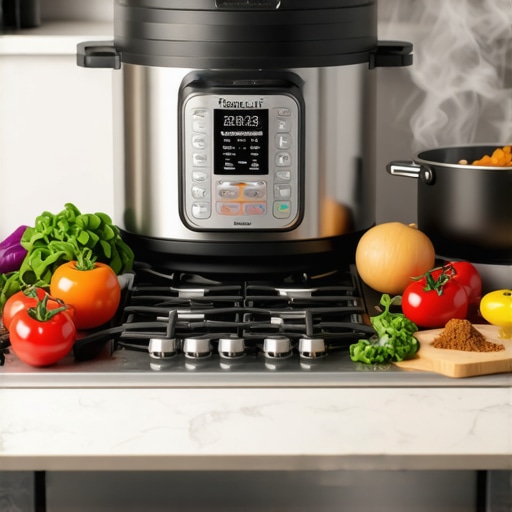
Have you ever stared at a cluttered kitchen, overwhelmed by the idea of cooking dinner after a long day, only to realize you forgot to start the slow cooker hours ago? That lightbulb moment—where I finally understood the power of the right hacks—changed everything for me. Those moments of frustration, the endless scrolling for recipes, and the fear of under or overcooking are common. But I promise, there’s a better way. This year, I’ve dived deep into the best pressure cookers and multicookers, discovering game-changing hacks that turn even the busiest weeknights into a breeze. And today, I want to share what I’ve learned so you can conquer your kitchen chaos with confidence.
Why Simplifying Dinner Matters More Than Ever
Between work, family, and everything in between, finding time to cook can feel like an impossible puzzle. But here’s the thing—one-pot meals are a lifesaver. They cut down on dishes, save time, and still deliver hearty, delicious food. The catch? Without the right techniques, they can turn into a soggy, flavorless mess. That’s where savvy pressure cooker and multicooker hacks come in. They help you unlock the full potential of your appliances, making dinner prep faster, smarter, and more reliable. Trust me, once you master these tricks, you’ll wonder how you ever managed without them.
Is All the Hype About Pressure & Multicooker Hacks Just Fluff?
Early on, I made the mistake of thinking that any quick fix would do—only to end up with dry chicken or mushy vegetables. My biggest mistake was ignoring the importance of proper sealing and timing. Once I started paying attention to those details, everything changed. I found that the secret isn’t in complicated recipes but in simple, proven techniques. Want to learn more? Check out this comprehensive guide for expert tips that will elevate your meals. Now, I’m here to help you avoid my rookie errors and unlock the full potential of your kitchen gadgets, making every one-pot meal a success.
Choose the Right Settings to Optimize Results
Start by selecting the appropriate pressure level—high or low—based on your recipe. For tender meats or beans, high pressure usually does the trick, while delicate vegetables benefit from low pressure. I once tried to cook a delicate fish fillet on high pressure, which resulted in a mushy mess. After that, I learned to double-check my settings for each dish. Remember, consistency is key—once you find the right pressure for a type of meal, stick with it to save time and avoid errors. For more detailed guidance, visit this expert guide.
Perfect the Timing to Prevent Overcooking
Timing is everything when using pressure and multicookers. Overcooking can turn a perfectly tender dish into a soggy disaster. I once left my stew under pressure for 10 minutes too long, and the vegetables turned to mush. To avoid this, always set a timer and use the quick-release method when the cook time ends. This halts the cooking process immediately, preserving texture and flavor. Use a reliable timer and keep a mental note of common cooking times for different ingredients—this makes the process faster and more predictable. For quick recipes, check out these quick recipes.
Layer Flavors with Smart Ingredient Prep
Prepping ingredients properly is like laying a solid foundation for a building. Searing meats before pressure cooking adds depth, while chopping vegetables uniformly ensures even cooking. I remember tossing raw potatoes and carrots into my first pressure cooker stew, only to find some pieces undercooked while others turned to mush. Now, I make sure to sauté aromatics first, then add ingredients in order of cooking time. This technique enhances flavor and texture. For more advanced tips, explore top multicooker tips.
Layer Liquids and Thicken Sauces
Adding the right amount of liquid is crucial—too much, and your dish becomes watery; too little, and it might burn or stick. Think of liquids as the glue that holds flavors together. When I made a beef stew, I initially added too much broth, which diluted the spices. Now, I start with less—about half of what the recipe suggests—and add more if needed after pressure cooking. To thicken sauces, release the pressure naturally, then use the sauté function to reduce the liquid and intensify flavors. This method yields a rich, hearty sauce without extra steps. For sauce-making tips, visit these sauce tips.
Utilize Natural Release for Better Texture
Natural pressure release allows residual heat to finish cooking and helps ingredients retain their shape. I learned this the hard way when I quickly released pressure after cooking chicken, only to find it dry and stringy. Giving the pressure cooker time to naturally release—usually 10-15 minutes—lets the dish settle and prevents overcooking. For tougher cuts, this method ensures tenderness without losing moisture. To master this, plan your cooking time accordingly—set a timer for natural release, so you’re not waiting around. For additional insights, check out this comprehensive guide.
Finish with Freshness and Garnishes
Once the pressure cooking is complete, add fresh herbs or a squeeze of lemon to brighten flavors. I often forget this step, but it makes a significant difference. For example, a sprinkle of chopped parsley on my stew elevated it from bland to vibrant. Keep garnishes handy—herbs, lemon slices, or a drizzle of olive oil—to add just before serving. This simple step transforms your dish and adds a professional touch. For more plating tips, explore this article.
Many home cooks jump into pressure cooking and multicooker techniques with the idea that following basic tips will guarantee success. While simplicity is essential, there’s a little-known nuance that can make or break your dishes: understanding how residual heat and pressure release interact with your ingredients. This often-overlooked detail can cause common mistakes like overcooked vegetables or dry meats, even when you’re using the right settings. Let’s dig deeper into this often-missed aspect so you can elevate your culinary game.
One of the biggest myths is that once the timer goes off, your meal is ready. In reality, those final moments—especially during natural release—are critical. Many cooks release pressure immediately after cooking, thinking the dish is done. But, in my experience, allowing residual heat to continue gently cooking the ingredients ensures better texture and flavor preservation. This is why experts emphasize the importance of natural release for tougher cuts of meat or delicate vegetables. According to a study by culinary scientist Dr. Harold McGee, residual heat can contribute significantly to the final doneness of a meal, making a difference between a perfect dish and one that’s overdone. This is a subtle but powerful detail that separates novice cooks from seasoned chefs.
How does the interaction of pressure release and residual heat impact your results?
When you use natural pressure release, you’re effectively letting the remaining steam and heat gently finish the cooking process. This slow cooldown prevents sudden temperature drops that can lead to uneven textures. Conversely, quick release can cause rapid cooling, which might stop the cooking prematurely, leaving some ingredients undercooked or causing others to overcook as they continue to sit in residual heat. Mastering this balance is especially important when cooking multi-ingredient dishes like stews or braises. Remember, the timing and method of pressure release are just as crucial as selecting the right pressure and time settings. For advanced tips on how to optimize this process, check out this detailed guide.
Another common mistake is ignoring ingredient-specific nuances. For example, root vegetables and tougher cuts of meat benefit from longer natural releases, which allow the residual heat to tenderize the ingredients gradually. Delicate fish or quick-cooking vegetables, however, need immediate release to prevent mushiness. Recognizing this subtle difference can save you from many kitchen disasters. As always, practice and observation will help you intuitively understand these interactions more deeply. Have you ever fallen into this trap? Let me know in the comments!
By mastering the interaction of pressure release techniques with residual heat, you’re not just following recipes—you’re developing an intuitive understanding of your appliance’s behavior. This knowledge transforms your approach from guesswork to art, making every meal a triumph. So next time you cook, pay close attention to how and when you release pressure. Your taste buds will thank you.
Keeping your pressure cooker or multicooker in top shape is crucial for ensuring consistent performance and extending its lifespan. Personally, I rely on a few specific tools and habits that help me maintain my appliances and troubleshoot issues quickly. One essential item is a soft-bristle brush, which I use regularly to clean the rubber gaskets and valves. These parts are vital for proper sealing and safety, and buildup can cause leaks or pressure loss. Regular cleaning with a gentle brush prevents residue from affecting performance and helps you catch any wear early.
Another tool I swear by is a silicone spatula. It’s perfect for scraping out stubborn bits of food from the inner pot without scratching the surface. Maintaining a clean inner surface not only ensures better flavor retention but also prevents corrosion over time. I also keep a small bottle of food-grade silicone lubricant on hand, which I apply sparingly to the gasket to keep it supple and creating a tight seal. This small step can prevent common problems like slow pressure buildup or leaks.
When it comes to software or firmware updates, many modern pressure cookers and multicookers now include smart features that can be upgraded via an app. Regularly updating the device ensures you benefit from the latest bug fixes and feature improvements. I recommend checking your manufacturer’s website or app periodically for updates—this can improve the device’s efficiency and safety over time.
Thinking about the long-term, routine inspections are key. Every few months, I dismantle the gasket and clean all the contact surfaces thoroughly. If you notice cracks, tears, or deformities, replacing the gasket immediately is vital. Many manufacturers offer affordable replacement kits, which I keep on hand for emergencies. This proactive approach helps avoid sudden failures during busy weeknights and keeps your cooking safe and predictable.
Looking ahead, I believe the trend toward smart appliances will continue to grow. Future models could include self-diagnostic tools that alert you to worn parts or need for maintenance. Until then, a simple routine of cleaning, inspecting, and updating will keep your device running smoothly for years to come.
How do I maintain my pressure cooker or multicooker over time?
The key is consistency. Make it a habit to clean the gasket and valves after each use, inspect for damage, and replace parts before they fail. Keep the inner pot and lid surfaces free of food residue, and avoid using abrasive cleaners that can scratch or damage the seals. Additionally, store your appliance in a dry, cool place to prevent mold or deformation of rubber parts. For a comprehensive guide on maintaining your multicooker, visit this detailed guide. Remember, a well-maintained device not only lasts longer but also cooks more safely and efficiently. Give these tips a try today, and you’ll see a noticeable difference in your cooking experience.
The Hardest Lesson I Learned About Pressure Cooking
One of my biggest realizations was that the timing and pressure release method can make or break your dish. I used to think that setting the timer was enough, but I learned the hard way that rushing the pressure release often led to overcooked vegetables or dry meats. The secret is patience—allowing residual heat to finish the job naturally sometimes yields the most tender, flavorful results. This lesson transformed my approach and can do the same for you.
My Essential Toolkit for Pressure Cooking Success
Clean tools like a soft-bristle brush and silicone spatula have become my best friends in maintaining my appliances. They help me keep gaskets and valves in top shape, preventing leaks and ensuring safety. Regularly updating the firmware on smart cookers and inspecting rubber seals are habits that keep my device performing flawlessly. These small, consistent actions save me time and frustration in the long run.
Embrace the Future with Confidence
The journey to perfect one-pot meals with pressure and multicookers is ongoing, but every step is worth it. By understanding the interaction between pressure release, residual heat, and ingredient nuances, you develop an intuitive skill that elevates your cooking. Don’t be afraid to experiment, learn from mistakes, and keep refining your technique. Your taste buds—and your busy schedule—will thank you for it. Now, I challenge you: what’s the one pressure cooker hack you’re eager to try next? Share your thoughts below!
I really appreciated the emphasis on the importance of natural pressure release. In my experience, rushing to open the valve often ruins the texture of tender meats and vegetables, leaving them overcooked or mushy. Allowing that gentle cooldown truly makes a difference, especially for recipes like stews or braised dishes. One thing I’ve found helpful is planning my meal timing so that I can set the natural release while doing other prep work or setting the table. Have you all noticed similar improvements when giving some extra time for residual heat to work its magic? It really elevates the overall flavor and texture of the dish.
This post really resonates with me because I used to overlook the importance of natural pressure release in my cooking. It was only after some trial and error that I noticed how much better my dishes turned out when I let residual heat do its job, especially with delicate ingredients like fish or quick-cooking vegetables. I also find that planning to do other prep work during the natural release phase saves me a lot of time. One question I have is whether anyone has tried different natural release durations for specific dishes—like 10 versus 15 minutes—to see if it really impacts texture or flavor? I’d love to hear how others fine-tune this part of their routine to get perfect results every time.
This post really highlights how mastering pressure release techniques can dramatically impact the final dish. I used to rush through the release because I was impatient, but I noticed that doing a natural release for at least 10 minutes really improved my meat’s tenderness and retained more flavor. I’ve also started timing my other prep work during this period, which makes everything more efficient. One thing I’m curious about—has anyone experimented with different release times for specific dishes, like longer for tougher cuts or shorter for vegetables? I’d love to hear how you fine-tune this to get perfect results every time. Overall, understanding the science behind residual heat and pressure release has completely transformed my approach to pressure cooking.
I fully agree with the importance of proper pressure release techniques. I used to rush the process, especially during busy weeknights, but I found that giving the dish a natural release for about 10-15 minutes really makes a noticeable difference in texture and moisture. I’ve experimented with different times depending on the ingredients—longer for tougher cuts and shorter for delicate vegetables. One way I stay on top of it is by timing my other prep work to coincide with the natural release period, which helps me maximize efficiency without sacrificing quality. Has anyone else noticed a significant difference in flavor or tenderness when adjusting the natural release duration? I’d be interested to hear how others fine-tune this step to suit different recipes or ingredients.