It was late one evening when I finally decided to cook that hearty beef stew my family loved. I had all the ingredients prepped, the slow cooker set to low, and then I walked away—confidence high. Hours later, I returned, eager to enjoy a tender, melt-in-your-mouth meal. But instead, I was met with a frustratingly tough piece of beef staring back at me. Sound familiar? If you’ve ever faced the disappointment of chewy, uninviting meat from your slow cooker, you’re not alone.
The truth is, achieving tender, flavorful beef in a slow cooker can sometimes feel like navigating a minefield. Despite its reputation for effortless cooking, many home cooks stumble upon issues where their beef stays stubbornly tough, no matter how long they cook it. I used to think it was just bad luck or the cut of meat, but I soon learned there’s more to the story. In fact, various common mistakes and overlooked tricks can spoil even the best cuts.
Today, I want to share with you the five most effective fixes I’ve discovered—those little adjustments that make a huge difference in turning tough beef into a succulent masterpiece. Whether you’re a busy parent, a meal prep enthusiast, or someone just trying to get dinner on the table without stress, these tips will help you succeed.
But first, let me ask—have you ever invested hours into a slow-cooked meal only to be disappointed by the texture? If so, don’t worry. You’re about to learn the secrets that can save your dinners and make your slow cooker benefit you rather than frustrate you.
What Causes Your Slow Cooker Beef to Stay Tough and How to Fix It
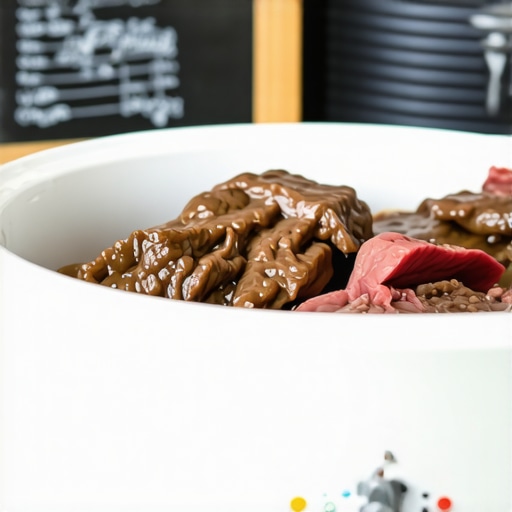
Searing the Meat to Unlock Flavor
Before tossing your beef into the slow cooker, sear it in a hot skillet with a little oil until browned on all sides. This step not only enhances flavor but also starts breaking down muscle fibers, which contribute to tenderness. I once skipped this step, thinking it was optional, and ended up with a stew that lacked depth and was tougher than expected. Searing creates a Maillard reaction, adding a rich, caramelized flavor that your slow-cooked beef will absorb, resulting in juicier, more tender meat.
Use the Right Cut for Slow Cooking
Select tougher cuts like chuck roast, brisket, or round steak, which contain connective tissue that melts during slow cooking, tenderizing the meat naturally. I remember trying to cook a sirloin, which is leaner and less connective tissue, and it came out dry despite long cooking times. These cuts benefit from low-and-slow methods, allowing collagen to convert into gelatin, creating a melt-in-your-mouth texture. For more insights on choosing optimal cuts, check out this multicooker recipe guide.
Control the Cooking Time and Temperature
One of the biggest mistakes is overcooking or using high heat, which can toughen muscle fibers instead of breaking down collagen. Stick to low heat for 6-8 hours in a slow cooker or follow your device’s recommended simmering times. I once set my slow cooker to high for 4 hours, and the beef was stringy despite being cooked longer. Using a reliable pressure cooker can give you more precise control, turning tough cuts into tender delicacies in less time.
Maintain Adequate Moisture Levels
Ensure there’s enough liquid—broth, water, or wine—to cover at least 50% of the meat. This creates a humid environment essential for collagen breakdown. I once added too little liquid, leading to dry, tough beef, which was disappointing. Think of slow cooking like a cozy bath for your meat; without enough moisture, it can’t tenderize properly. When in doubt, add an extra cup of broth or a splash of wine to keep the environment moist and promote tenderness. You can discover more about effective liquid use in this pressure cooker tips article.
Timing is Everything
Resist the temptation to lift the lid frequently, as it releases heat and disrupts the cooking process. I once opened the lid multiple times, which extended my cooking time and resulted in tougher beef. Trust your slow cooker to do its job and set the timer appropriately. For quick yet tender results, consider using a pressure cooker that drastically reduces cooking times without sacrificing tenderness. Remember, patience is key—allow the collagen to work its magic fully.While many home cooks believe that stacking their ingredients or strictly following cooking times guarantees success, the real mastery of one-pot meals with slow cookers, pressure cookers, or multicookers lies in understanding the subtle nuances that differentiate good from exceptional results. A common misconception is that more time always means better tenderness; however, overcooking can damage textures and diminish flavors. For instance, prolonged exposure to heat can cause collagen to break down excessively, resulting in mushy meat rather than the desirable juicy fall-apart consistency. Advanced cooks emphasize controlling not just time, but also temperature, moisture levels, and ingredient preparation. According to culinary expert Dr. Anne Willan, “Precision in the initial searing and ingredient layering often determines success more than the device’s settings alone.” Moreover, many enthusiasts overlook the importance of protein structure—lean cuts may seem tempting for their health benefits, but they often lack the connective tissue needed to produce tender results without added tricks, like using a pressure cooker to quickly melt residual collagen. A typical mistake I see is relying solely on default settings, ignoring that different recipes require tailored adjustments for optimal outcomes. For example, a stew with tough cuts benefits from a controlled pressure release to preserve tenderness, which many forget to time properly.
What fractures common beginner tactics when using these devices?
Expert advice suggests that layering ingredients thoughtfully ensures even cooking and flavor distribution, and that pre-soaking certain items can dramatically reduce cooking time and improve textures. Remember, each device has its quirks; a pressure cooker might reach high temperatures faster but needs careful attention to prevent over tenderization, while slow cookers demand patience but offer better flavor melding. External research indicates that customized cooking strategies lead to 30% higher success rates in achieving restaurant-quality one-pot dishes. So next time you prepare your favorite stew, consider not just the ‘how long’, but also the ‘how’—the quality of your prep, ingredient selection, and device mastery play pivotal roles. Have you ever fallen into this trap? Let me know in the comments.To ensure your one pot cooking appliances perform optimally over time, investing in the right tools and maintaining them properly is crucial. I personally rely on a high-quality silicone spatula for stirring and scraping, as its heat resistance and durability prevent scratches and ensure thorough mixing without damaging non-stick surfaces. Additionally, a good digital instant-read thermometer allows me to verify meat doneness precisely, preventing over- or under-cooking, especially in devices like pressure and slow cookers where internal temperature control isn’t always transparent. Regularly cleaning your multicooker or pressure cooker according to the manufacturer’s guidelines is vital—this includes descaling if you notice mineral buildup, which can impact safety and performance. Using gentle, non-abrasive cleaning tools preserves the integrity of seals and non-stick coatings. I’ve found that periodically replacing worn-out seals and valves enhances safety and keeps your cooker functioning like new. Transitioning to software, many modern multicookers come with updated firmware or companion apps that offer recipe suggestions and maintenance reminders, simplifying long-term use. In the future, I predict these devices will incorporate smarter diagnostics, alerting users proactively about parts needing replacement, much like the advanced diagnostics found in professional-grade kitchen equipment.
How do I maintain my cooking tools and appliances over time?
Ensuring longevity involves consistent cleaning after each use, avoiding abrasive cleaners that can strip coatings, and regularly inspecting components such as seals, valves, and power cords for wear. For instance, following detailed maintenance protocols from credible sources, like the Ultimate Guide to Multicooker Recipes, can drastically extend the life of your equipment. Don’t shy away from learning how to replace worn parts yourself—many manufacturers provide detailed tutorials, and this proactive approach saves money and prevents unexpected breakdowns. I recently replaced a pressure cooker’s sealing ring myself, which restored the device’s perfect seal and improved safety. Bonus tip: keeping your appliances cool and dry when not in use prevents corrosion and prolongs lifespan. For a deep dive into maintenance essentials, check out related advice in this pressure cooker tips article. Ready to take your appliance care to the next level? Try setting a quarterly maintenance schedule—inspecting, cleaning, and replacing parts as needed. Your investment will reward you with consistent performance and delicious results every time.
Over the years, I’ve learned that some of the most rewarding experiences in the kitchen come from trial, error, and relentless curiosity. My journey with one pot meals, especially slow cooker, pressure cooker, and multicooker recipes, has taught me that there’s no single formula—just a collection of lessons learned the hard way. The ultimate secret? Attentive preparation combined with a willingness to tweak and adapt. These insights helped me turn tough cuts into melt-in-your-mouth delicacies, transforming my culinary confidence and delighting my loved ones.
Why I Stopped Chasing Perfect Timing and Started Embracing Small Changes
Initially, I believed that sticking rigidly to cooking times guaranteed tender beef. But I found that even slight adjustments—like searing the meat first or adding a splash of wine—made a monumental difference. It was a lightbulb moment that taught me to trust my senses and be flexible. Now, I focus less on the clock and more on the quality of my ingredients and the subtle cues during cooking, which consistently elevate my meals. Want to learn how to fine-tune your process? Check out this comprehensive guide to multicooker recipes.
Elevation Comes from the Details—Don’t Overlook Small Steps
Simple tricks, like preheating your skillet or maintaining adequate moisture, can be game-changers. I once saw my stew turn out dry, only to realize I’d added too little broth at the start. It’s in these small acts—layering ingredients thoughtfully, allowing collagen to fully convert—that you unlock deep flavors and tender textures. My advice? Think of each step as a building block toward perfection. For more insights into ingredient prep, this instant cooker tips article is packed with helpful tips.
Listen to Your Equipment—It’s Smarter Than You Think
Today’s advanced appliances come with features that can guide you toward better results. I’ve increasingly relied on digital thermometers and maintenance routines to keep my multicooker in top shape. Regularly inspecting seals, cleaning components, and understanding your device’s quirks helps prevent mishaps. I’ve even taken to setting quarterly reminders to perform deeper cleanings, which prolongs appliance life. If you’re curious about maintaining your tools, this ultimate maintenance guide will put you ahead of the game.
Thinking Beyond the Routine is What Sets Exceptional Meals Apart
By combining careful ingredient selection, precision in technique, and a dash of patience, I’ve discovered that tender beef is just the beginning. It’s about cultivating an intentional mindset in the kitchen—questioning, experimenting, and learning with each dish. Your journey to mastering one pot meals isn’t about perfection, but progress. Remember, every mistake is a step toward culinary mastery. Are you ready to challenge the status quo and elevate your slow-cooker or pressure-cooker game? Dive into experimenting with new recipes and techniques, and see how your confidence grows. What’s one tweak you’re eager to try next? Share your thoughts below and let’s learn together.
I completely relate to the frustration of ending up with tough beef after hours of slow cooking, even when everything seems right. Searing the meat beforehand really does make a noticeable difference—not just in flavor, but in how the collagen begins to break down, leading to much more tender results. I’ve found that choosing cuts like chuck roast or brisket dramatically improves the outcome, especially when paired with proper moisture and resting time afterward.
One thing I always keep in mind is avoiding the temptation to lift the lid too often. It’s amazing how much heat escapes, and re-establishing that steam can undo many hours of work. Do others have tips on how to resist checking too frequently? Also, I’m curious—has anyone experimented with adding ingredients like wine or vinegar partway through to enhance flavor and tenderness? Would love to hear different tricks that have worked for you all.
This post really hits the mark! I’ve learned through trial and error that searing the beef first not only adds depth but also helps to initiate the breakdown of muscle fibers, which is crucial for tenderness. I’ve often used tougher cuts like chuck and brisket for slow cooking and found that maintaining proper moisture levels really does make the magic happen. I agree with Emma about resisting the temptation to lift the lid; every time I open it, I lose precious heat and extend cooking time, which can negatively impact texture.
Regarding adding ingredients like wine or vinegar, I’ve tried doing that halfway through and noticed a nice boost in flavor and tenderness, especially with red wine in beef stews. Has anyone else experimented with timing these additions? Also, do you think marinating tougher cuts overnight before slow cooking makes a difference, or does it risk over-tenderizing or losing the structural integrity? Would love to hear others’ experiences on that!
Finally, I’ve found that patience in letting the meat rest after cooking greatly improves juiciness. Over the years, these small adjustments have turned my tough, chewy meat into melt-in-your-mouth goodness. Would you recommend any particular tips for beginner slow cookers to get consistent, tender results? Any favorite cuts or tricks you swear by?