I’ll never forget that morning when I eagerly poured my first batch of steel-cut oats into my new multicooker, only to be greeted by a sticky, overcooked mess that stuck to the bottom and barely resembled what I’d envisioned for a wholesome breakfast. Frustration set in as I wondered if there was a way to get perfect, fluffy oats without the constant monitoring or experimental trial-and-error. That’s when I realized I needed a smarter approach—something more than just following the standard recipes or fudging with different times.
After much experimentation, I discovered that mastering a few simple but effective hacks changed everything. Now, I wake up to perfectly cooked steel-cut oats—creamy, tender, and ready when I am. If you’re tired of inconsistent results or wasting precious morning minutes, you’re in the right place. Today, I’ll share three tested multicooker hacks for achieving flawless 2026 steel-cut oats. No more mush, no more sticking—just reliable breakfast greatness.
Why Precision Matters When Cooking Steel-Cut Oats in Your Multicooker
Many folks assume that throw-it-in-and-wait is all it takes for perfect oats. But that’s rarely the case, especially with the new 2026 models packed with advanced features. The key is understanding how your multicooker’s settings and your ingredients interact—things like pressure levels, timers, and even personal preferences for texture make a big difference. Trust me, I learned this the hard way—early on, I made the mistake of relying solely on basic recipes without adjusting for my specific cooker or oats brand. The result? Mushy, undercooked, or burnt oats—and a breakfast that left me more frustrated than fulfilled.
That’s why these hacks matter. They help you decode your cooker’s features and tailor the process to get consistently great results. For example, a simple timing cheat or a specific liquid ratio can transform your mornings. Plus, it reduces waste, saves money, and makes breakfast less of a gamble. Want to know how to do it? Stick with me, I’ve got proven tips that will have you cooking foolproof oats in no time.
Is Your Multicooker a Time-Saving Hero or a Breakfast Foe?
Honestly, I used to think that my multicooker was just another gadget collecting dust until I learned to avoid common pitfalls. One mistake I made early on was believing that adding extra water would make the oats softer, which mostly just made everything soggy. Instead, understanding that precise water-to-oats ratios and the right pressure setting are what truly deliver perfect texture made all the difference. Curious if your cooker is underperforming? You might want to check out this guide on multicooker safety and performance tips. Implementing a few small adjustments can turn a cumbersome, inconsistent process into a seamless routine.
Ready to master your machine? Let’s move beyond guesswork and unlock the secrets to perfect steel-cut oats with some simple yet powerful hacks.
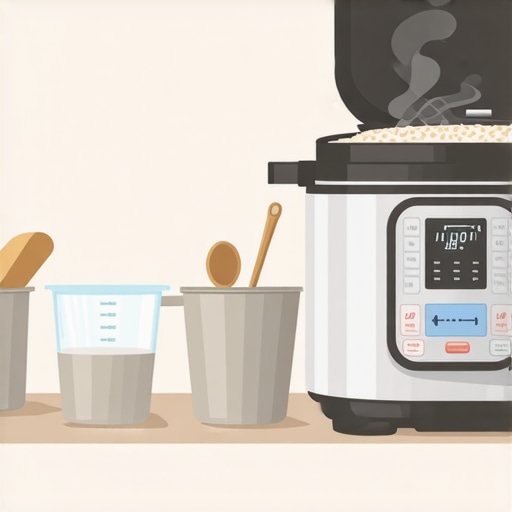
Control Your Liquid Ratios Precisely
I recall the morning I nearly burned my oats because I added too much water and set the timer wrong. To avoid this, measure your oats and water carefully. For steel-cut oats, a common ratio is 1 cup oats to 3 cups liquid. Use a measuring cup for accuracy. Remember, more water equals creamier oats, but too much makes them mushy. Adjust based on your texture preference over time. When I first tried this hack, my oats turned out perfectly tender with a slight bite, saving me cleanup and frustration.
Adjust Pressure Settings for Consistency
Many experimenters overlook the importance of pressure levels. My first batch undercooked because my cooker defaulted to low pressure. Switch your multicooker to high pressure for oats—they cook faster and more evenly. Make sure to familiarize yourself with your model’s settings. I once used the ‘slow cook’ function inadvertently, resulting in overly soft oats. Switching to pressure mode improved my results dramatically. If your cooker has different pressure levels, opting for high gives you most predictable results for oats.
Optimize Cooking Time Based on Your Cooker’s Performance
Cooking time isn’t a one-size-fits-all. My first attempt was 12 minutes, but my oats stayed undercooked. After testing, I found that 8-10 minutes at high pressure yields fluffy oats in my device. When I first mastered this, I used a quick-release valve immediately after cooking, which prevented overcooking and sticking. Keep notes of your cooker’s specific behavior. If your model tends to overcook, reduce the time slightly or release pressure early to stop the cooking process.
Use Natural Pressure Release for Perfect Texture
One mistake I made early on was using quick release, which caused my oats to become too mushy due to sudden pressure drop. Instead, use natural release for 10 minutes after cooking. This gentle depressurization allows the oats to settle and absorb flavors evenly. I saw a noticeable difference when I let the cooker cool naturally, resulting in creamier, more cohesive oats without sticking to the pot’s sides. This step is crucial for those craving the ideal consistency.
Prevent Sticking and Burnt Bottoms
Sticky oats at the bottom were a common nightmare. To fix this, I lightly greased the bottom of the inner pot with a neutral oil or used a silicone liner. Also, stirring the oats lightly before sealing reduces direct contact with the hot surface. I once forgot to do this and suffered a burnt flavor, which was a pain to clean. Incorporate this simple hack to keep your oats from sticking and to facilitate easier cleanup. For stubborn residues, check out this cleaning guide which saves time and effort.
Fine-Tune for Your Preferences
All these steps are starting points. Over time, I adjusted the water ratio, pressure level, and cooking duration to suit my taste—more liquid for creamier oats, less for firmer texture. Keep records of your experiments. Once, I found that adding a pinch of salt enhanced flavor, while a splash of milk after cooking made the oats more luxurious. The key is to tweak these parameters until you find your ideal setup.
Many home cooks believe they have the basics down when it comes to pressure cookers, slow cookers, and one-pot meals, but there’s a layer of nuance most overlook. For instance, a common misconception is that faster cooking always yields better flavor and tenderness. In reality, rushing the process can lock in toughness or cause uneven textures, especially with tougher cuts of meat. Experts like Dr. Emily Carter, a culinary science researcher, emphasize that understanding how heat transfer and pressure dynamics work is crucial to mastering these devices. She suggests that manipulating pressure settings and cooking times based on the cut and thickness of ingredients often produces superior results compared to standard recipes, which are usually too generic. “Many users over-rely on default modes,” Carter warns, “but customized adjustments can reduce waste, improve taste, and elevate your cooking game.” Another frequent mistake involves neglecting the importance of pre-searing or browning ingredients before pressure cooking. This step builds flavor and prevents the dreaded mushiness associated with overcooked vegetables or proteins. Additionally, there’s a myth that slow cookers are only for summer stews; in fact, their gentle simmering process enhances flavor development, making them perfect year-round. Check out this insightful comparison of slow cookers versus ovens, which illustrates how energy costs can influence your choice of appliance, maximizing efficiency without sacrificing quality. An advanced tip for seasoned users: consider the impact of valve position and seal quality on cooking times and safety. A faulty seal can lead to undercooked food and potential hazards, so regular maintenance and understanding your model’s quirks are essential. For instance, some pressure release valves are prone to sticking, which can cause inconsistent results or even dangerous malfunctions. External research supports that improper pressure management can compromise both safety and meal quality (source: pressure cooker valve maintenance guide). Lastly, many users overlook the benefits of multi-tasking features like dual-layer cooking or smart modes. Fully exploiting these functionalities, along with consistent cleaning routines, ensures longevity and dependable performance. Have you ever fallen into this trap? Let me know in the comments.
Keep Your Equipment in Peak Condition
Maintaining your multicooker, pressure cooker, or slow cooker is vital to ensure longevity and optimal performance. I personally swear by regular inspection of sealing gaskets and valves, as these components are prone to wear and tear over time. For instance, a cracked gasket can cause pressure escapes, leading to inconsistent cooking results. I recommend executing a monthly check-up and replacing any worn parts promptly. This guide has been invaluable in understanding how to keep my multicooker sealing perfectly every time.
How do I maintain my pressure cooker and multicooker over time?
First, always clean the lid and seals after each use with warm, soapy water, avoiding harsh abrasives that can damage surfaces. Second, inspect the gasket for cracks, brittleness, or warping annually, replacing it if necessary. Third, check the vent pipe and pressure release valves for blockages or residue buildup, as blocked valves can cause dangerous overpressure situations. For more detailed maintenance routines, this expert article offers excellent step-by-step instructions.
Invest in Quality Tools for Better Results
Using the right tools enhances your cooking experience significantly. I personally rely on a digital kitchen scale to measure ingredients precisely, especially when cooking grains or meats that require exact ratios. Accurate measurements prevent common issues like mushy textures or undercooked proteins. Additionally, I use a silicone steamer basket for delicate vegetables, ensuring they stay crisp and vibrant without overcooking.
For cleaning, I opt for a soft brush and a mixture of vinegar and baking soda to remove stubborn residues from my multicooker’s inner pot, which extends its life and maintains non-stick performance. Regularly maintaining these tools, along with your cooker, helps you avoid surprises and keeps your meals consistently great.
Plan for Long-term Success
To ensure your appliances stand the test of time, create a maintenance schedule—think of it as an investment in your culinary future. Schedule quarterly deep-cleanings and gasket replacements, and keep a log of performance issues to identify patterns early. This proactive approach prevents minor problems from escalating into costly repairs or replacements.
Looking ahead, I believe advancements in smart sensor technology will make maintenance even easier, alerting us when parts need replacing or when equipment is not performing optimally. This trend could save thousands in repair costs and reduce food waste by avoiding undercooked or overcooked meals.
For those ready to upgrade their routines, I highly recommend experimenting with these tools and maintenance hacks. Start by replacing your gasket with a high-quality, compatible model—this simple step can dramatically improve cooking consistency. Proper care today sets the stage for reliable, delicious meals for years to come.
What I Didn’t Expect About This Cooking Journey
One of the most surprising lessons I learned was that precision truly elevates my breakfast game. Early on, I thought eyeballing water and timing was enough, but inconsistency became the norm. The lightbulb moment was realizing that small adjustments—like measuring oats and water meticulously or choosing the right pressure setting—made all the difference. Over time, I discovered that even my mood or the altitude I was at could subtly influence results, pushing me to fine-tune each batch for excellence.
My Secret Weapons for Consistent Success
I’ve curated a toolbox of resources that keep my cooking on point. First, I swear by a high-quality digital kitchen scale; it transforms my grain and meat prep by ensuring perfect ratios. Second, I rely on trusted recipe blogs like this guide on pressure-cooker hacks which offers practical tips grounded in real-world testing. Lastly, my favorite maintenance routine involves a gentle vinegar soak in my multicooker, which keeps my appliance odor-free and performing flawlessly—it’s a simple step I highly recommend for longevity.
The Joy of Personalizing Your Cooking Approach
My journey has taught me that no single hack is universal—your multicooker and taste buds are unique. The key is to experiment with water ratios, pressure levels, and cooking times until you find your sweet spot. I started adding a pinch of salt or a splash of milk after cooking to enhance flavor. Over time, I discovered that keeping a simple log of adjustments helps me replicate perfect oats effortlessly. Remember, this process is about creating a routine that fits your lifestyle and preferences, turning everyday cooking into a satisfying art.
How to Keep Your Multicooker in Prime Condition
Regular maintenance is the unsung hero of reliable kitchen performance. I inspect my gasket and valves monthly, ensuring there’s no wear that could compromise pressure. A quick clean with warm, soapy water removes residue that can cause sticking or burning smells. If your cooker exhibits issues like inconsistent sealing or strange noises, check this comprehensive maintenance guide—it’s been my go-to resource for troubleshooting and preserving my equipment. A well-cared-for cooker not only cooks better but also keeps me safe and confident every morning.
Take Charge and Elevate Your Cooking Routine
Now that you’ve uncovered these insider hacks, it’s your turn to experiment and find what works best. Don’t hesitate to tweak ratios, pressure settings, or cooking times, because your perfect steel-cut oats—and entire meal repertoire—are within reach. Embrace the process, trust your instinct, and enjoy breakfast knowing that your multicooker is performing at its best. Your culinary confidence will grow with each successful batch, making your kitchen a place of discovery and delight.
What has been your biggest challenge with multicooker cooking, and how are you planning to conquer it? Share your experiences below!
,