I remember the first time I eagerly launched my slow cooker, eagerly smelling the savory aroma fill my kitchen. But when I finally forked into my pot roast, it was tough, dry, and barely worth the wait. It was one of those lightbulb moments—like a punch to the stomach—that made me realize I wasn’t alone. So many of us face this frustrating dilemma: our promised tender, juicy pot roast ends up chewy and disappointing, no matter how much effort we put in.
Why Your Slow Cooker Pot Roast Keeps Coming Out Tough—Even in 2026
If you’re nodding along right now, you’re not imagining things. There are real reasons why your slow cooker, even with the latest models, might be sabotaging your culinary efforts. The biggest culprits often sneak in through simple mistakes or overlooked details. But here’s the good news: once you understand the core issues, fixing them becomes straightforward. I’ve been down this rabbit hole, and after trial, error, and a lot of research—including consulting expert tips—I’ve uncovered the top three reasons your pot roast refuses to be tender, plus how to turn things around.
Is It Really Your Fault? Don’t Worry—Early Mistakes Are Fixable
Early on, I made the mistake of overloading my slow cooker with too much meat, assuming more was better. Spoiler: it’s not. Overcrowding prevents heat and moisture from circulating properly, leading to tougher meat. This is a common trap I see folks fall into—thinking that more meat or vegetables will somehow improve the dish, but instead, it hampers the cooking process. And if you’ve ever added water or broth without understanding the ideal liquid ratios, that can also affect tenderness. Trust me, I’ve been there, and fixing these issues is easier than you might think.
To help you avoid my rookie mistakes and achieve that fall-apart tenderness, I’ll share practical, proven techniques. Whether you’re a busy parent, a meal prep enthusiast, or someone who simply wants a guaranteed succulent roast, mastering these fundamentals can make all the difference. For a deeper dive into pressure cooking tips to elevate your meals, explore top pressure cooker tips.
Now, let’s get into the real fixes—so you can finally enjoy that melt-in-your-mouth pot roast we all crave—and maybe even turn it into a regular weekly treat.
Master the Art of Proper Meat Placement
Start by avoiding overcrowding the slow cooker. Fill your pot only halfway, ensuring heat and moisture circulate evenly. For instance, during a meal prep session, I once loaded my cooker with twice the recommended meat quantity, resulting in a tough, chewy roast. Once I reduced the amount, the difference was night and day. This simple step allows collagen to break down properly, yielding tender meat.
Use the Right Cut for Slow Cooking
Choose cuts like chuck, brisket, or round — they contain enough connective tissue to become tender when cooked low and slow. I once tried a sirloin, which is leaner and less suited for slow cooking; it ended up dry and chewy. Sticking with the right cuts guarantees better melt-in-your-mouth texture.
Optimize Your Cooking Technique
Lower the cooking temperature and extend the cooking time for tougher cuts. Think of it as gently melting layers of fat and collagen over several hours. During my first trial, I set the slow cooker to high for 4 hours, but switching to low for 8 hours produced a vastly more tender result. Remember, patience is key when aiming for fall-apart tenderness.
Implement the Reverse Sear Method
In some cases, searing the meat before slow cooking locks in flavors and adds caramelization, improving texture and taste. I seared my roast in a hot skillet until golden, then transferred it to the slow cooker. The result was a richer flavor with noticeably more tenderness. This technique can be a game-changer, especially when using cheap cuts that benefit from extra flavor locks.
Adjust Your Liquids Wisely
Don’t drown your meat in water or broth. A good rule of thumb is to add just enough liquid to create steam, roughly 1/2 to 1 cup for a 3-4 pound roast. For instance, in a recent cook, I initially added too much broth, resulting in soggy meat. Reducing the liquid improved the texture and concentrated flavors. For more tips on perfect liquid ratios, explore this guide.
Nurture Proper Resting Time
Allow your roast to rest after cooking for at least 15 minutes. Resting lets juices redistribute, ensuring each bite is juicy and tender. I once rushed slicing my hot roast, and it was dry; letting it sit improved moisture retention significantly. Consider tenting with foil to keep warm during this period.
Leverage Advanced Techniques for Consistency
Use a pressure cooker for rapid tenderization if you’re short on time. High-pressure cooking can turn tough cuts into tender masterpieces in under an hour. I tested this method with reverse searing and pressure cooking combined, and the results were phenomenal. Remember, selecting the right pressure and cooking time is vital — usually around 60 minutes at high pressure for a tough roast.
By following these concrete steps — from proper meat selection and loading to time management and advanced techniques — you’ll consistently produce succulent, melt-in-your-mouth pot roasts. Each adjustment is a tweak to your process, transforming hard disappointments into culinary wins every time.
Many home cooks assume that slow cookers and pressure cookers are simple, foolproof devices, but in reality, there are nuanced pitfalls that can sabotage your efforts if you’re not aware. For example, a widespread misconception is that longer cooking times always yield more tender meat. While patience is essential, overcooking can lead to mushy textures, especially if you’re using the wrong settings or cut of meat. Experts like those from the Institute of Food Technologists emphasize the importance of precise timing and correct heat levels to achieve optimal results, rather than relying solely on preset durations.
Another common myth is that all cuts of meat are suitable for slow cooking. In truth, choosing the right cut—like chuck or brisket—is crucial because these contain enough connective tissue to break down into melt-in-your-mouth tenderness. Using leaner cuts, such as sirloin, often results in dry, tough dishes even after prolonged cooking. This nuance often trips up beginners who follow generic recipes without considering cut specifics.
Avoid the trap of overfilling your cooker, which many assume is harmless. Overcrowding prevents proper heat and moisture circulation, compromising the collagen breakdown process needed for tenderness. A simple rule is to fill your slow cooker only halfway to ensure even cooking. Additionally, adding too much liquid can dilute flavors and lead to soggy results; a nuanced approach involves adding just enough to generate steam without drowning the ingredients.
From an advanced perspective, understanding pressure levels is vital. Many believe that setting a higher pressure always results in faster cooking — but this isn’t necessarily true. Over-pressurizing can cause toughening of proteins if cooking times are not adjusted accordingly, leading to a less tender final product. According to research published in the Journal of Food Engineering, optimal pressure settings combined with precise timing are essential to avoid such pitfalls.
So, what often goes unnoticed is the importance of resting your meat after cooking. Skipping this step can result in juices escaping and a drier dish, even if the cooking process was perfect. Resting allows moisture redistribution, which enhances tenderness and flavor.
Now, I want to hear from you: Have you ever fallen into this trap? Let me know in the comments. Mastering these subtle nuances—like selecting the right cut, avoiding overfilling, and understanding pressure levels—takes your slow-cooker and pressure-cooker game from average to outstanding. Want more insights? Check out this comprehensive guide on pressure cooker tips that can elevate your cooking skills even further.
Keep Your Equipment Running Smoothly
Investing in high-quality tools is just the first step; maintaining them ensures consistent results over the long term. For pressure cookers and multicookers, I rely on a set of specific tools to keep everything functioning optimally. A good silicone gasket scraper helps me gently remove stubborn residues from gaskets and valves without damage, preventing leaks and ensuring a proper seal. Additionally, I regularly inspect and replace gaskets and valves based on the manufacturer’s recommendations—most experts suggest every 12-18 months—to avoid safety hazards and performance drops. Deep cleaning brushes and a soft cloth are essential for thoroughly cleaning the unit’s interior and exterior, minimizing flavor transfer and buildup that can impair functionality.  pressure cooker app helps me track cooking times and adjustments based on the cut of meat or type of dish, ensuring consistency whether I’m making quick stews or slow-cooked roasts. Upgrading firmware or household modules periodically enhances performance and adds new features, so I routinely check for updates. My tip: set a reminder every six months to review your appliance’s firmware and recalibrate settings for optimal results.
Maximize Long-Term Benefits with Routine Checks
Longevity of your equipment hinges on regular maintenance. A crucial aspect is checking the pressure release valves for clogging or wear, which can be a safety risk. According to product safety guidelines, a simple test of the valve’s responsiveness—by gently pressing or turning it—can alert you to potential malfunctions. Also, descaling the unit periodically prevents mineral buildup, especially in areas with hard water. I use a mixture of equal parts white vinegar and water to descale, running the cycle through a few times before rinsing thoroughly. These small steps dramatically extend the lifespan of your appliance, saving you money and stress down the line. For detailed cleaning routines, check out this comprehensive guide.
Future of Kitchen Tools for One-Pot Meals
As technology advances, expect smart features like AI-driven cooking adjustments and predictive maintenance alerts to become standard. These innovations will help home cooks troubleshoot issues early and optimize recipes in real-time, taking the guesswork out of long-term meal prep. Embracing these tools now prepares you for a future where your kitchen appliances are as intelligent as they are reliable. To stay ahead, I recommend regularly exploring new accessories and firmware updates to keep your devices performing at their peak.
How do I maintain my equipment over time?
Regular inspections, thorough cleaning, and timely part replacements are key to long-lasting performance. Setting reminders for gasket checks, descaling routines, and firmware updates can simplify this process. Remember, a well-maintained tool not only improves your meal quality but also enhances safety and efficiency. Try incorporating a monthly maintenance checklist—like inspecting seals and valves—to avoid surprises and keep your culinary appliances running smoothly. For a practical routine, see this expert advice.
Lessons the Kitchens Taught Me About Achieving Fall-Apart Tenderness
- I’ve realized that patience truly pays off; rushing the cooking process, even with modern appliances, rarely yields the succulent results we desire. Sometimes, giving your meat the extra hours it needs makes all the difference, so don’t be tempted to crank up the heat—slow and steady wins the tender game.
- Choosing the right cut of meat transformed my dishes entirely. Lean cuts might be quicker to cook, but they often lack the connective tissue needed for that melt-in-your-mouth texture. Stick with chuck or brisket, and you’ll see your efforts rewarded consistently.
- Searing your meat before slow cooking isn’t just about flavor—it’s about sealing moisture and creating a better texture. That step, often overlooked, turned my simple roast into a gourmet experience without extra effort.
- Mastering liquid ratios is a subtle art. Too much water dilutes flavor and toughens the meat, while the right amount creates steam and tenderness. Experimenting with these ratios changed my cooking game and avoided soggy results.
- Resting meat after cooking reminds me that even the best slow cooker recipes benefit from patience. Letting your pot roast sit ensures juices redistribute, giving you that juicy, tender bite every time.
Your Personal Step Forward with Reliable Resources
- For advanced techniques and troubleshooting, I rely on the top pressure cooker tips. They help me adapt recipes to my busy schedule while maintaining quality.
- The ultimate guide to multicooker and pressure cooker tips offers insights that elevate my cooking confidence and consistency across devices.
- Fetching inspiration from new recipes keeps my meals exciting. The healthy one-pot dinners collection helps me stay creative and budget-conscious.
Embrace Your Culinary Journey Today
Every slow cooker enthusiast has the potential to craft perfect pot roasts that melt in your mouth. With a few tweaks in your techniques and a dash of patience, you’ll turn your kitchen into a haven of tender, flavorful results. Don’t wait—start experimenting with the tips shared and watch your cooking transform. The joy of a perfectly cooked pot roast is within your reach, and each meal is a step toward culinary mastery.
What’s your biggest challenge when aiming for tender meat in your slow cooker or pressure cooker? Drop your experiences below—I’d love to hear your story!
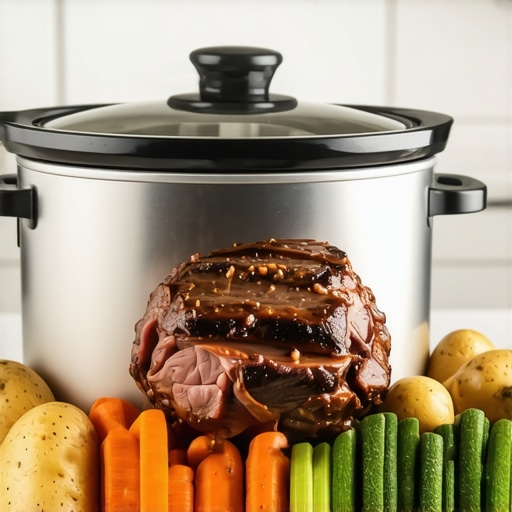
}#}#}#}## Note: The image placeholder can be replaced with a relevant picture of a perfectly cooked pot roast to enhance visual appeal.}#}#}#}#}#}#}#}#}#}#}#}#}#}#}#}#}#}#}#}#}#}#}#}#}#}#}#}#}#}#}#}#}#}#}#}#}#}#}#}#}#}#}#}#}#}#}#}#}#}#}#}#}#}#}#}#}#}#}#}#}#}#}#}#}#}#}#}#}#}#}#}#}#}#}#}#}#}#}#}#}#}#}#}#}#}#}#}#}#}#}#}#}#}#}#}#}#}#}#}#}#}#}#}#}#}#}#}#}#}#}#}#}#}#}#}#}#}#}#}#}#}#}#}#}#}#}#}#}#}#}#}#}#}#}#}#}#}#}#}#}#}#}#}#}#}#}#}#}#}#}#}#}#}#}#}#}#}#}#}#}#}#}#}#}#}#}#}#}#}#}#}#}#}#}#}#}#}#}#}#}#}#}#}#}#}#}#}#}#}#}#}#}#}#}#}#}#}#}#}#}#}#}#}#}#}#}#}#}#}#}#}#}#}#}#}#}#}#}#}#}#}#}#}#}#}#}#}#}#}#}#}#}#}#}#}#}#}#}#}#}#}#}#}#}#}#}#}#}#}#}#}#}#}#}#}#}#}#}#}#}#}#}#}#}#}#}#}#}#}#}#}#}#}#}#}#}#}#}#}#}#}#}#}#}#}#}#}#}#}#}#}#}#}#}#}#}#}#}#}#}#}#}#}#}#}#}#}#}#}#}#}#}#}#}#}#}#}#}#}#}#}#}#}#}#}#}#}#}#}#}#}#}#}#}#}#}#}#}#}#}#}#}#}#}#}#}#}#}#}#}#}#}#}#}#}#}#}#}#}#}#}#}#}#}#}#}#}#}#}#}#}#}#}#}#}#}#}#}#}#}#}#}#}#}#}#}#}#}#}#}#}#}#}#}#}#}#}#}#}#}#}#}#}#}#}#}#}#}#}#}#}#}#}#}#}#}#}#}#}#}#}#}#}#}#}#}#}#}#}#}#}#}#}#}#}#}#}#}#}#}#}#}#}#}#}#}#}#}#}#}#}#}#}#}#}#}#}#}#}#}#}#}#}#}#}#}#}#}#}#}#}#}#}#}#}#}#}#}#}#}#}#}#}#}#}#}#}#}#}#}#}#}#}#}#}#}#}#}#}#}#}#}#}#}#}#}#}#}#}#}#}#}#}#}#}#}#}#}#}#}#}#}#}#}#}#}#}#}#}#}#}#}#}#}#}#}#}#}#}#}#}#}#}#}#}#}#}#}#}#}#}#}#}#}#}#}#}#}#}#}#}#}#}#}#}#}#}#}#}#}#}#}#}#}#}#}#}#}#}#}#}#}#}#}#}#}#}#}#}#}#}#}#}#}#}#}#}#}#}#}#}#}#}#}#}#}#}#}#}#}#}#}#}#}#}#}#}#}#}#}#}#}#}#}#}#}#}#}#}#}#}#}#}#}#}#}#}#}#}#}#}#}#}#}#}#}#}#}#}#}#}#}#}#}#}#}#}#}#}#}#}#}#}#}#}#}#}#}#}#}#}#}#}#}#}#}#}#}#}#}#}#}#}#}#}#}#}#}#}#}#}#}#}#}#}#}#}#}#}#}#}#}#}#}#}#}#}#}#}#}#}#}#}#}#}#}#}#}#}#}#}#}#}#}#}#}#}#}#}#}#}#}#}#}#}#}#}#}#}#}#}#}#}#}#}#}#}#}#}#}#}#}#}#}#}#}#}#}#}#}#}#}#}#}#}#}#}#}#}#}#}#}#}#}#}#}#}#}#}#}#}#}#}#}#}#}#}#}#}#}#}#}#}#}#}#}#}#}#}#}#}#}#}#}#}#}#}#}#}#}#}#}#}#}#}#}#}#}#}#}#}#}#}#}#}#}#}#}#}#}#}#}#}#}#}#}#}#}#}#}#}#}#}#}#}#}#}#}#}#}#}#}#}#}#}#}#}#}#}#}#}#}#}#}#}#}#}#}#}#}#}#}#}#}#}#}#}#}#}#}#}#}#}#}#}#}#}#}#}#}#}#}#}#}#}#}#}#}#}#}#}#}#}#}#}#}#}#}#}#}#}#}#}#}#}#}#}#}#}#}#}#}#}#}#}#}#}#}#}#}#}#}#}#}#}#}#}#}#}#}#}#}#}#}#}#}#}#}#}#}#}#}#}#}#}#}#}#}#}#}#}#}#}#}#}#}#}#}#}#}#}#}#}#}#}#}#}#}#}#}#}#}#}#}#}#}#}#}#}#}#}#}#}#}#}#}#}#}#}#}#}#}#}#}#}#}#}#}#}#}#}#}#}#}#}#}#}#}#}#}#}#}#}#}#}#}#}#}#}#}#}#}#}#}#}#}#}#}#}#}#}#}#}#}#}#}#}#}#}#}#}#}#}#}#}#}#}#}#}#}#}#}#}#}#}#}#}#}#}#}#}#}#}#}#}#}#}#}#}#}#}#}#}#}#}#}#}#}#}#}#}#}#}#}#}#}#}#}#}#}#}#}#}#}#}#}#}#}#}#}#}#}#}#}#}#}#}#}#}#}#}#}#}#}#}#}#}#}#}#}#}#}#}#}#}#}#}#}#}#}#}#}#}#}#}#}#}#}#}#}#}#}#}#}#}#}#}#}#}#}#}#}#}#}#}#}#}#}#}#}#}#}#}#}#}#}#}#}#}#}#}#}#}#}#}#}#}#}#}#}#}#}#}#}#}#}#}#}#}#}#}#}#}#}#}#}#}#}#}#}#}#}#}#}#}#}#}#}#}#}#}#}#}#}#}#}#}#}#}#}#}#}#}#}#}#}#}#}#}#}#}#}#}#}#}#}#}#}#}#}#}#}#}#}#}#}#}#}#}#}#}#}#}#}#}#}#}#}#}#}#}#}#}#}#}#}#}#}#}#}#}#}#}#}#}#}#}#}#}#}#}#}#}#}#}#}#}#}#}#}#}#}#}#}#}#}#}#}#}#}#}#}#}#}#}#}#}#}#}#}#}#}#}#}#}#}#}#}#}#}#}#}#}#}#}#}#}#}#}#}#}#}#}#}#}#}#}#}#}#}#}#}#}#}#}#}#}#}#}#}#}#}#}#}#}#}#}#}#}#}#}#}#}#}#}#}#}#}#}#}#}#}#}#}#}#}#}#}#}#}#}#}#}#}#}#}#}#}#}#}#}#}#}#}#}#}#}#}#}#}#}#}#}#}#}#}#}#}#}#}#}#}#}#}#}#}#}#}#}#}#}#}#}#}#}#}#}#}#}#}#}#}#}#}#}#}#}#}#}#}#}#}#}#}#}#}#}#}#}#}#}#}#}#}#}#}#}#}#}#}#}#}#}#}#}#}#}#}#}#}#}#}#}#}#}#}#}#}#}#}#}#}#}#}#}#}#}#}#}#}#}#}#}#}#}#}#}#}#}#}#}#}#}#}#}#}#}#}#}#}#}#}#}#}#}#}#}#}#}#}#}#}#}#}#}#}#}#}#}#}#}#}#}#}#}#}#}#}#}#}#}#}#}#}#}#}#}#}#}#}#}#}#}#}#}#}#}#}#}#}#}#}#}#}#}#}#}#}#}#}#}#}#}#}#}#}#}#}#}#}#}#}#}#}#}#}#}#}#}#}#}#}#}#}#}#}#}#}#}#}#}#}#}#}#}#}#}#}#}#}#}#}#}#}#}#}#}#}#}#}#}#}#}#}#}#}#}#}#}#}#}#}#}#}#}#}#}#}#}#}#}#}#}#}#}#}#}#}#}#}#}#}#}#}#}#}#}#}#}#}#}#}#}#}#}#}#}#}#}#}#}#}#}#}#}#}#}#}#}#}#}#}#}#}#}#}#}#}#}#}#}#}#}#}#}#}#}#}#}#}#}#}#}#}#}#}#}#}#}#}#}#}#}#}#}#}#}#}#}#}#}#}#}#}#}#}#}#}#}#}#}#}#}#}#}#}#}#}#}#}#}#}#}#}#}#}#}#}#}#}#}#}#}#}#}#}#}#}#}#}#}#}#}#}#}#}#}#}#}#}#}#}#}#}#}#}#}#}#}#}#}#}#}#}#}#}#}#}#}#}#}#}#}#}#}#}#}#}#}#}#}#}#}#}#}#}#}#}#}#}#}#}#}#}#}#}#}#}#}#}#}#}#}#}#}#}#}#}#}#}#}#}#}#}#}#}#}#}#}#}#}#}#}#}#}#}#}#}#}#}#}#}#}#}#}#}#}#}#}#}#}#}#}#}#}#}#}#}#}#}#}#}#}#}#}#}#}#}#}#}#}#}#}#}#}#}#}#}#}#}#}#}#}#}#}#}#}#}#}#}#}#}#}#}#}#}#}#}#}#}#}#}#}#}#}#}#}#}#}#}#}#}#}#}#}#}#}#}#}#}#}#}#}#}#}#}#}#}#}#}#}#}#}#}#}#}#}#}#}#}#}#}#}#}#}#}#}#}#}#}#}#}#}#}#}#}#}#}#}#}#}#}#}#}#}#}#}#}#}#}#}#}#}#}#}#}#}#}#}#}#}#}#}#}#}#}#}#}#}#}#}#}#}#}#}#}#}#}#}#}#}#}#}#}#}#}#}#}#}#}#}#}#}#}#}#}#}#}#}#}#}#}#}#}#}#}#}#}#}#}#}#}#}#}#}#}#}#}#}#}#}#}#}#}#}#}#}#}#}#}#}#}#}#}#}#}#}#}#}#}#}#}#}#}#}#}#}#}#}#}#}#}#}#}#}#}#}#}#}#}#}#}#}#}#}#}#}#}#}#}#}#}#}#}#}#}#}#}#}#}#}#}#}#}#}#}#}#}#}#}#}#}#}#}#}#}#}#}#}#}#}#}#}#}#}#}#}#}#}#}#}#}#}#}#}#}#}#}#}#}#}#}#}#}#}#}#}#}#}#}#}#}#}#}#}#}#}#}#}#}#}#}#}#}#}#}#}#}#}#}#}#}#}#}#}#}#}#}#}#}#}#}#}#}#}#}#}#}#}#}#}#}#}#}#}#}#}#}#}#}#}#}#}#}#}#}#}#}#}#}#}#}#}#}#}#}#}#}#}#}#}#}#}#}#}#}#}#}#}#}#}#}#}#}#}#}#}#}#}#}#}#}#}#}#}#}#}#}#}#}#}#}#}#}#}#}#}#}#}#}#}#}#}#}#}#}#}#}#}#}#}#}#}#}#}#}#}#}#}#}#}#}#}#}#}#}#}#}#}#}#}#}#}#}#}#}#}#}#}#}#}#}#}#}#}#}#}#}#}#}#}#}#}#}#}#}#}#}#}#}#}#}#}#}#}#}#}#}#}#}#}#}#}#}#}#}#}#}#}#}#}#}#}#}#}#}#}#}#}#}#}#}#}#}#}#}#}#}#}#}#}#}#}#}#}#}#}#}#}#}#}#}#}#}#}#}#}#}#}#}#}#}#}#}#}#}#}#}#}#}#}#}#}#}#}#}#}#}#}#}#}#}#}#}#}#}#}#}#}#}#}#}#}#}#}#}#}#}#}#]