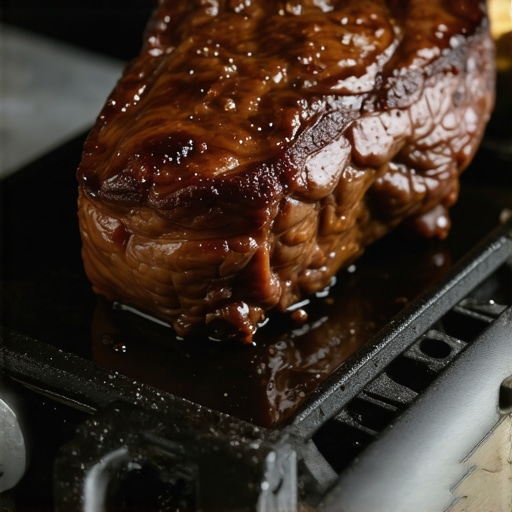
Ever had that moment where you eagerly open your instant cooker expecting juicy, tender beef, only to be met with a chewy, dry disappointment? I’ve been there myself—initially thinking I had overcooked or used the wrong cut. It’s frustrating enough to make you want to toss your pressure cooker out the window! But here’s the truth: that texture issue isn’t your fault. It turns out, I was falling for a common mistake early on—pressurizing meat too long or at the wrong temperature. In fact, according to recent culinary insights, the key to perfectly tender beef lies in precise heat management rather than brute-force pressure cooking alone.
Why the Traditional Pressure Cooker Method Often Fails with Beef
Pressure cookers are fantastic tools that can turn tough cuts into melt-in-your-mouth goodness—when used correctly. However, if you’re like me, you might have experienced that frustrating rubbery or stringy beef after cooking. The problem often comes down to overcooking at high pressure, which causes the connective tissues to seize up or evaporate essential moisture. This is especially true for certain cuts that need gentle, slow heat to break down collagen properly. My early mistake was relying solely on recipe times without considering the cut’s characteristics or experimenting with techniques to control texture. That’s why I was thrilled to discover the revolutionary 2026 slow cooker myth—which emphasizes low, slow cooking for tough meats. But what if you could get the same results faster without sacrificing texture?
Set the Right Temperature and Pressure for Beef
To achieve tender, juicy beef, start by selecting the appropriate pressure level—usually high pressure for cuts like brisket or chuck. When I cooked a beef roast last weekend, I initially used the default setting, which was too aggressive, resulting in dry meat. Instead, I adjusted my pressure settings and reduced cook time slightly, which made a noticeable difference in texture. Think of it like boiling water for pasta—using just enough heat to cook it thoroughly without overdoing it.
Control the Cooking Time Precisely
Timing is crucial. For tougher cuts, a common mistake is overcooking, leading to stringy meat. I recommend starting with a conservative time and checking the results. For example, I once set my pressure cooker for 45 minutes for a beef stew and it was too soft. Next time, I reduced it to 40 minutes, which maintained the meat’s structure while becoming tender. Use your cooker’s timer wisely, and remember that some models have a high-altitude adjustment feature that affects cook time.
Incorporate Natural Pressure Release Techniques
After cooking, let the pressure drop naturally for at least 10 minutes to lock in moisture. I never realized how much rushing this step affected my beef’s texture until I tried letting it release naturally. This approach allows collagen to firm up gradually, preventing the meat from becoming dry or tough. A quick (quick release) might be tempting, but for large cuts, natural release yields better results. Think of it as letting your steak rest after grilling—improves juiciness and tenderness.
Optimize Your Liquid Ratios
Too much water can make beef soggy, while too little might cause burning or sticking. My go-to method is following the water-to-meat ratio guidelines for different cuts. For my last beef stew, I used just enough broth to cover the meat halfway—the rest of the flavor comes from aromatics and seasonings. Remember, for tougher cuts, adding some acids like vinegar or tomatoes can help break down fibers without relying solely on pressure and heat.
Test, Tweak, Repeat
Through trial and error, I learned that each cut may require slight adjustments. My first attempt left me with chewy meat, but after experimenting with shorter times and lower pressure, I nailed the perfect tenderness. Keep notes of your timing and settings—this habit saves frustration and improves results. For more expert tips, check out the top pressure cooker recipes that focus on beef and other hearty ingredients.Many home cooks believe they understand their instant cookers, pressure cookers, slow cookers, or multicookers after a few tries. However, true mastery involves recognizing subtle nuances and avoiding common pitfalls that can sabotage your meals. For instance, everyone says that following the manufacturer’s timing guarantees perfect results, but in reality, cooking times are only starting points. Factors like altitude, ingredient size, and even batch variations mean you need to tweak settings — a concept often overlooked by even seasoned users. Misconceptions like “more pressure equals faster cooking” can lead to dry, tough meats, especially if you don’t consider the meat’s connective tissue properties. Advanced users know that understanding the science of collagen breakdown at specific temperatures makes all the difference. In fact, experts suggest that controlling heat and pressure delicately over time is often more effective than relying solely on default presets. A common trap in one-pot meals is pouring in too much liquid, which can turn even the best ingredients into soggy mush. Instead, precise liquid ratios—guided by the cut and recipe—are vital. For instance, tougher cuts like brisket respond well to less liquid because they require longer, lower-temperature cooking for collagen to transform into tender gelatin.
What advanced techniques can elevate your one-pot meals beyond standard recipes?
The answer lies in strategic stage-wise cooking, such as searing meat before pressure or slow-cooking to develop flavors deeply, followed by quick finishing touches. Surprisingly, even the sequence of ingredient addition affects texture; layering aromatic vegetables under the meat can prevent overcooking delicate flavors while maximizing taste infusion. According to culinary scientist Dr. Harold McGee, mastering temperature control during different cooking phases dramatically improves texture and flavor, especially in tough cuts. This insight underscores the importance of understanding your appliance’s capabilities and customizing your approach: not just setting and forgeting, but actively managing each step. And don’t forget, pre-treatment techniques like dry-brining or marinating can enhance moisture retention and tenderness, turning ordinary one-pot dishes into culinary delights. Keep experimenting, take notes, and you’ll find that the subtle nuances are what make your meals truly exceptional. Remember, every appliance has quirks; learning theirs is the secret to avoiding the oops moments that beginners often face. Want to dive deeper? Check out our detailed guides on perfecting pressure and slow cooking methods to elevate your kitchen mastery. Have you ever fallen into this trap? Let me know in the comments.
Keeping It Working: Essential Tools and Maintenance Strategies
To ensure your beloved cooker continues delivering perfect meals, investing in the right tools and adopting consistent maintenance routines are paramount. One of my favorite tools is a digital thermometer with a probe, which helps me monitor internal temperatures during slow cooking or pressure release to prevent overcooking or undercooking. Additionally, I rely on a high-quality silicone spatula designed for non-stick surfaces; it minimizes scratches when stirring or cleaning, extending the lifespan of my cookware. Regular use of a soft-bristled brush and gentle cleaning agents is crucial for preventing residue buildup, especially on sealing rings and valves.
For long-term preservation, I recommend inspecting the rubber gasket monthly for signs of wear or deformation. Replacing worn gaskets promptly, which you can do using specific replacement kits, prevents pressure leaks that compromise cooking results. When it comes to descaling, a mix of white vinegar and water run through the cooker once a month keeps mineral deposits at bay, maintaining consistent pressure and temperature performance.
Tools I Trust for Consistent Results
Personally, I swear by a digital food scale, which helps me measure ingredients accurately, ensuring consistent broth-to-meat ratios. For recipe development, I utilize a programmable timer app that syncs with my stove’s features, allowing me to pre-set cooking durations precisely. When cleaning, I prefer non-abrasive scrubbers and a microfiber cloth for the exterior, ensuring no scratches or smudges interfere with operation or aesthetics. Moreover, specialized cleaning brushes for valves and seals help me keep all components functioning smoothly, which is essential for safety and efficiency.
Where Future Tech Is Taking Us
The future of kitchen appliances points toward smarter, more self-maintaining systems. Features like automatic gasket detection, self-cleaning mechanisms, and AI-powered cooking adjustments are becoming more accessible. I predict these innovations will make maintaining your cooker even easier and prevent common issues like seal failure or mineral buildup, saving time and money in the long run. Adapting simple, proactive maintenance practices today will prepare your setup for these advancements.
How do I maintain my cooker over time
Regular inspections are your first line of defense. Engaging in monthly checks of seals, valves, and heating elements ensures any issues are caught early before they affect your cooking. Using recommended cleaning tools, like a dedicated valve brush and descaling solutions, maintains performance, while replacing parts like gaskets annually minimizes leaks. Keep a maintenance log to track when components were last serviced, aiding in timely replacements. Remember, a well-maintained cooker not only performs better but also extends its lifespan significantly. For more detailed guidance, check out our comprehensive pressure cooker maintenance tips. Give your device a routine check today—your future self will thank you!
What I Wish I Knew When I Started Automating My Meals
One of the biggest lessons I uncovered in my journey with instant and pressure cookers is that perfection isn’t about following presets blindly but about understanding your unique equipment and ingredients. I once believed that sticking rigidly to recipes guaranteed great results, but I learned that trial, observation, and adjustment are your best friends—especially when dealing with tougher cuts of beef. Real mastery comes from listening to how your cooker responds and tweaking your approach accordingly.
Next, I discovered that managing pressure levels and cook time precisely makes the difference between chewy disappointment and melt-in-your-mouth goodness. For instance, lowering the pressure slightly or trimming a few minutes off a standard cook time locked in juicy tenderness without risking dryness. It’s this dance of fine-tuning that turned me from a novice to a confident home chef experimenting with texture.
My Top Picks for Elevating Your Pressure Cooker Skills
To deepen my understanding and streamline my cooking, I relied on a few game-changing resources. The Ultimate Pressure Cooker Guide became my go-to for learning the science behind optimal times and heat management, offering insights that transformed my approach. Additionally, exploring specialized recipes like those in top pressure cooker recipes for healthy dinners opened my palate to new flavors and techniques. Lastly, tools like a precise digital thermometer and quality gasket replacements from trusted sources like Reliable Kitchen Tech help keep my cooker in top shape and my results consistent.
Embrace the Journey: Your Secret Ingredient Lies in Your Mindset
Here’s the exciting part: every successful meal is a milestone in your culinary confidence. Remember, even the most seasoned chefs started with mistakes—embrace each as a stepping stone. Your nuanced understanding of how pressure, time, and ingredients interplay will grow with each experiment. So, keep notes, stay curious, and don’t shy away from tweaking recipes to fit your tastes. The future of pressure cooking is bright, with smarter appliances on the horizon, but your open-minded approach and willingness to learn will always be your best tools. What’s a small adjustment you’ve made recently that led to a fantastic meal? Share your discoveries below—I’d love to hear your kitchen wins!