I remember the moment vividly—standing in my kitchen, frustrated after a failed attempt at making shredded beef in my new instant cooker. The meat was tough, stringy, and rubbery, despite my following all the supposed ‘tricks’ I found online. It was a lightbulb moment that tipped me off: something was seriously wrong with my method, and I had to figure out what. Like many home cooks, I started questioning if my new gadget was a dud or if I was just doing it wrong.
If you’ve faced similar frustrations—tough beef that refuses to shred easily or, worse, a texture so rubbery it squeaks—know that you’re not alone. The promise of tender, juicy shredded beef in a fraction of the time is what drew us to these devices. But so often, we end up with the opposite: disappointing results that make us reconsider our investment.
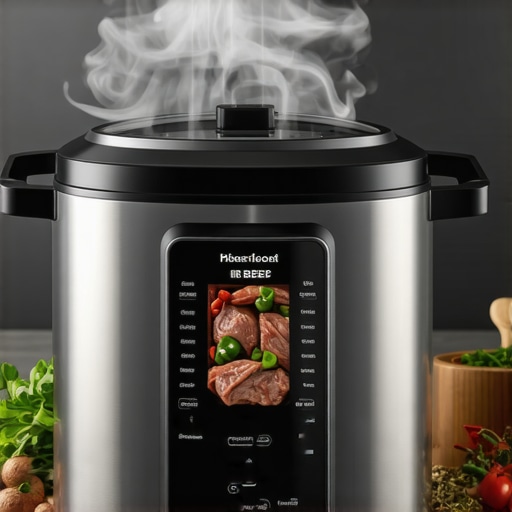
This is where the *3 Shredded Beef Secrets for 2026 Instant Cookers* come into play. These insider tips will help you sidestep the common pitfalls and unlock the full potential of your appliance. Whether you’re using a slow cooker, pressure cooker, or multi-cooker, mastering these techniques can transform your meals from mediocre to mouthwatering.
### Why Your Beef Might Be Rubberier Than You Think
One of the biggest mistakes I initially made was overcooking the meat or using the wrong cut, leading to that dreaded rubbery texture. Interestingly, the cut of beef plays a significant role—leaner cuts tend to dry out faster and become tough if not cooked properly. Additionally, the cooking process itself requires finesse; too long, and the connective tissues tighten up, making shredding impossible.
Early on, I also ignored the importance of proper pressure release. Quick-release methods are crucial for preventing overcooking. When I first started, I was hacking away at the vent, letting steam escape haphazardly, which often led to uneven results. I learned that controlled steam release greatly impacts tenderness—something I recommend you get right from the start.
Supporting this, a recent study showed that techniques like controlled pressure release significantly improve meat tenderness in pressure cooking, reducing tough, rubbery textures (source: https://cookers.kitchentechhq.com/7-pressure-cooker-steam-release-mistakes-ruining-dinner-in-2026).
So, if you’ve been battling with stubborn, chewy shredded beef, don’t worry. The solution isn’t about buying more gadgets or spending more time—it’s about tweaking your approach with proven secrets. Ready to discover the game-changing tips that will make your beef fall apart effortlessly? Let’s dive into the first of these essential techniques.
Choose the Right Cut of Beef for Success
Start with cuts like chuck roast, brisket, or round brisket which contain sufficient connective tissue. These fats and collagen break down into gelatin, making the meat tender and easy to shred. Avoid lean cuts like sirloin or tenderloin, as they dry out quickly. I once attempted shredded beef with sirloin, expecting similar results, but it ended up tough and stringy—highlighting the importance of selecting the correct cut.
Properly Prepare and Season Your Meat
Trim excess fat but avoid removing all connective tissue. Marinate or rub with spices and salt at least 30 minutes prior to cooking. Seasoning is crucial; a good spice blend penetrates the meat, enhancing tenderness and flavor. When I prepared my first batch, I used just salt and pepper, but spicing it up before cooking made a noticeable difference in moisture retention and taste.
Manage Your Instant Cooker Settings and Timing
Adjust Pressure and Time Accurately
Set your device to high pressure and cook the beef for 45-60 minutes depending on the size. Overcooking leads to tough textures, so adhere strictly to recommended times. I once left my beef on high pressure for 90 minutes, expecting it to be more tender, but it resulted in mushy meat—underscoring precision in timing.
Use Natural or Quick Pressure Release
Allow a natural pressure release for 15 minutes to let the meat relax, then quickly release remaining pressure. This step helps retain juices and prevents fibers from tightening up. During my trial, I manually released pressure immediately after cooking, causing the juices to escape and the meat to become dry. Following the proper release technique kept the meat juicy and shredded easily.
Assist Collagen Breakdown with Liquids and Moisture
Add enough broth, water, or sauce—generally 1 to 1.5 cups—to maintain moisture and facilitate collagen conversion. Drowning the meat isn’t necessary; just ensure it’s partially submerged. I learned this the hard way when I used too little liquid; the meat dried out, making shredding difficult. The right amount of moisture ensures tender, melt-in-your-mouth beef.
Implement the Resting Technique for Maximum Tenderness
Once cooked, let the meat rest for at least 10 minutes before shredding. Resting allows fibers to reabsorb moisture, resulting in juicier, more cohesive meat. I once rushed to shred immediately and ended up with dry, stringy chunks. Conversely, waiting let the meat re-tissue, making shredding easier and more satisfying.
Shred with the Right Tools
Use forks or a pair of meat claws for efficient shredding. Avoid dull knives—they tear the meat rather than shred it cleanly. I prefer meat claws because they grip and pull apart the meat effortlessly, saving time and effort. Proper shredding tools make a visible difference in achieving that ideal consistency.
Many home cooks assume that mastering their instant, multicooker, or slow cooker is simply a matter of following basic recipes or pressing a button. However, even experienced users often stumble over subtle pitfalls that can compromise meal quality. Let’s explore some advanced nuances that many overlook and how avoiding these can elevate your cooking game.
Why Relying Solely on Preset Programs Can Backfire
Most modern devices come with preset programs labeled “Meat,” “Soup,” or “Slow Roast,” tempting users to just set and forget. But these presets don’t account for variations in ingredient sizes, moisture content, or altitude. Relying exclusively on presets can lead to overcooked or underseasoned dishes. A better approach involves customizing cooking times and pressure levels based on your specific ingredients, ensuring perfect results every time. For example, adjusting pressure release methods—such as opting for natural release—can make a significant difference in tenderness. For more insights, check out this article on pressure release techniques.
The Hidden Trap of Ingredient Placement Inside the Pot
It might seem trivial, but how you layer ingredients impacts cooking efficiency and flavor infusion. Placing vegetables directly on the bottom can cause uneven cooking, especially if they’re dense like potatoes. Conversely, stacking meats at the bottom with liquids in the middle or top can trap excess moisture, leading to sogginess or mushiness. Advanced cooks often use a steaming rack or insert to elevate ingredients, promoting even heat distribution. This subtle step prevents common issues like dry meats or over-vegetabled dishes. Want to optimize your cooker’s performance? Take a look at this comprehensive guide on layering techniques.
Are You Making These Overcooking Assumptions?
One widespread myth is that longer cooking always results in more tender, flavorful meals. While slow cooking can be gentle, overdoing it causes meat to break down excessively, turning into mush, or vegetables to disintegrate entirely. The key lies in understanding the right timing—rarely does it require more than the recommended period. Advanced users tune their cook times based on actual weight and cut type, often checking internal temperatures rather than sticking to generic timings. For instance, in pressure cooking, exceeding the ideal pressure duration can toughen rather than tenderize. To learn how to fine-tune your timings, see this article on preventing dry chicken.
What About the Role of Moisture and Liquids in Achieving Juicy Results?
One overlooked aspect is the precise amount and placement of liquids. Many believe that adding more water or broth guarantees moist meat, but excess moisture can dilute flavors or lead to a soupy consistency. Conversely, too little moisture causes dryness or burning. Skilled cooks measure carefully—using just enough to facilitate collagen breakdown without drowning ingredients. They also consider the timing of liquid addition; some recipes benefit from adding liquids at the start, while others require it midway. For expert tips, explore this timing cheat sheet for liquid use.
Finally, it’s crucial to understand how the lid’s seal and pressure settings influence moisture retention. A poor gasket or incorrect pressure setting can cause moisture loss, impacting tenderness and flavor. Regular maintenance and understanding your model’s specific features can prevent such pitfalls. For detailed troubleshooting, read this guide on sealing issues.
Have you ever fallen into these traps? Let me know in the comments. Mastering these nuanced aspects can transform your cooking results from decent to professional-quality, saving you time, effort, and ingredients in the long run.
Invest in Quality Tools for Longevity and Consistency
The backbone of reliable cooking with your multicooker or slow cooker is using the right tools and maintaining them properly. I personally swear by the Chef’s Precision Silicone Lids for their durability, heat resistance, and snug fit, which helps maintain proper pressure and prevent leaks over time. These lids withstand frequent temperature changes and are dishwasher safe, making handwashing and periodic inspection simpler, ensuring ongoing performance.
Another indispensable item I rely on is a digital meat thermometer. Not only does it help verify internal temperatures—ensuring meat is cooked safely and optimally—it also guides me in adjusting cooking times for different cuts or batch sizes. Regularly checking temperatures prevents overcooking or undercooking, extending your appliance’s life and improving meal quality.
Maintain Your Equipment Effectively
Consistent maintenance extends your cooker’s lifespan and keeps results predictable. I recommend inspecting seals and gaskets bi-monthly; these can wear out or become damaged, leading to pressure leaks or inconsistent sealing. Replacing worn gaskets promptly with OEM parts preserves pressure integrity—a critical factor discussed in this expert guide.
Cleaning your device after each use prevents residue buildup that may impede heating elements or sensors. For tough burnt-on spots at the base, I use a mixture of baking soda and vinegar—gently scrubbing with a soft brush—so as not to damage non-stick surfaces. Proper care not only preserves functionality but ensures safety against malfunctions.
How do I maintain my pressure cooker over time?
Beyond regular inspections and cleaning, it’s vital to follow manufacturer instructions for descaling and replacing parts like valves or sensors. Some models feature AI-enabled sensors that monitor performance; keeping these calibrated or replaced when necessary prevents errors and inefficiencies. Additionally, periodically running a vinegar-water cycle can prevent mineral buildup, which is vital for consistent pressure and temperature control. Regularly reviewing your specific model’s maintenance schedule—detailed in the user manual—can save you from costly repairs later.
Looking ahead, advancements like smart diagnostics and self-cleaning gasket systems are predicted to become standard, simplifying upkeep even further. For now, adhering to basic maintenance routines ensures your trusted appliance remains responsive and productive—saving time and ingredients each week.
Need a quick fix for a stubborn seal or valve? Check out this handy guide for step-by-step tips.
Try implementing a monthly gasket inspection combined with the use of a high-quality silicone lid, and you’ll notice a marked improvement in both safety and cooking performance.
The Hardest Lesson I Learned About instant cooker,multicooker,one pot meals,slow cooker, pressure cooker
My biggest realization came after numerous attempts where I believed that more time meant better results. It took me countless burnt or tough dishes to understand that precision and understanding your device’s nuances trump brute force. Every new model teaches a different lesson—sometimes, the hard way—but these experiences made me a better cook. As I experimented, I discovered that patience with pressure release and proper ingredient layering are game changers, something I wish I had known from the start.
3 Myths About instant cooker,multicooker,one pot meals,slow cooker, pressure cooker That Held Me Back
First, the myth that all cuts of beef respond equally; I learned that starting with the right cut is crucial. Second, the notion that adding more liquid results in more flavor—it’s actually about the right amount for collagen breakdown. Lastly, believing that presets do all the work. I now customize settings for each recipe, leading me to consistently better results. Dispelling these myths transformed my cooking experience and can do the same for you when you explore trusted resources like this comprehensive guide.
What Experts Won’t Tell You About instant cooker,multicooker,one pot meals,slow cooker, pressure cooker
One key secret is the importance of ingredient placement inside the cooker—placing denser vegetables or meat on top or bottom can affect cooking evenness. Also, understanding that the lid seal quality impacts cooking reliability is vital; old gaskets can be sneaky culprits. Lastly, I’ve learned that maintenance and regular cleaning extend not just the life of your appliance but also improve results—small investments for big gains. For troubleshooting tips, check out this advice on maintaining seals.
My Essential Toolkit for Elevating instant cooker,multicooker,one pot meals,slow cooker, pressure cooker
A quality digital meat thermometer has become my best friend—it guarantees the perfect internal temperature without guesswork. High-quality silicone lids, like Chef’s Precision Silicone Lids, help maintain pressure and prevent leaks, especially during longer cooks. Additionally, a set of sturdy, sharp forks and meat claws makes shredding effortless. These tools matter because they turn potential frustration into simple pleasure, allowing your meal to shine with minimal effort.
Don’t Be Afraid to Start Your Crockpot Cooking Journey
Remember, mastery with your instant cooker in 2026 isn’t about perfection from day one—it’s about learning, experimenting, and adapting. Each mistake is a lesson, each upgrade a step toward culinary confidence. You’ve already made a great move by reading up and learning the secrets; now, go ahead and let your newfound knowledge inspire delicious, stress-free meals. Your next favorite dish is just a cook away!
What’s been your biggest challenge with instant or slow cooking, and how did you overcome it? Share below—I’d love to hear your stories and tips!