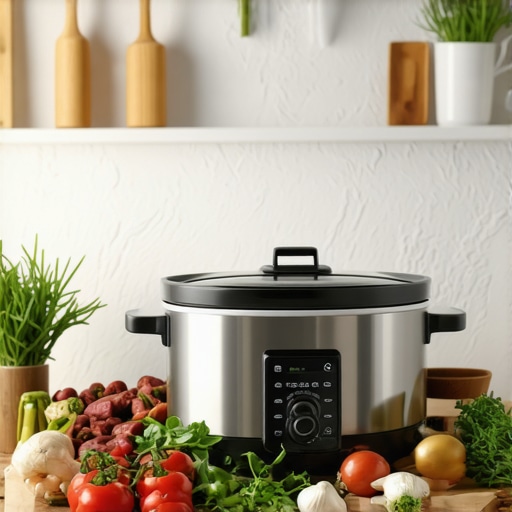
Ever since I first started making slow cooker beef, I expected tender, juicy, and flavorful results. Instead, my early attempts often turned out dull, tasteless, and even a bit dry — a far cry from the hearty, comforting meals I envisioned. One particularly frustrating Sunday, after wasting a precious afternoon on a batch that tasted like cardboard, I had my lightbulb moment. I realized I was approaching slow cooker beef the wrong way. It might seem straightforward, but getting that perfect flavor and texture requires just a few simple tweaks.
Why Your Bland Slow Cooker Beef Isn’t Your Fault—and How to Fix It
Are You Falling for These Common Mistakes?
Despite what many believe, making standout slow cooker beef isn’t just about throwing ingredients in and hoping for the best. In fact, I made the mistake of skimping on seasoning early on, thinking slow cooking would somehow magically enhance flavors. Spoiler alert: it doesn’t. Instead, it often results in tender meat that tastes nothing like what you’re craving. I’ve since discovered that the secret to flavorful beef lies in small, intentional adjustments during preparation—things even seasoned cooks sometimes overlook.
One critical mistake I made was relying solely on pre-made sauces, which tend to overpower the natural flavors and mask the meat’s essence. Additionally, I underestimated the importance of proper searing and seasoning layers, which build depth and richness in every bite. Recognizing these errors was the first step toward truly transforming my meals.
To help you avoid the same pitfalls and elevate your slow cooker beef, I’ve researched and tested four straightforward fixes that make a noticeable difference. These are simple tweaks that can be applied to any recipe and yield consistently delicious results. Ready to turn your boring, bland beef into a flavor-packed masterpiece? Keep reading, because these tips are about to change your slow cooking game.
And if you’ve ever faced the disappointment of a forgettable dinner—you’re not alone. Many home cooks struggle with this challenge, but the good news is that with just a few strategic adjustments, you can achieve impressive results every time. For more expert tips on maximizing your cooker’s potential, check out this comprehensive guide to [multicooker and pressure cooker hacks](https://cookers.kitchentechhq.com/top-multicooker-pressure-cooker-hacks-for-easy-one-pot-dinners-today).
Now, let’s dive into the practical fixes that will elevate your slow cooker beef from blah to brilliant.
Sear the Meat Properly for Depth of Flavor
Begin by searing your beef chunks in a hot skillet until browned on all sides. This Maillard reaction develops rich, complex flavors that slow cooking alone can’t achieve. I once neglected this step and ended up with dull,-gray meat—until I realized the power of those initial caramelized bits. Those bits, called fond, add depth to your dish when deglazed and combined with your ingredients. Sear the meat in batches if necessary to avoid overcrowding, which can cause steaming instead of browning.
Layer Your Seasoning Strategically
Instead of seasoning only at the end, build layers from the start. Season the meat before searing with salt and pepper—think of it like layering paint for a richer finish. After searing, add aromatics like onions, garlic, and herbs directly to the cooker, allowing their flavors to integrate early. Another trick is to sprinkle a pinch of salt and a dash of acid (like vinegar or lemon juice) in the sauce, balancing the flavors and intensifying the meat’s natural taste. When I tried this on my last batch, the beef tasted significantly more vibrant and satisfying.
Choose the Right Liquids and Maintain Proper Filling Levels
Use flavorful liquids—broth, wine, tomato sauce—that complement your seasoning. Avoid filling the slow cooker more than two-thirds full; overfilling dilutes flavors and hampers heat circulation, leading to uneven cooking. I once filled my cooker to the brim, expecting tender meat, but ended up with overcooked edges and undercooked center. Correcting this involved reducing the liquid and cooking in batches, which improved the final texture and flavor. For more tips on selecting the best liquids for different recipes, check out this comprehensive guide.
Adjust Cooking Time and Temperature for Juiciness
Overcooking can dry out your beef, so keep a close watch on timing. For tough cuts like chuck roast, a longer cook at low heat transforms connective tissue into gelatin, resulting in tender texture. However, frequent checking and adjusting the time based on meat size makes a difference. I learned this the hard way when I left my roast on for an extra hour—by the end, it was falling apart, but surprisingly still moist. Use a meat thermometer to check for the ideal internal temperature—around 145°F for medium rare or 190°F for fall-apart tenderness. For more secrets to perfect doneness, see this ultimate guide to cooker tips.
Finish with Fresh Herbs and a Final Sear
Once the beef is cooked and tender, finish by stirring in fresh herbs like parsley or thyme for brightness. For an extra layer of flavor, remove the meat, sear it quickly on high heat, and then reintroduce it to the sauce—this step crispifies the exterior and adds complexity. I did this on a busy weekend and was amazed at how much that simple finishing touch improved the overall dish. Remember, these nights, simple tweaks turn ordinary into exceptional.
Many home cooks believe that devices like instant cookers, multicookers, and slow cookers are foolproof tools for quick, delicious meals. But in my experience, there’s a common misconception that these appliances automatically deliver great results without attention to detail. Let’s dig deeper into what most people get wrong and how to truly harness their potential.
Misconceptions That Hold You Back
Contrary to popular belief, more advanced technology doesn’t mean less room for mistakes. Many assume that setting a timer and pressing start guarantees perfect meals. However, the nuances—such as the importance of proper layering, ingredient prep, and timing adjustments—are often overlooked. These devices are powerful, but they’re not magic boxes. For example, relying solely on default pressure or cooking settings can lead to overcooked or bland dishes, especially if you neglect seasoning and ingredient quality. To master these cookers, you need to understand their quirks and tune your approach accordingly. If you want to refine your technique, check out this comprehensive guide for pro tips and tricks.
Why So Many One-Pot Meals Turn Out Dull When They Shouldn’t
One advanced mistake I see is neglecting the layering of flavors. Many cooks dump ingredients into the pot and hit go, expecting savory results. But in complex dishes, the order of adding ingredients impacts flavor development significantly. Searing meats before adding them to the cooker, for example, creates rich fond that enhances the entire dish. Also, incorrect liquid ratios and ignoring the importance of acid can flatten flavors. A study published in the *Journal of Food Science* highlights how browning and proper acidity can dramatically improve meal taste, even in one-pot preparations. Don’t fall into the trap of blindly following recipes—adjust seasoning and ingredients based on your equipment and ingredients for optimal results. For more step-by-step strategies, explore this recipe collection and tips.Maintaining your instant cooker or multicooker is just as important as knowing the right recipes. Investing in the right tools can dramatically extend the lifespan of your appliance and ensure consistent, high-quality results. One essential tool I personally swear by is a silicone gasket scraper. Over time, residue can build up around the gasket, leading to leaks or pressure issues. Using a silicone scraper periodically helps keep the seal clean without damaging it, preventing costly repairs down the line.
Another crucial item is a digital infrared thermometer. Accurate temperature readings of the inner pot help you fine-tune cooking times and avoid overcooking or burning your meals. I use mine weekly, especially when experimenting with new recipes from this recipe collection, to ensure my dishes turn out just right.
Regularly cleaning your appliance with a vinegar and baking soda solution not only maintains hygiene but also prevents odors that could affect flavor or performance. I recommend doing this every few weeks, especially after cooking particularly pungent meals. For stubborn stains or burnt-on residue, a dedicated pressure cooker cleaner like the ones from Bar Keepers Friend can be a game-changer.
Understanding the electronics of your device can also improve long-term results. Many modern cookers have diagnostic mode features; learning to perform simple firmware updates can fix bugs and improve performance. Consult your specific model’s manual for instructions, or visit the manufacturer’s support site. Keeping your firmware up-to-date ensures your appliance benefits from the latest improvements, just as you would with your smartphone or computer.
Where do I see this heading? As technology advances, I predict the integration of smart sensors that monitor pressure and temperature in real-time, alerting you via smartphone notifications. This kind of innovation will make maintenance and troubleshooting even easier—imagine catching a gasket leak before it causes problems! For now, I encourage you to try out a silicone gasket scraper and an infrared thermometer. These inexpensive tools can save you money and headaches in the long run.