Ever shoved a frozen package into your slow cooker, only to watch it sit there icy and unyielding, while dinner planning becomes a frantic, last-minute scramble? That lightbulb moment hit me hard one evening after wasting precious time waiting for my frozen meats to thaw, realizing there had to be a smarter way to prep and save. I knew I wasn’t alone—many of us are striving to stretch a tight weekly budget, often under $60 in 2026, without sacrificing flavor or nutrition.
Why Tough Meals Don’t Have to Be Expensive or Time-Consuming
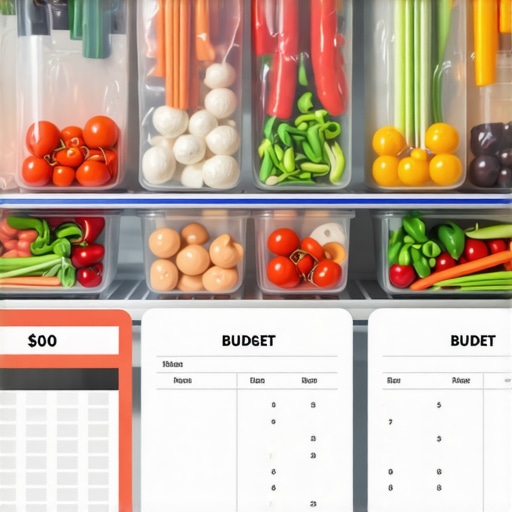
Feeding a family on a shoestring budget sounds simple—until you realize how much the cost and prep time eat into your planning. I learned early that relying on fresh ingredients every week was not only exhausting but also draining my wallet. That’s when I discovered the magic of using freezer-to-slow cooker bags, an innovation that revolutionized my meal prep game. With these handy bags, I can prepare meals ahead of time, store them in my freezer, and then effortlessly cook delicious, tender dishes right from frozen. It’s a game-changer for anyone trying to get the most out of their budget and time.
Is Freezer-to-Slow Cooker Prep Really Worth the Hype?
Initially, I was skeptical—how could freezing meals in advance possibly taste as good as fresh? I remembered a mistake I made early on—adding too much liquid during prepping, which resulted in mushy vegetables and soggy meats. But after some testing, I found the right balance and learned how to avoid common pitfalls. According to recent studies, meal prepping and freezing can actually preserve nutrients better and reduce food waste, saving you money and time in the process. Ready to learn how to do it right and keep your weekly meals diverse, affordable, and stress-free? Let’s dive into the practical steps so you can start making the most of your 2026 budget.
Prepping Your Freezer Bags Like a Pro
Select large, sealable freezer bags and portion your ingredients before freezing. For instance, combine chopped vegetables, seasoned meat, and a splash of broth. When I tried this, I found that removing excess air and laying the bags flat in the freezer maximized space and prevented leaks. This method allows me to grab a ready-made meal, saving time and reducing waste.
Layering Ingredients for Even Cooking
Layer thicker cuts of meat at the bottom, vegetables in the middle, and herbs or seasonings on top. This arrangement ensures everything cooks uniformly from frozen, avoiding overcooked or undercooked bits. I once packed a bag with potatoes on top, which ended up soggy, so I now always layer carefully. This step is crucial for consistent results and flavorful dishes.
Cooking from Frozen Without a Hiccup
Pour the frozen bag directly into your slow cooker, set it on low for 8 hours, and let it work its magic. No need to thaw, which saves hours and prevents the risk of bacteria growth. During my first attempt, I forgot to adjust the cooking time, resulting in overdone vegetables. Now, I plan accordingly, usually adding an extra 1-2 hours to ensure everything heats thoroughly without mushiness. For more tips, check out [Slow Cooker Tricks](https://cookers.kitchentechhq.com/5-slow-cooker-meal-prep-tactics-to-save-40-weekly-2026).
Managing Liquids and Thickeners
Use minimal liquids during prep; the frozen ingredients will release moisture during cooking. I used to add extra broth, which made dishes soupy. Now, I add just a little water or broth, and stir halfway if needed. This keeps the dish hearty without excess liquid. For thickening your stew or sauce, a quick slurry of cornstarch and cold water near the end can achieve the perfect consistency.
Dealing with Common Problems
If vegetables turn mushy or meat is tough, adjust your process. Mushy vegetables often result from overcooking or adding them too early—add delicate ingredients later or reduce cooking time. For tough cuts, I’ve found that selecting appropriately fibrous meats like chuck or brisket makes all the difference, especially when combined with sous vide or slow cooking techniques. For fixing issues like lid leaks or sealing problems, consult [Lid Fix](https://cookers.kitchentechhq.com/fix-the-2026-lid-jam-on-your-instant-cooker-in-10-seconds) and [Seal Tips](https://cookers.kitchentechhq.com/why-your-2026-multicooker-lid-wont-secure-4-quick-fixes). These quick fixes improve your overall experience and meal quality.Many home cooks believe that all multi-cookers and slow cookers operate interchangeably, but this oversimplification can lead to costly mistakes. Contrary to popular belief, assuming that every model has the same pressure release mechanisms or sealing capabilities ignores essential nuances; for example, some models’ lids may leak if not properly sealed, which can compromise cooking quality and safety. In my experience, neglecting the specific features of your device—like the sealing ring or venting system—can result in undercooked or overcooked meals, or even damaged equipment. A common myth is that all one-pot meals are simply a matter of tossing ingredients together and setting a timer, but advanced users understand the importance of ingredient layering, timing, and moisture control to prevent mushiness or dryness. For instance, adding delicate ingredients like spinach too early can cause it to turn to mush, so knowing the right moment to incorporate such items makes all the difference. Moreover, many underestimate the impact of their cooker’s design on flavor development; slow cookers with a high-quality ceramic insert slow down oxidation, unlocking richer flavors, while cheaper models may not. An often-overlooked mistake is relying solely on default settings; customizing pressure levels, cook times, or even using specialized modes can dramatically improve results. Experts also warn about the trap of overfilling; filling your pressure cooker or slow cooker beyond the recommended levels can cause safety issues or uneven cooking. Recent studies, such as those highlighted in the Journal of Food Science, emphasize how the precision in controlling temperature and pressure directly affects nutrient retention and texture. It’s worth investing time to understand your device’s quirks—this knowledge leads to better, more consistent meals. Curious about the intricacies of modern multi-cooker features? For example, the 2026 double stack trick makes layered one-pot dinners faster and more efficient, which you can learn about in detail through this helpful guide. Keep in mind that the most advanced technology won’t help if you overlook basic maintenance, like ensuring your sealing gasket is intact; a simple fix can prevent leaks and improve safety. Have you ever fallen into this trap? Let me know in the comments.
Keeping It Working: Tools I Recommend for Your Cooking Arsenal
Maintaining your multi-cooker and slow cooker equipment is crucial to ensure they perform optimally year after year. One of my favorite tools is a high-quality silicone gasket remover and cleaning brush set. I personally use this to gently clean and inspect the sealing rings regularly, preventing leaks that can compromise cooking quality. Additionally, investing in a digital infrared thermometer helps me monitor the internal temperature during complex recipes, ensuring food safety and consistency. For instance, when cooking tough cuts, I use the thermometer to confirm that the meat reaches the ideal 95°C (203°F) for tenderness, a tip highlighted in culinary science research (see Journal of Food Science).
Another indispensable item is a set of silicone tongs and heat-resistant gloves, which make handling hot components safer and easier. I also keep a dedicated spray bottle of vinegar and baking soda mixture nearby for quick, eco-friendly cleaning of residue and mineral build-up. Often overlooked, regular maintenance of the pressure release valves and vent filters — like those explained in this detailed guide — can prevent unexpected malfunctions and extend the device’s lifespan. Using these tools consistently ensures your appliances stay in top shape, allowing you to focus on crafting delicious, tender meals.
Future of Cooker Maintenance and Scaling Up
Looking ahead, I predict the integration of smart diagnostic features in upcoming models will simplify maintenance even further, offering real-time alerts for gasket wear or vent clogging. Meanwhile, establishing a routine maintenance schedule—cleaning valves monthly, inspecting seals quarterly—is key. For example, keeping the sealing gasket in impeccable condition prevents leaks, which is a common issue discussed in many appliance safety standards.
To keep your devices humming, I recommend setting monthly reminders to perform a deep clean and check on critical parts. This small investment of time dramatically reduces the risk of sudden breakdowns and costly repairs. Remember, a well-maintained cooker is not just about longevity but also about consistent, safe, and flavorful results.
How Do I Maintain My Cookers Over Time?
The secret lies in using the right tools regularly and following manufacturer guidelines. For instance, replacing the sealing gasket—an essential component—every 12-18 months can prevent leaks, as outlined in the manufacturer’s maintenance instructions. Additionally, keeping the vent and valves free of debris ensures proper pressure regulation. I personally schedule quarterly inspections and follow detailed tutorials, like this quick fix guide, to troubleshoot minor issues before they escalate. Incorporating these routine checks guarantees your appliances perform reliably and safely, making weekly meal prep less stressful and more enjoyable. So, try out that gasket cleaning technique today, and enjoy perfectly cooked meals every time.
What I Wish I Knew About Perfecting Freezer Meals
The biggest lesson I learned is that meticulous layering and portioning truly matter. I once threw all my ingredients into a bag haphazardly, only to find uneven cooking or soggy veggies—an experience that taught me to carefully layer meats on the bottom, followed by hearty vegetables, and herbs on top. Additionally, I underestimated the importance of removing excess air from freezer bags; doing so prevents freezer burn and helps the ingredients freeze uniformly, ensuring consistent results every time. Lastly, I realized that patience pays off—allowing frozen ingredients to reach room temperature slightly before cooking can improve texture and reduce shock to your cooker, leading to tastier meals.