It was 6 PM, and I was staring at a cart full of groceries and a ticking clock. The kids were hungry, my energy was waning, and I hadn’t even started dinner. I remember that feeling all too well—overwhelmed and stuck, wondering if I’d ever find a way to make mealtime simpler without sacrificing flavor.
Then, it hit me. What if I could throw everything into one pot, set it, forget it, and come back to a delicious, wholesome meal? That lightbulb moment led me down the rabbit hole of exploring the magic of multicookers and one pot dinners. Believe me, once I mastered the art, my evenings transformed from frantic chaos to calm, connected family time.
In today’s busy world, finding quick, nourishing meal solutions is more crucial than ever. Whether you’re juggling work-from-home life, family duties, or just trying to stay sane, an efficient cooking method can be a game-changer. That’s exactly what this guide aims to deliver—simple, reliable strategies to turn your multicooker into your go-to kitchen hero.
But I want to ask—have you ever faced a dinner disaster where every stove burner was busy, and the clock kept ticking? Or perhaps you’ve hesitated because you didn’t know where to start with multicooker recipes? If so, you’re not alone. Many beginners stumble early on, often making rookie mistakes like overfilling the cooker or selecting the wrong settings, which can turn a simple meal into a kitchen nightmare. Early in my journey, I once ignored these tips and ended up with burnt rice—trust me, lesson learned!
The good news? With a few expert hacks and some patience, you can avoid these pitfalls and truly harness the power of your multicooker. Ready to turn your mealtime stress into success? Let’s dive into the practical steps that will forever change how you cook dinner.
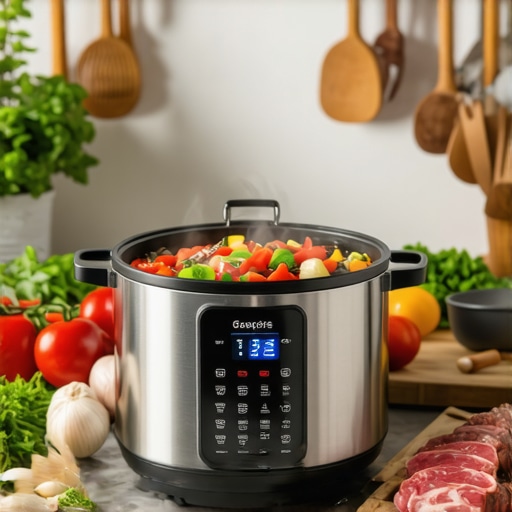
Your Secret Weapon: The Multi-Pot Marvel for Daily Dinners
Choose the Right Equipment for Your Meal
Start by selecting a multicooker that matches your needs, whether it’s a pressure cooker, slow cooker, or instant pot. Think of it as choosing a versatile tool—you wouldn’t use a hammer to drill, so pick the appliance that suits the recipe. I once grabbed my old slow cooker for a quick stew, but it took hours. Transitioning to a pressure cooker for similar recipes cut cooking time by over half, making weeknights manageable.
Prep Once, Cook Smart
Gather all ingredients, chop vegetables, and measure spices before starting. This ‘mise en place’ approach might sound simple, but it prevents last-minute scrambling. For instance, I prepped ingredients for my beef stew and layered them in the order of cooking. When I started the multicooker on high pressure, I was done in 30 minutes, and the flavor was rich. This method ensures smooth cooking without rushing or mistakes.
Layer Flavors with the Correct Sequence
Start by sautéing aromatics like onions and garlic using the ‘saute’ function if your multicooker allows. Then add proteins, vegetables, liquids, and seasonings in stages. A mistake I made early on was dumping everything together; the result was bland or overcooked components. Instead, I sautéed onions and garlic, browned chicken, then added broth and vegetables. The end result was a hearty, well-seasoned dish with minimal cleanup. For more expert insights, explore this comprehensive guide.
Master the Timing and Settings
Use the appropriate pressure or temperature setting for your dish. For stews, a high-pressure cook for 15-20 minutes works well; for rice, the ‘rice’ function is ideal. Don’t forget to set the timer correctly. I once left a dish in the ‘keep warm’ setting for too long, which overcooked the ingredients. Learning to read your multicooker’s guide and experimenting with timing can be significantly helpful. For detailed timing tips, check this resource.
Release Pressure Safely
After cooking, release the pressure as directed—either naturally or quick-release—depending on the recipe. I remember rushing to open the lid after pressure built up, only to have hot steam escape suddenly, burning my hand slightly. Patience is key; consult your cooker’s manual for safe release methods. Implementing correct pressure release techniques ensures safety and maintains food quality. Want to perfect your technique? Visit this detailed guide.
Final Touches and Serving
Once the lid is open, give the dish a gentle stir, taste, and adjust seasoning if needed. Sometimes, a squeeze of lemon or a sprinkle of fresh herbs elevates the flavors instantly. I once finished a chicken curry, added a dash of lime juice, and it transformed the dish. Keep your ingredients ready for finishing touches so you can serve immediately, preserving freshness and flavor. For more quick tips, see this article.
Many home cooks believe that choosing the right pressure cooker or multicooker alone guarantees successful meals, but the real challenge lies in understanding the nuances that separate amateur errors from culinary mastery. For instance, a widespread myth is that all pressure cookers perform equally, but in reality, variations in design, sealing mechanisms, and pressure regulation can dramatically affect cooking results. In my experience, an off-brand model might seem tempting for savings, but it often lacks precise pressure control, leading to inconsistent textures or overcooked ingredients.
Another common mistake revolves around the assumption that longer cooking times always yield better flavors. While it’s tempting to think ‘more is better,’ overextending pressure cooking can cause meat to dry out or vegetables to become mushy. Advanced cooks know that mastering the timing, based on ingredient type and size, is essential. For detailed guidance, you might want to explore this comprehensive guide.
A frequently overlooked nuance concerns the safety aspect of pressure release methods. Many users rush to open the lid immediately after cooking, risking hot steam burns or spoiling the dish’s texture. Understanding when to naturally release pressure versus quick-release can make or break your meal and your safety. A trap to avoid is ignoring your cooker’s manual, which can differ significantly between models, so always read the instructions carefully before attempting to release pressure.
Have you ever fallen into this trap? Let me know in the comments. Additionally, advanced cooks ask: How can I fine-tune pressure levels for delicate dishes without sacrificing flavor? The answer lies in mastering the various pressure settings and experimenting incrementally, as recommended in this expert resource. Understanding these subtleties allows you to elevate your one-pot meals from ordinary to exceptional, avoiding common pitfalls that trap even seasoned cooks.
Tools That Make Maintenance Easier
Investing in the right tools can significantly extend the lifespan of your multicooker while ensuring consistent performance. I personally recommend having a silicone gasket scraper; it helps remove food buildup from the sealing ring without damaging it, which is essential for maintaining proper pressure. Additionally, a soft-bristle brush is perfect for cleaning vents and sensors, preventing clogs that could affect cooking times and safety. Using a digital thermometer designed for small appliances allows me to check the internal temperature settings periodically, ensuring my cooker operates within safe and optimal ranges.
Long-Term Care Strategies
Regularly inspecting the sealing ring for cracks or hardening is crucial. I set a bi-monthly reminder to remove and wash the gasket gently with warm soapy water, then let it air dry. This prevents mildew buildup and maintains a tight seal. Another tip is to check the pressure release valves for blockages; a simple vinegar soak once a quarter keeps them clean and responsive. Over time, I’ve found that maintaining a schedule of thorough cleanings and inspections prevents expensive repairs and keeps my meals consistently tasty.
Future of Multicooker Technology
As smart home integrations become more prevalent, I predict increased adoption of multicookers with Wi-Fi connectivity, allowing remote monitoring and diagnostics. Manufacturers are also refining sealing technologies and sensor accuracy, making appliances more durable and user-friendly. Staying ahead means embracing these innovations—consider models with built-in self-cleaning cycles or troubleshooting alerts. I’m excited to see how these advancements will reduce downtime and make long-term maintenance even simpler.
How do I maintain my multicooker over time?
Proper maintenance involves regular cleaning of the gasket, vents, and pressure valves, as well as periodic inspection for wear and tear. Using tools like specialized brushes and silicone scrapers simplifies this process and helps preserve the appliance’s integrity. Documented best practices, such as those outlined in this comprehensive guide, provide valuable insights for ensuring longevity. I encourage you to set a maintenance schedule and stick to it—your future self will thank you when you’re enjoying perfectly cooked meals without worry of appliance failure.
To keep your multicooker performing reliably, always heed the manufacturer’s instructions and don’t neglect routine upkeep. For an advanced tip, try applying a small amount of food-grade silicone spray on the gasket after cleaning; this helps maintain flexibility and create a better seal. By implementing these maintenance habits, you ensure your investment continues to deliver delicious, effortless dinners for years to come.
Over the years, I’ve discovered that true culinary mastery isn’t just about following recipes—it’s about understanding the subtleties that elevate your dishes from good to unforgettable. One of the most valuable lessons I’ve learned is that precision in timing and a grasp of your appliance’s unique quirks can make all the difference. For example, I once overfilled my multicooker, thinking more ingredients would mean more flavor, only to end up with a jumbled, undercooked mess. That experience taught me to respect the device’s capacity and to measure ingredients carefully, ensuring each element cooks perfectly together.
Another insight came from experimenting with different pressure settings. I used to assume that longer cooking was always better, but I found that delicate vegetables and tender meats need just the right amount of pressure and time—not more. This realization helped me create meals with balanced textures that satisfy every time. If you’re curious about fine-tuning your multicooker skills, I highly recommend exploring this comprehensive guide, which dives into the nuances that can transform your everyday cooking.