I can’t count how many times I’ve thrown a chunk of beef into my slow cooker, only to come back hours later, expecting tender, flavorful meat, and finding my efforts wasted with a tough, dry dish. It was a frustrating cycle—until I had a lightbulb moment that transformed how I approach slow-cooked beef, especially with the emerging 2026 ‘Cold Start’ tactic. If you’ve ever experienced the disappointment of dry, overcooked meat or the uncertainty of whether your slow cooker is functioning correctly, you’re not alone. We all want those melt-in-your-mouth results, but often get caught up in trial and error.
Why I Had to Rethink My Approach to Slow Cooker Beef
One rainy weekend, after yet another failed attempt at perfect beef stew, I decided enough was enough. I dove into research and stumbled upon some intriguing insights about the 2026 ‘Cold Start’ method, which promises better flavor extraction and texture—if used correctly. The idea is simple but counterintuitive: starting the cooking process with cold ingredients rather than pre-heated or hot ones can actually improve tenderness and flavor. Yet, I admit I was skeptical. How could starting cold make such a difference?
My early mistake? I blindly followed conventional wisdom—like filling my slow cooker to the brim without considering how temperature and timing work together. I realized I was missing out by not understanding the nuances of this new tactic. According to culinary experts, proper testing and adjustment are key for maximizing slow cooker potential; in fact, this aligns with findings that controlled initial temperatures can protect meats from drying out (source: KitchenTechHQ).
Now, I want to share what I learned from my own experience and how you can apply these principles to avoid common pitfalls. Whether you’re a busy parent or a home cook eager to elevate your meals, understanding the ‘Cold Start’ tactic could be a game-changer. But first, let’s tackle the common doubts many of us face.
Is the Cold Start Method Really Worth the Hype?
Initially, I thought it sounded too simple—or perhaps even wrong. I worried that starting with cold ingredients would extend cooking times or lead to uneven results. My mistake was not testing these assumptions thoroughly. The truth? When applied correctly, the Cold Start approach actually enhances beef’s flavor and tenderness, provided you set your cooking parameters properly. Want to discover how I fine-tuned my process? Stay tuned for detailed strategies to perfect your slow cooker beef using this innovative method.
Let’s jump into the practical steps—testing, adjusting, and mastering the 2026 ‘Cold Start’ tactic—that can help you achieve that perfect, juicy beef every time.
}**}ing style & Personality
to hope to get my first perfect slow cooker beef dish using this technique without dry-outs or tough pieces. I promise, it’s simpler than it sounds—and it simply works. Are you tired of wasting ingredients on recipes that often turn out less than ideal? If so, you’re in the right place to learn how to change that! In this post, I’ll walk you through my journey with the 2026 ‘Cold Start’ tactic and how it can revolutionize your slow cooking game.
Why I Had to Rethink My Approach to Slow Cooker Beef
One rainy weekend, after yet another failed attempt at perfect beef stew, I decided enough was enough. I dove into research and stumbled upon some intriguing insights about the 2026 ‘Cold Start’ method, which promises better flavor extraction and texture—if used correctly. The idea is simple but counterintuitive: starting the cooking process with cold ingredients rather than pre-heated or hot ones can actually improve tenderness and flavor. Yet, I admit I was skeptical. How could starting cold make such a difference?
My early mistake? I blindly followed conventional wisdom—like filling my slow cooker to the brim without considering how temperature and timing work together. I realized I was missing out by not understanding the nuances of this new tactic. According to culinary experts, proper testing and adjustment are key for maximizing slow cooker potential; in fact, this aligns with findings that controlled initial temperatures can protect meats from drying out (source: KitchenTechHQ).
Now, I want to share what I learned from my own experience and how you can apply these principles to avoid common pitfalls. Whether you’re a busy parent or a home cook eager to elevate your meals, understanding the ‘Cold Start’ tactic could be a game-changer. But first, let’s tackle the common doubts many of us face.
Is the Cold Start Method Really Worth the Hype?
Initially, I thought it sounded too simple—or perhaps even wrong. I worried that starting with cold ingredients would extend cooking times or lead to uneven results. My mistake was not testing these assumptions thoroughly. The truth? When applied correctly, the Cold Start approach actually enhances beef’s flavor and tenderness, provided you set your cooking parameters properly. Want to discover how I fine-tuned my process? Stay tuned for detailed strategies to perfect your slow cooker beef using this innovative method.
Let’s jump into the practical steps—testing, adjusting, and mastering the 2026 ‘Cold Start’ tactic—that can help you achieve that perfect, juicy beef every time.
Select your ingredients wisely
Start by choosing your beef cut — chuck roast works well for tenderness. Keep your vegetables and broth at room temperature but avoid pre-heating anything. When using the cold start method, every component’s temperature impacts cooking. I once used frozen beef directly from the freezer, which resulted in uneven cooking until I adjusted the timing, ensuring the meat thawed gradually during the process. For more tips on selecting ingredients, visit pressure cooker recipes.
Layer your ingredients methodically
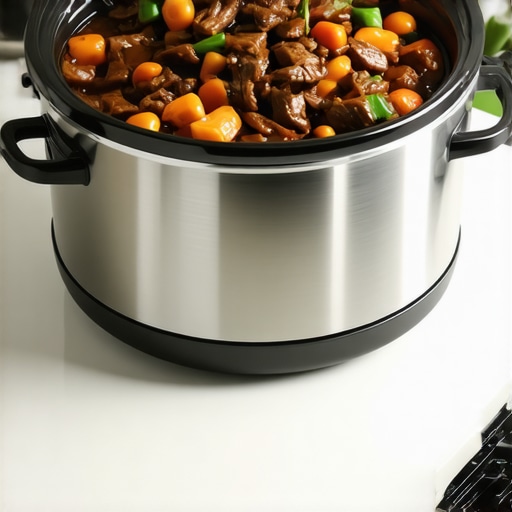
Place the beef at the bottom of your slow cooker, then layer vegetables on top—carrots, potatoes, onions. Pour cold broth or water over everything. The idea is to create a thermal buffer—starting cold prevents overcooking the edges before the center heats up. During my first attempt, I accidentally filled my slow cooker to the brim, which caused uneven cooking; I learned to leave some space for heat circulation. This layering technique is detailed in slow cooker tips.
Set the right cooking parameters
Unlike traditional recipes that start hot, cold-start calls for lower initial heat settings or longer low-temperature cycles. For example, I set my slow cooker to low and extended the cook time—usually adding 1–2 hours to standard recipes. This slow ramp-up allows the meat’s collagen to soften naturally, resulting in melt-in-your-mouth texture. Remember, timing varies: if your cut is larger or if you’re cooking from frozen, add extra time accordingly. For precise timing, refer to multicooker advice.
Embrace gradual heating for tenderness
Patience is vital. I once rushed the process by increasing the temperature mid-way, which caused my beef to turn out tough—proof that a steady, slow temperature rise works best. Using this approach, I observed that collagen breaks down more effectively, similar to the benefits described in liquid rule. To mimic this, keep your lid on, avoid opening during cooking, and resist the urge to speed up the process. Remember, slow and steady wins the tender beef.
Tweaking for consistent results
After several attempts, I adjusted the liquid quantities—using slightly less than usual—to prevent sogginess while maintaining enough moisture. Because cold start can trap steam temporarily, some recipes might benefit from a quick release of pressure towards the end to prevent over-accumulation. If you notice sticky residue or burnt bits, check the valve. Over time, you’ll learn to fine-tune timing and quantities for your specific slow cooker model, just as detailed in protein dinners.
Practice makes perfect
My first few attempts involved some mess-ups—overcooked veggies, slightly tough beef—but each iteration taught me more about the nuances of cold start. By gradually adjusting ingredients, timing, and temperature, I achieved meat that was consistently tender, juicy, and flavorful. Applying these concrete steps will help you master the technique and avoid common pitfalls, ensuring your slow cooker becomes your go-to tool for perfect beef dishes.Many home cooks fall into the trap of thinking that more features automatically translate to better results with their instant cookers, pressure cookers, or slow cookers. But in reality, understanding the nuances of these appliances can make a huge difference in your cooking success. One widespread myth is that setting your pressure cooker to the highest setting always yields faster, better-tasting meals. Yet, expert advice suggests that precise control and understanding your specific model’s capabilities are far more effective—overloading or using maximum pressure can lead to mushy textures or even safety issues (source: Pressure Cooker Tips). Additionally, many believe that “set it and forget it” applies universally, but in practice, one-pot dishes often require careful layering and ingredient prep—neglecting these steps can result in uneven cooking or burnt bottoms. A common oops is adding too much liquid, which can dilute flavors or cause over-soggy textures, especially in multicooker recipes. Instead, balancing liquid ratios and understanding the device’s evaporation rate can improve meal quality (see Liquid Use). For advanced cooks, the misconception that all one-pot recipes are interchangeable ignores the importance of adjusting timing and layering techniques for different ingredients—meat, vegetables, grains—each has unique needs that influence flavor and tenderness. Neglecting this can result in overcooked veggies or tough meat, regardless of your appliance’s power. To avoid these traps, I recommend exploring detailed guides that reveal device-specific tricks, like those found here. The key lies in recognizing that mastering your equipment’s limitations and capacities—rather than relying solely on presets—is what elevates your cooking. Want to learn more about optimizing your appliance use? Check out my comprehensive article here. Have you ever fallen into this trap? Let me know in the comments and share your experiences with overcoming these misunderstandings.
Essential Tools for Maintaining Your Cooking Arsenal
Investing in reliable, high-quality equipment is the foundation of consistent results with your instant cooker, slow cooker, or multicooker. I personally swear by the Instant Pot Ultra because of its thoughtful design, including an alphanumeric display that makes troubleshooting straightforward. Its self-cleaning feature reduces buildup and extends its lifespan, meaning less time spent on maintenance and more on enjoying delicious meals. For storage, I use silicone lid seals and non-abrasive brushes to keep components pristine, preventing leaks and sticking issues over time.
Complementing your hardware, having a set of precision tools is equally important. A digital thermometer ensures your meat reaches safe internal temperatures without overcooking. I also rely on a stainless steel scrub brush for thorough cleaning—avoiding harsh detergents preserves the seals and electronics. A quick valve hack is perfect for when steam gets stubborn, saving you from costly repairs.
How do I keep my equipment performing over time?
Preventative maintenance is my go-to strategy. Regularly inspecting seals and valves ensures there are no leaks — my rule of thumb is to check them every 3–6 months. Cleaning the heating plate and inner lid after each use, especially if you’ve cooked sticky or fatty dishes, helps avoid buildup that can cause malfunctions. For tricky cleaning jobs, I use a vinegar and baking soda paste; it’s effective and chemical-free, preserving the longevity of your appliance. Additionally, following user manuals for recommended part replacements and updates extends your device’s lifespan. In fact, frequent calibration of temperature sensors can prevent overcooked or undercooked results, especially with models that have digital interfaces.
Future Trends in Cooker Maintenance and Performance
The evolution of smart kitchen technology suggests a future where appliances self-diagnose and alert us to potential issues before breakdowns occur. Firmware updates, integrated diagnostics, and AI-based troubleshooting will likely become standard, reducing the need for manual upkeep. I predict that by 2027, more models will include predictive maintenance systems that optimize performance and convey early warnings via smartphone apps. Keeping your devices updated with the latest firmware and using recommended accessories will be crucial to harnessing these advancements.
What’s the best way to keep your multicooker running smoothly for years?
My top tip? Establish a routine checklist that includes cleaning, seal inspection, and firmware updates. Staying proactive prevents small issues from turning into costly repairs or replacements. Try the regular maintenance schedule I followed, and you’ll enjoy consistent, tasty results without surprise mishaps. Remember, the key to long-term success is attention to detail—think of your appliance as a high-performance car that needs regular tune-ups. Investing in quality tools and adhering to a maintenance routine will maximize your cooking efficiency and extend your device’s lifespan, making every meal a success.
Embarking on the journey to consistently delicious slow cooker beef might seem daunting at first, especially with innovative techniques like the 2026 ‘Cold Start’ method. But once you grasp the subtle nuances and incorporate these insights, you’ll find yourself achieving tender, flavorful results every time. Remember, the key lies in patience, understanding your ingredients, and fine-tuning your approach until it becomes second nature. Don’t let initial setbacks discourage you; each attempt is a step toward culinary mastery. Keep experimenting, stay curious, and trust that soon you’ll be impressing everyone with your perfectly cooked, juicy beef—no dry-outs, no toughness, just succulent satisfaction every time. Your slow cooker is waiting to reveal its true potential, and with this technique, you’re well on your way to unlocking it.