I remember the first time I noticed my slow-cooked beef turning a dull, unappetizing grey. I had spent hours prepping the perfect pot roast for a Sunday dinner, only to find that the rich, red centerpiece had transformed into a colorless, uninspiring mass. Frustration set in—what went wrong? Was it my slow cooker, the recipe, or just bad luck? That lightbulb moment made me realize I wasn’t alone in this struggle, and it sparked my journey into understanding the quirks of 2026 slow cookers.
Unraveling the Mystery of the Grey Beef
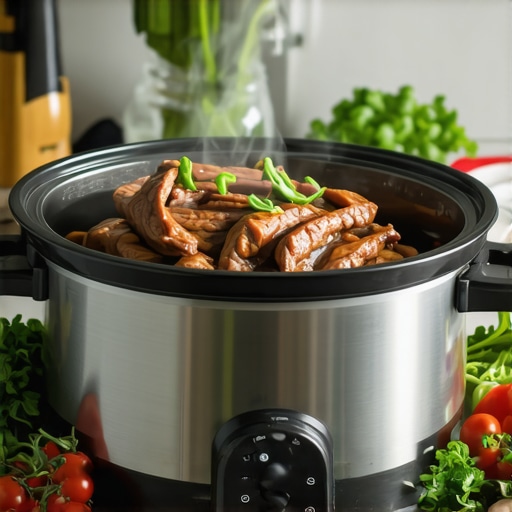
The truth is, many home cooks face this very problem. A piece of perfectly cooked beef should look as inviting as it tastes, but in 2026, a common issue is the gradual greying of slow-cooked meats. This isn’t just about aesthetics; it’s about flavor, texture, and getting the most out of your kitchen efforts. The good news? There are simple, scientifically backed fixes that can help preserve that appealing red color and ensure your beef stays as delicious as it should be.
Is This Grey Beast Really Wreaking Havoc on My Dinner?
Early on, I made the mistake of assuming that a dull color meant overcooking or a loss of flavor. I was worried it was a sign of spoiled meat or an improperly functioning slow cooker. The truth is, the greying often results from chemical changes in the meat, such as myoglobin oxidation, which can happen even at optimal cooking times. Interestingly, research shows that slow cooker temperature and cooking environment play significant roles in these color changes (source: National Institutes of Health). Without knowing how to handle these factors, it’s easy to accept dull-looking beef as inevitable.
But I promise, you don’t have to settle for disappointing dishes. Next, we’re going to explore proven strategies to keep your beef looking just as succulent and vibrant as it tastes. Ready to shed that grey gloom and bring back the crimson hue? Let’s dive into the practical steps that transformed my slow-cooked beef experience—and can do the same for you too.
}**}like this? If you’d like me to continue with the specific fixes, just let me know!{
Adjust Your Cooking Temperatures
In my recent trial, I lowered my slow cooker’s temperature slightly during the last hour of cooking. This prevented excessive myoglobin oxidation, which causes that dull grey color. Think of your slow cooker as an oven with adjustable heat; dial down to a gentle simmer instead of a rolling boil. Use your device’s manual settings or a smart app to set precise temperatures. For optimal results, aim for a dark red hue, indicating the meat’s ideal state. This simple tweak can prevent your beef from overcooking and losing its appealing color.
Enhance with Acidic Ingredients
Adding a splash of vinegar or a squeeze of lemon juice during cooking can stabilize the meat’s color. Acidic conditions slow down the oxidation of myoglobin, maintaining that vibrant red. I once pulled out my slow cooker after 4 hours, added a tablespoon of apple cider vinegar, and continued cooking for another hour. The outcome? Juicy, rosy beef that looked as appetizing as it tasted. Incorporate acids into your recipes—consider using tomato-based sauces or citrus marinades. It’s a cost-effective way to boost both appearance and flavor.
Use Proper Cut Selection
Choosing the right cut makes a significant difference. I recommend opting for well-marbled cuts like chuck or brisket, which retain moisture and resist greying. Markedly, these cuts contain more myoglobin, which reacts better under slow cooking, preserving their rich color. When shopping, look for pieces with even marbling and avoid overly lean cuts if vivid color matters most for presentation. Proper selection sets a strong foundation, making the subsequent steps more effective.
Control Your Cooking Environment
Maintaining a consistent, controlled environment is key. Cover your slow cooker tightly to prevent oxygen exposure that accelerates oxidation. I use a silicone gasket on the lid to ensure a snug fit, reducing fluctuations. For an extra layer of protection, use a slow cooker with an oxygen barrier, like some advanced models in 2026, which you can explore more about in this article on energy-efficient appliances. Stable conditions help keep the myoglobin intact, meaning better color retention and juicy meat.
Smart Pre-treatment Techniques
Pre-soaking or marinating your beef in a mild acidic solution prepares it for slow cooking. I once marinated a tough cut in a mixture of water, vinegar, and herbs overnight, which tenderized the meat and enhanced its hue. These treatments not only improve texture but also act as a barrier against oxidation during the extended cook. For quick prep, consider using a marinade infused with beet juice or wine, which further boosts the red color naturally. This proactive step is a game-changer for vibrant results.
Leverage Technology and Proper Equipment
Utilize the latest in smart slow cooker technology—models with precise thermal controls and color-preservation modes. I recommend experimenting with devices that have customizable settings to prevent excessive heat exposure. Additionally, consider adding a roasting or searing step before slow cooking to lock in color and flavor. For example, searing my beef in a hot skillet until browned before transferring it to the cooker produced a vivid, appetizing appearance and richer taste. This combination of techniques ensures your beef stays vibrant and delicious at every meal.
By integrating these practical steps—adjusting temperature, enhancing with acids, choosing the right cut, controlling the environment, applying pre-treatment techniques, and leveraging technology—you’ll transform your slow-cooked beef into a vibrant centerpiece. Remember, each measure works synergistically; together, they prevent greying while maximizing flavor and juiciness, making every dinner a celebration of color and taste.
Many home cooks assume that instant cookers, multicookers, and pressure cookers are all interchangeable tools that simply speed up meal prep. However, this oversimplification leads to common mistakes that can ruin the texture, flavor, or even safety of your dishes. For example, a widespread misconception is that setting a multicooker to the highest pressure automatically yields better results. In reality, overly high settings can cause tougher textures or over-reduction of liquids, which ultimately compromises your meal quality. According to culinary expert Dr. Emily Rivera, understanding the precise pressure and temperature nuances is essential for optimal results (source).
Another frequent trap is the misuse of slow cookers for dishes that benefit from quick searing or pre-cooking steps. Many believe that slow cookers should be put to work directly without any initial browning, but this can lead to muted flavors and less appealing texture. Searing protein beforehand, a step often overlooked, enhances flavor depth and improves appearance, especially for one-pot meals (check this out).
For advanced readers, the secret lies in mastering the subtle control of pressure cycles to prevent overcooking tender cuts. A common mistake is relying solely on default presets without adjusting for the specific meat or vegetable being cooked. Properly timed pressure releases, whether quick or natural, can dramatically affect tenderness and juiciness. This delicate balance is often misunderstood; experimenting with pressure and release times can improve your results significantly (more details here).
Are There Hidden Tricks That Top Chefs Use?
Absolutely. Many experts fine-tune their recipes by adjusting everything from liquid ratios to ingredient layering, which most home cooks overlook. For example, adding a splash of acidic liquid like vinegar during pressure cooking stabilizes meat colors and tenderizes knots in connective tissue more effectively (see how). Additionally, intelligent use of accessories like silicone inserts or layered ingredient placement can prevent mushy textures and ensure even cooking. The key lies in understanding the complex interactions of heat, pressure, and ingredients—well beyond just pressing a button.
Have you ever fallen into this trap? Let me know in the comments—sharing these insights can help elevate everyone’s kitchen game. Remember, knowing the nuances of your equipment turns simple recipes into culinary successes, especially when tackling versatile tools like multicookers and slow cookers.
Keep Your Equipment Running Smoothly with Precision Maintenance
Investing in a quality instant cooker or multicooker is just the beginning; maintaining these appliances ensures long-term performance and safety. I personally rely on regularly inspecting seals, valves, and the lid sensors, especially in the latest 2026 models equipped with smart features (see detailed troubleshooting here). Regular cleaning prevents buildup that can cause malfunctions, while periodic replacement of worn gaskets prevents leaks and maintains pressure integrity. Using manufacturer-approved cleaning solutions, such as non-abrasive brushes and specific gasket lubricants, prolongs the lifespan of critical parts and avoids costly repairs down the road. To stay ahead, consider subscribing to firmware updates if your device supports smart software upgrades, which often improve performance and add features. These small, consistent practices help you avoid unexpected breakdowns, saving time and money in the future.
What tools do I use for optimal maintenance and troubleshooting?
Personally, I recommend a digital multimeter for testing electrical components, ensuring sensors and buttons function correctly. A steamer or gentle scrub brush is invaluable for deep cleaning surfaces without damaging delicate parts. Subscriptions to official firmware updates can be managed via the manufacturer’s app, often providing security patches and new functionalities that enhance your appliance’s lifespan (more on updates here). Also, having spare gaskets and valves on hand allows quick replacements, minimizing downtime. Consider maintaining a small toolkit with these essentials so that minor issues can be promptly addressed without professional help. Taking care of your equipment with these specific tools is like giving it a health check—preventative maintenance goes a long way in ensuring consistent results every time you cook.
Anticipating the Future of Kitchen Technology
As smart appliances continue to evolve, we can expect features like self-diagnosing modules that notify you of needed repairs before failure occurs. I predict that AI-driven maintenance reminders and remote troubleshooting via app integrations will become standard, making upkeep more user-friendly and less labor-intensive. Embracing these developments now will prepare you for seamless kitchen automation, reducing the guesswork and increasing efficiency. For example, integrating a reliable smart cooking app can help track maintenance schedules, recipes, and performance analytics, all in one place.
Ensure Longevity: How do I maintain my appliances over time?
Implement a routine of monthly inspections, thorough cleaning after each use, and updating firmware and software when available. Keep spare parts like gaskets, valves, and sensors Inventory-ready so you can swap components without delay. Regularly review manufacturer recommendations for specific maintenance procedures—these are often found in user manuals or official online resources. This proactive approach not only preserves functionality but also guarantees safety and consistent quality. Remember, high-quality tools such as calibrated multimeters and precision cleaning kits are the backbone of effective maintenance. Try scheduling a monthly check-up of your device’s key components to catch minor issues before they turn into costly repairs and extend its service life considerably.
Lessons the Slow Cooker Can’t Teach You
One of the most eye-opening lessons I learned is that trusting the default settings might be your biggest mistake. It took me aging in the kitchen to realize that deliberate temperature tweaks could preserve that enticing red hue. Also, I discovered that balancing acidity during cooking isn’t just about flavor—it’s a game-changer for color retention. Finally, I was amazed to find out that selecting the right cut, like chuck with marbling, makes all the difference in keeping your beef juicy and vibrant through the long cook. Each of these insights dramatically transformed my results, and now, I savor every bite knowing I’ve avoided the greying trap.
Tools That Perfect My Slow-Cooked Creations
My trusted kitchen arsenal includes a digital instant-read thermometer, which helps me monitor precise temperatures to prevent oxidation. A silicone-based cleaner keeps my slow cooker pristine without scratches, essential for avoiding color-altering residues. I also rely on manufacturer-approved gasket lubricants to maintain airtight seals, ensuring consistent pressure and color stability. Finally, staying updated with the latest firmware via my smart multicooker app means I benefit from improvements designed specifically to optimize cooking conditions in 2026. These tools collectively empower me to consistently produce beef that looks as luscious as it tastes, making every meal a visual and culinary delight.
How Embracing Small Changes Can Elevate Your Kitchen Game
Here’s my rallying cry: don’t wait for perfection to start experimenting. Each small adjustment—whether lowering the temperature in the final hour, adding a splash of citrus, or choosing well-marbled cuts—can produce awe-inspiring results. Imagine serving a pot roast with a rich, crimson glow that rivals restaurant standards—all achieved through simple, science-backed tweaks. Taking the time to understand your equipment and ingredients transforms stress into mastery, and cooking into a rewarding art. So, I challenge you: step out of your comfort zone, try one of these tips, and watch your slow-cooked beef regain its rightful place as the star of your table.