Ever had one of those hectic weeknights where the idea of cooking feels overwhelming? I remember the moment I almost gave up on dinner entirely—standing in my kitchen, staring at a pile of ingredients, feeling the clock ticking away, and knowing I needed a solution fast. That lightbulb moment? Realizing that the secret to saving my sanity was right there in my MultiCooker. But like many, I initially struggled to get consistent, delicious results. I kept overcooking, undercooking, or ending up with a soggy mess. Sound familiar?
Why One-Pot Meals Are a Game-Changer for Busy Homes
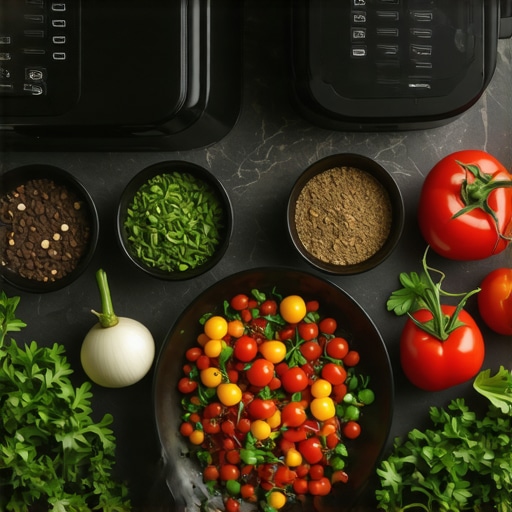
One-pot meals are more than just a trend—they’re a lifesaver. They simplify cooking, cut down on cleanup, and pack a punch of flavor. With the right tips, your MultiCooker or Instant Pot can become your best friend in the kitchen. Yet, diving into the world of one-pot recipes can feel intimidating at first. I’ve been there—struggling to balance timing, ingredients, and the quirks of different appliances. That’s why I want to share what I’ve learned to help you avoid the mistakes I made early on and start creating perfect meals every time.
Is the hype about Instant & MultiCooker Tips actually worth the effort?
Absolutely—if you know the right tricks. I once thought that just throwing everything in and pressing a button would do the trick. But I quickly learned that a few simple strategies make all the difference. For example, understanding how to layer flavors, adjust pressure levels, and select proper cooking times can turn a mediocre dish into a restaurant-quality meal. Trust me, mastering these tips transformed my approach and saved me hours in the kitchen. Want to learn more? Check out this guide on busy weeknight one-pot meals.
One common mistake I made? Overfilling my cooker. It sounds obvious, but it’s easy to underestimate how much the ingredients will expand or release steam. Early on, I faced the frustration of failed recipes or food that was unevenly cooked. That’s why understanding the basics—like not exceeding the max fill line—can save you from the same pitfalls. Want more insider secrets? Dive into expert tips for perfect multicooker meals.
Layer Your Ingredients Strategically
When I first started using my MultiCooker, I would toss everything in at once, expecting perfect results. That approach often led to uneven cooking or mushy textures. Instead, I now layer ingredients based on cooking times. For example, tougher vegetables like carrots and potatoes go at the bottom, as they take longer to cook, while delicate greens are added last. This way, everything finishes simultaneously, ensuring optimal texture and flavor. For more detailed layering strategies, visit this guide to easy one-pot dinners.
Use the Correct Liquid Levels
Overfilling your cooker not only risks messes but can also prevent proper pressure buildup. I once tried a beef stew with too much liquid, and the excess steam caused a safety release, ruining the dish. Always adhere to the max fill line indicated on your appliance. Typically, for most recipes, 1 to 1.5 cups of liquid are enough for pressure cooking, as the ingredients release moisture during cooking. Check the specific recipe guidelines and your appliance manual for best results. Learn more about liquid management at this detailed hack guide.
Adjust Cooking Times Based on Ingredients
One mistake I made early on was sticking rigidly to recipe times without considering ingredient variations. For example, frozen chicken breasts take longer than fresh ones. I once cooked frozen chicken for the same time as fresh, and it was underdone. My solution was to reduce the cooking time for tender ingredients and extend it for frozen or tougher items. Use the quick reference table for typical ingredient times, then adjust based on your experience. This approach ensures perfectly cooked proteins and vegetables every time.
Master Pressure Settings and Release Methods
Understanding how to manipulate pressure levels is key. I once used high pressure for everything, resulting in overcooked rice and shredded chicken. Now, I select pressure settings based on the dish—high pressure for stews and beans, low for delicate dishes like fish or eggs. Also, choosing natural release over quick release preserves moisture and texture. For example, I let my rice rest under natural pressure for 10 minutes before releasing. This small step prevents sogginess and preserves fluffiness. Dive deeper into pressure techniques at this ultimate pressure cooker guide.
Experiment with Flavors and Seasonings
Finally, a crucial step is balancing flavors. I used to add salt and spices at the start, only to find the dish too salty or bland. Now, I season in stages—adding a pinch of salt early to build base flavor, then adjusting at the end for balance. Also, consider adding aromatics like garlic, onion, or herbs in the initial layers, which infuse the entire dish during pressure cooking. This method maximizes flavor without over-seasoning. For seasoning hacks, check this seasoning strategy article.

Many home cooks approach their MultiCooker or Instant Pot with a set-it-and-forget-it mentality, believing that following basic recipes and timers guarantees success. However, this oversimplification often leads to common mistakes that compromise meal quality. Let’s dig deeper into the nuances that even experienced users sometimes miss, and why understanding these subtleties can elevate your cooking to professional levels.
Why the Myth That All Ingredients Cook Equally Is Wrong
One of the most pervasive misconceptions is that all ingredients require the same cooking time. In reality, different components have vastly different textures and moisture contents, which affect their pressure and heat requirements. For instance, root vegetables like carrots and potatoes need longer, while leafy greens cook quickly and can turn mushy if overexposed. Failing to adjust for these differences results in uneven textures or overcooked components, which is especially frustrating when preparing complex dishes. Mastering ingredient-specific cooking times is essential for professional results. For advanced tips, check this guide to quick-pressure-cooker recipes.
Common Mistakes: Overfilling and Underfilling
Another critical yet often overlooked aspect is the importance of proper fill levels. Many users assume that the more ingredients, the better, leading to overfilling. Overfilling can prevent pressure from building correctly, cause dangerous steam leaks, or result in food that is undercooked or stuck to the lid. Conversely, underfilling can cause ingredients to burn or stick to the bottom. The key is to adhere strictly to the manufacturer’s recommended maximum and minimum fill lines, which are designed to optimize pressure and heat distribution. For more detailed insights, explore this detailed hack guide.
Advanced Question: How Do Pressure Settings and Release Methods Affect Texture and Juiciness?
Many cooks stick to a single pressure setting, typically high, without considering how it impacts dish quality. However, selecting the right pressure level and release method is crucial for achieving desired textures and moisture retention. High pressure is excellent for tough meats and dense vegetables, while low pressure preserves delicate proteins like fish or eggs. Additionally, natural release allows residual heat and pressure to gently finish cooking, helping retain moisture and prevent overcooking. Quick release, on the other hand, can sometimes cause dishes to become dry or overcooked if not used appropriately. According to food science expert Harold McGee, controlling pressure and release methods directly influences the gelatinization, collagen breakdown, and moisture retention, which are critical for optimal texture and flavor. For a comprehensive understanding, visit this ultimate pressure cooker guide.
In conclusion, these nuances—ingredient-specific timing, proper fill levels, and pressure management—are often overlooked but are key to unlocking your MultiCooker’s full potential. By paying attention to these details, you’ll consistently produce restaurant-quality dishes at home. Have you ever fallen into this trap? Let me know in the comments.
Maintaining your multicooker is crucial for ensuring it continues to deliver perfect meals and lasts for years. I personally swear by a few specific tools and routines that keep my device running smoothly, preventing common issues like buildup, malfunction, or uneven heating. In this post, I’ll share the tools I recommend and some practical maintenance tips. Additionally, I’ll explore where this trend of kitchen appliance care is heading, emphasizing how investing in the right tools can save you time and money in the long run.
How do I maintain my multicooker over time?
Consistent maintenance begins with understanding your appliance’s needs. I regularly use a soft brush and a microfiber cloth to clean the lid, sealing ring, and steam vent after each use. For stubborn residue, I rely on a mixture of baking soda and vinegar, which acts as a gentle abrasive and disinfectant. An inexpensive but invaluable tool I use is a silicone brush—perfect for cleaning tight spots without scratching the surface. To prevent limescale buildup, I run a water cycle with plain vinegar once a month, especially if I have hard water in my area. This simple routine extends the lifespan of internal components and ensures even heat distribution, which is essential for consistent results.
Another critical aspect is regularly inspecting the sealing ring. Over time, it can wear out or develop odors that affect pressure and flavor. I recommend replacing it every 12-18 months, depending on usage. Keep a set of spare rings handy—this is a small investment that pays off by preventing leaks and maintaining safety. For detailed guidance on parts replacement and troubleshooting, check this comprehensive guide.
Tools I recommend for ongoing maintenance
Beyond cleaning supplies, I use a digital infrared thermometer to check the temperature of the heating plate periodically. This helps me catch any issues with uneven heating early on, which could indicate a malfunction. Additionally, I keep a small vacuum with a brush attachment to clean out vents and crevices—dust and debris can accumulate over time and impair performance. For deep cleaning, I rely on a soft toothbrush and a mild detergent to scrub away any buildup inside the lid and around the steam release valve. These tools, combined with a routine cleaning schedule, keep my multicooker performing like new.
Looking ahead, I believe the future of appliance maintenance will involve smart diagnostics. Imagine your multicooker alerting you when a component needs replacement or suggesting cleaning routines based on usage patterns—much like how modern cars notify you about oil changes. This proactive approach will minimize downtime and prolong device lifespan, making home cooking even more seamless.
Try this advanced tip: Perform a periodic water cycle with vinegar to descale your device. This simple step prevents mineral buildup and maintains optimal pressure and temperature. It’s a small routine that yields big results, ensuring your multicooker stays in top form for all your culinary adventures.
Investing in the right maintenance tools and routines is essential for keeping your multicooker working efficiently. By doing so, you ensure your investment continues to serve up delicious, perfectly cooked meals while avoiding costly repairs or replacements. Ready to give your device some TLC? Start with a vinegar water cycle this weekend and see the difference it makes!
The Hardest Lesson I Learned About MultiCooker Magic
One of my biggest lightbulb moments was realizing that not all ingredients cook equally in a MultiCooker. I used to toss everything in at once, expecting uniform results, only to end up with mushy vegetables and underdone meats. The breakthrough came when I started understanding ingredient-specific timing and layering, which transformed my meals from mediocre to restaurant-quality. That lesson taught me patience and precision are key to mastering this versatile appliance.
My Essential Toolkit for Pressure Cooker Success
Over time, I discovered that certain tools make all the difference. A reliable silicone brush helps me clean tight spots without scratching, while a digital infrared thermometer ensures my heating is even, preventing hot spots that could burn food. A set of spare sealing rings is a small investment that saves me from leaks and safety issues. Trusting these tools has made my MultiCooker maintenance routine simple yet effective, prolonging its lifespan and ensuring consistent results every time.
Embrace the Future of Cooking with Confidence
Now, I invite you to take your kitchen skills to the next level. With the right knowledge and tools, your MultiCooker can become your secret weapon for delicious, effortless meals. Remember, every mistake is a stepping stone toward culinary mastery. So, don’t be afraid to experiment, learn from your experiences, and enjoy the process of becoming a home cooking pro. Your perfect one-pot dinner is just a few mindful steps away!
What’s the most surprising lesson you’ve learned from using your MultiCooker? Share your story below and let’s grow together as kitchen explorers!
Reading through this detailed post really resounded with me. I used to think that just tossing everything into my MultiCooker would yield good results, but I quickly learned that the real skill lies in understanding ingredient-specific cooking times and layering effectively. I remember once overfilling the cooker with ingredients, only to have the lid won’t seal properly, causing a safety shutoff. Since then, I’ve become a stickler for following the max fill line and carefully selecting pressure levels for different dishes. I also found that using a silicone brush for cleaning and a digital thermometer helps me maintain my device better, preventing issues before they start. One thing I’m curious about, does anyone have advice on how often to replace the sealing rings or how to tell when it’s time to swap them out? In my experience, a fresh ring makes a real difference in pressure maintenance and safety, especially during longer cooking sessions. Would love to hear everyone’s tips on keeping our appliances in top shape for those perfect one-pot meals!
I totally resonate with the importance of ingredient layering and proper liquid levels that this post emphasizes. Overfilling and ignoring the layering can quite often lead to uneven textures, which is frustrating after putting effort into a meal. I’ve found that keeping a small chart with typical cooking times and recommended liquid amounts for different ingredients has been a game-changer for me. As for the sealing rings mentioned earlier, I’d add that it’s good practice to inspect them regularly for any cracks or stiffness—especially if you notice any loss of pressure during cooking. Replacing them promptly when needed is worth the investment for safety and consistent results. Have others noticed how mineral deposits or food odors can linger in the rings even after cleaning? I’ve started adding a vinegar soak for the rings about once every few months, which keeps them fresh and odor-free. I’m curious, have any of you tried creative seasoning methods that enhance flavors without overdoing it at the beginning? Would love to hear some tips to add even more delicious layers to our one-pot creations.
This post really hits home for me, especially the part about ingredient layering and adjusting cooking times. I used to toss everything in the pot at once and wonder why some veggies would come out mushy while the chicken was underdone. Now, I always pay close attention to the different cooking times and try to layer accordingly, which has improved my results drastically. I also find that learning to use the pressure release methods properly—natural vs. quick—is a game-changer, especially when cooking delicate items like fish or eggs. Has anyone else found that experimenting with slightly different pressure levels and release times can really fine-tune the texture of your dishes? I think the most overlooked aspect is how much the small details—like pressure and timing—can elevate everyday meals to restaurant quality, especially during busy weeknights. What’s been your most surprising discovery when trying to perfect your settings? I’d love to hear everyone’s tips and experiences to keep improving.