Have you ever pulled apart a slow-cooked beef roast only to find it drier than cardboard, despite following what you thought were straightforward instructions? I remember the frustrating moment when I sat at my kitchen table, slicing into a beef dish that looked promising, yet was tough and stringy. It was a lightbulb moment for me—what was I doing wrong? As someone who loves the convenience of slow cooking but hates the disappointment of tough meat, I knew I had to crack this code.
Why Tough Slow Cooker Beef Drives Us Crazy—and How to Fix It
For years, I believed that low and slow was the golden rule for tender beef. Turns out, the real secret is a bit more nuanced. The key isn’t just timing—it’s sealing the deal right from the start. The classic mistake I made early on was neglecting the importance of the lid’s seal, which led to moisture escaping and the beef drying out. This realization opened my eyes to a simple but effective hack that transforms tough cuts into melt-in-your-mouth perfection: using the right sealing method during cooking.
Is the Sealing Hack Really Worth the Hype?
Early in my journey, I was skeptical. I wondered if a tiny tweak could really make that much difference. Spoiler: it absolutely does. The trick is ensuring your slow cooker lid creates an airtight seal, trapping moisture and heat. This is especially crucial when cooking tough cuts like chuck roast or brisket. I learned this lesson the hard way when my initial attempts failed—remembering to check the gasket and lid placement can be the difference between a chunk of rubbery meat and succulent goodness. And, if you want to get a deeper understanding of how sealing impacts your cooking, this comprehensive guide explains the science behind it.
So, if you’re tired of dry, tough beef turning your meal into a disappointment, stick around. I’ll share the practical steps, backed by real experience and tested tricks, to make your slow cooker beef a guaranteed success. Let’s turn that tough cut into a tender masterpiece—because you deserve it.
Choose the Right Cut and Prepare It Clearly
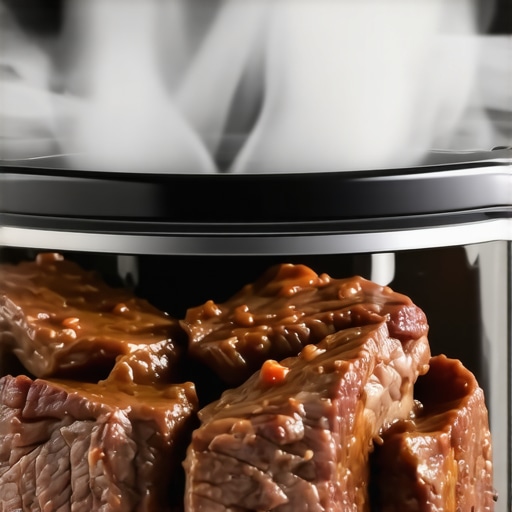
Start with a tougher cut like chuck or brisket, which benefits from slow cooking. Pat the meat dry with paper towels to remove excess moisture that could hinder browning. Season it generously with salt and spices before searing. During my first attempt, I neglected the searing step and ended up with bland, tough meat—searing in a hot skillet until browned is essential to develop flavor and improve texture.
Sear the Meat Properly for Rich Flavors
Use a heavy skillet, like cast iron, and don’t overcrowd it—overcrowding causes steaming, not browning. Sear each side for 3-4 minutes until crusty. I once hurried through this step, which resulted in a pale surface and a less flavorful dish. Remember, that initial sear locks in juices and creates a depth of flavor that can’t be achieved otherwise.
Seal the Cooker to Preserve Moisture
The next crucial step is ensuring your lid creates an airtight seal. Check the gasket for cracks or buildup that can cause moisture to escape. Secure the lid tightly. For a vivid example, I once left the lid slightly ajar, leading to dried-out beef. For detailed troubleshooting, see how sealing impacts the cooking process in this guide: cold start meat rule.
Add Enough Liquid Without Submerging the Meat
Use a minimal amount of broth or water—about one cup for a typical 3-4 pound roast—just enough to create steam and prevent burning. Unlike traditional recipes that call for covering the meat entirely, slow cookers work best when there’s a balance. I once poured a full cup of water, resulting in a soggy exterior; adjusting the liquid content kept the beef moist without becoming mushy. Check out how to avoid sogginess: sogginess hacks.
Set the Correct Temperature and Time
Use the Low setting for 8-10 hours or the High setting for 4-6 hours, depending on your cut’s size. Consistent temperature is vital. My mistake was setting it on Warm after 6 hours, and the meat turned gray and rubbery—never forget to switch to the ‘Keep Warm’ mode. For more about low and slow methods, explore: slow-cooker myth.
Resist the Urge to Lift the Lid
Every time you open the lid, heat escapes, adding hours to cook time and risking dryness. I once peeked after 3 hours and lost valuable moisture and heat, resulting in tougher beef. Trust in the process—use the timer and keep the lid closed. To improve your lid sealing, see how to fix common issues: lid sealing tips.
Rest Before Serving for Juicier Results
Once done, turn off the cooker and let the beef rest for at least 10 minutes. Resting allows juices to redistribute, preventing dry bites. When I started doing this, the meat became noticeably more tender and flavorful. Remember, slicing too early means the juices escape, leaving dry meat behind—apply the rest rule for guaranteed results.
When it comes to one-pot meals and pressure cooking, many home cooks rely on common wisdom that, surprisingly, can lead them astray. A widespread misconception is that simply setting a slow cooker to low and leaving it for hours guarantees tender, flavorful meat. In reality, the nuances of heat distribution, lid sealing, and ingredient prep play crucial roles that often go ignored. For instance, the belief that all slow cookers operate identically ignores the significance of sealing mechanisms; a poor gasket or misaligned lid can cause moisture loss, turning what should be juicy into dry disappointment. Experts like America’s Test Kitchen emphasize the importance of verifying lid seals to maintain consistent moisture levels. Furthermore, many assume that high-pressure and quick-cook settings are interchangeable, but using them improperly can compromise texture and flavor—like overcooking delicate proteins or under-pressurizing tougher cuts. Avoid falling into this trap by understanding your specific appliance’s quirks, such as optimal timing for different cuts and the importance of natural pressure buildup. Additionally, the myth that longer cooking always yields better results neglects the damaging effects of overcooking, especially on vegetables and tender proteins. Advanced cooks know that adjusting cook times based on ingredient size, cut, and desired doneness is vital—something thoroughly explored in this detailed guide. For those seeking to maximize flavor and texture, mastering the science behind pressure and heat can make all the difference. One often overlooked aspect is the importance of ingredient layering and liquid ratios, which directly affect cooking efficiency and results; layering dense ingredients at the bottom ensures they contact the heat source, while minimal liquids—about one cup—prevent sogginess, as discussed in this comprehensive article. Pressurized cooking isn’t just about quick results but about precision; tweaking your methods can turn a mediocre dish into culinary excellence. Don’t forget, advanced techniques like reverse searing or resting meat post-cooking can elevate your dishes further. For a deeper dive into avoiding common pitfalls, see how to fix issues like soggy pasta or uneven cooking with these expert tips. Remember, understanding your devices’ nuances is the key to reliable, delicious outcomes. Have you ever fallen into this trap? Let me know in the comments.
Maintaining your slow cooker, multicooker, or instant pot is crucial for consistently delicious results. Over time, even the best equipment can develop issues like sealing problems or overheating, which can compromise your meals. To ensure longevity and reliable performance, I personally recommend investing in quality tools and adopting effective maintenance routines.
How do I keep my cooker working like new over the years?
First, prioritize regular inspection of sealing components such as gaskets and valves. For example, I routinely check my multicooker gasket for cracks or deformation—this simple step prevents moisture loss and maintains pressure integrity. A worn gasket not only causes inefficient cooking but can lead to safety hazards. For detailed guidance, see how to fix issues like a slow cooker not sealing properly in this comprehensive article.
Next, it’s wise to invest in tools that make maintenance easier. I use a silicone gasket scraper, which helps me gently remove residue from the gasket and lid without causing damage. Also, keeping the cooking chamber clean by following the steps in this quick hack ensures optimal operation. Regular descaling of pressure sensors with a vinegar solution prevents mineral buildup that can interfere with pressure regulation.
Additionally, software updates from manufacturer apps—like those for some smart multicookers—can improve performance and add new features. I make it a point to verify that my device’s firmware is current, which can typically be done via the manufacturer’s app or website. This proactive approach keeps my appliance running smoothly and helps avoid unexpected glitches.
Looking ahead, the trend in kitchen appliances tilts towards smarter, self-maintaining devices. Features like automatic gasket checking or self-cleaning modes could become standard, reducing user maintenance needs. Tesla’s approach to self-monitoring tech in their vehicles sets a precedent for how kitchen gadgets might evolve.
Ever wondered how to extend your appliance’s lifespan?
One proven method is to implement a routine of deep cleaning every 3-6 months, including the removal and inspection of internal components. For pressure cookers, regularly check and replace worn gaskets—neglecting this simple task can lead to safety issues and poor cooking results. To get hands-on tips, consult this guide on fixing common gasket problems in this article.
Don’t overlook the importance of proper storage—keeping your appliances in a dry, cool place prevents mold and deterioration. Also, avoid overloading the cooker during cleaning; instead, use gentle brushes and non-abrasive cleaners to preserve surfaces.
Take proactive steps today: try replacing your gasket every year or two, and see how it impacts your cooking quality. Regular maintenance not only extends your device’s life but also ensures every meal turns out perfect. For more advanced tips, explore how to troubleshoot and fix the most common multicooker issues in this expert article.
What I Wish I’d Known Before: Lessons from the Slow Cooker Frontlines
One of the toughest lessons I learned was that even the best slow cooker can’t rescue a badly prepared cut or neglecting sealing techniques. I once believed that simply tossing a tough roast into the cooker for hours was enough, but consistent tender results required understanding the nuances—like ensuring the lid seals tightly and selecting the right cut. That realization changed everything, underscoring the importance of attention to detail over mere time.
Another insight was the significance of resting meat after cooking. I used to slice immediately, but discovering that juices redistribute during a brief rest made my beef much more flavorful and moist. Patience truly pays off, especially when working with tough cuts destined for slow cooking.
I’ve also learned that various models have quirks, so customizing my approach—like adjusting liquid levels or cook times—was crucial. Sharing these learnings has helped me improve, and I hope they can do the same for you.
Tools and Resources That Elevated My Cooking Game
My secret weapon is a high-quality gasket and regular maintenance, which keeps the lid sealing reliably. Regularly inspecting and replacing worn gaskets, as advised in this guide, saved me from unexpected moisture loss.
Investing in a good digital thermometer helped me gauge internal temperature accurately, preventing over- or undercooking. It’s an inexpensive but transformative tool that I trust every time I cook a roast.
For deepening my understanding, books like Mastering the Art of Slow Cooking offered invaluable insights into ingredient prep and timing. Also, following blogs that focus on appliance maintenance, such as this resource, keeps my equipment in top shape, ensuring reliable results.
Finally, joining online communities has provided me with real-world tips and encouragement, reminding me that even experienced home cooks are always learning.
Embrace the Journey and Savor the Results
Mastering slow cooker beef is about more than following a recipe—it’s an ongoing process of learning, adjusting, and patience. Every successful batch boosts my confidence and deepens my appreciation for this versatile appliance. I encourage you to experiment with your technique, pay attention to your equipment, and enjoy the delicious rewards of your efforts.
What’s been your biggest breakthrough in slow cooking? Share your story below—I’d love to hear how you turned a tough cut into a melt-in-your-mouth masterpiece.