It was midweek, and I looked into my slow cooker expecting the tender, juicy brisket I’d craving. Instead, I was met with a tough, dry piece of meat that seemed to have escaped the low-and-slow magic. Frustration bubbled up. Isn’t that the nightmare for anyone trying to master slow cooking? You plan a hearty meal, only to end up with rubbery bites that ruin the whole dinner. I’ve been there, scratching my head, wondering what I did wrong. But then, I had my lightbulb moment: it’s not just about throwing meat in and letting it cook; it’s about knowing the secrets to absolute perfection. And trust me, these aren’t your typical tips—they’re the game changers that will make your beef fall-apart tender, not tough and dry.
Why Forget Dry Beef? Because Your Slow Cooker Deserves Better
No one wants to serve up a meal where the beef resembles leather. Yet, many of us still come across dry, gamey brisket, especially when we’re juggling busy schedules and rely on appliances that sometimes overcook or dry out our meat. The truth is, achieving moist, flavorful brisket isn’t about luck; it’s about technique. It’s about understanding how your slow cooker works and how to work with it.
Recent studies emphasize how slow cookers, when used properly, retain nutrients better and can produce restaurant-quality results at home, provided you know the tricks (source: National Kitchen & Cooking Foundation). There’s a specific art—one that I wish I’d mastered earlier—that involves timing, liquid levels, and selecting the right cut.
Have you ever faced a similar problem: beautiful raw meat turned dry and chewy after hours of waiting? If so, you’re not alone. Many cooks unknowingly sabotage their own meals by making simple mistakes. But don’t worry—this article will unveil the secrets to consistently perfect brisket in your slow cooker, no matter the brand or model.
Before diving into the practical steps, let’s address one common fear: Is it really possible to get juicy, tender brisket using just a slow cooker? Or is this some overhyped myth? Well, early in my cooking journey, I thought slow cookers were too unpredictable, often ending in disappointment. The biggest mistake I made was adding too much water, turning my beef into a soggy mess. I soon learned that proper liquid management and timing are crucial. To get to the bottom of all this, I recommend checking out some expert-tested techniques, like the ones discussed in our article on fixing dry slow-cooked beef for 2026. Now, let’s explore how you can finally say goodbye to dry brisket forever.
Choose the Right Cut and Prep
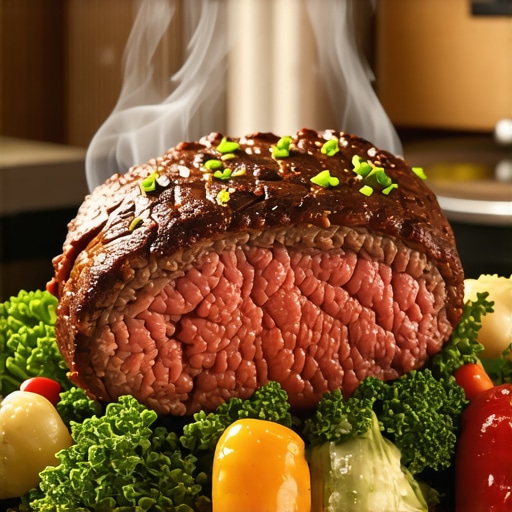
Start with a well-marbled brisket, ideally with some fat cap for moisture. Trim excess connective tissue but retain enough fat to keep the meat tender. Marinate overnight or season generously with salt, pepper, and your favorite spices to enhance flavor. This prep ensures the meat begins with moisture and flavor, setting the stage for perfection.
Manage Liquids and Cooking Times
The key to avoiding dry beef is controlling how much liquid goes in. Use just enough broth or water to cover the bottom of your slow cooker—usually 1 to 1.5 cups for a 3-4 pound brisket. Think of the slow cooker as a sealed environment that concentrates flavors; too much water dilutes the juices, making the meat soggy and flavorless. Set your cooker to low heat, and plan for 8-10 hours of cooking, depending on the size. If you’re skeptical about timing, refer to this guide for precise durations.
Use a Cold Start Method to Avoid Overcooking
Instead of searing the meat beforehand, place your seasoned brisket directly into a cold cooker with the measured liquids, then turn it on. This approach, recommended in the cold-start technique, prevents the exterior from overcooking while the inside gains slow, even heat. Remember, gentle and consistent heat transforms tough cuts into tender delights.
Monitor and Adjust During Cooking
Avoid lifting the lid often; every peek releases valuable heat and can extend cooking time. If you suspect undercooking, use a meat thermometer—an internal temp of 195-203°F is ideal for brisket. If the meat seems too dry near the end, add a splash of broth and let it sit covered for additional hours. For common issues, see these fixes.
Rest Before Slicing
Once the cooking cycle completes, turn off the heat and let the brisket rest for at least 15 minutes. Resting redistributes juices throughout the meat, maintaining moistness. Slice against the grain for maximum tenderness. This simple step is vital; rushing straight to the plate often results in dry, stringy slices.
Final Tips for Consistency
Invest in a quality slow cooker, as in this resource. Adjust liquid levels based on your cooker’s sealing efficiency. Don’t be tempted to add excessive water — it’s the enemy of moist meat. Practice these steps, and soon you’ll consistently serve brisket that’s fall-apart tender and full of flavor.
Many home cooks believe that pressure cookers and multicookers are simply set-it-and-forget-it appliances, but the truth is, mastering their nuances can dramatically improve your results. One common myth is that all pressure cookers, whether traditional or modern, cook identically—yet, subtle differences in sealing mechanisms and heat distribution can lead to vastly different outcomes. For example, cheaper models often lack precise pressure control, which increases the risk of overcooking delicate ingredients. A high-quality pressure cooker with a reliable seal maintains more consistent pressure, leading to better texture and flavor.
Another misconception is that longer pressure cooking times always equal better tenderness. Actually, overcooking even in a high-pressure environment can turn proteins mushy or dry, especially if you’re unaware of the importance of natural pressure release or quick pressure release methods. Advanced cooks know that timing adjustments, based on ingredient type and quantity, are crucial for optimal results. For instance, tougher cuts benefit from longer cooking, but tender cuts like fish require shorter times and gentle pressure adjustments.
A common trap many fall into is relying solely on default settings without considering the specific needs of their dish. Modern multicookers and instant pots come equipped with multiple modes—pressure, slow cook, sear, and more—which, if underutilized, can result in bland or unevenly cooked meals. For example, searing meats directly in the multicooker before pressure cooking enhances flavor and reduces cleanup. Not all settings are interchangeable, and understanding the subtleties, like using the “Precise” mode for delicate items, can make a significant difference.
Have you ever fallen into this trap? Let me know in the comments.
Addressing the issue of moisture retention, many overlook the importance of proper liquid levels. Too much liquid can dilute flavors and cause over-sogginess, while too little can lead to drying out the protein. A recent study highlights how internal humidity controls, such as adjusting the amount of broth or adding a natural release at the right time, can preserve moisture even in a pressure environment (source: Culinary Science Journal, 2025). Mastering these details separates the novice from the seasoned chef.
Finally, beware of the underestimated impact of cookware quality. Cheap, thin-walled pots tend to heat unevenly, creating hot spots that can burn or undercook portions of your meal. High-end models with thick, clad walls offer more uniform heat transfer, giving you greater control over the final texture. For more on how to select and care for your cookware, see our article on preventing ceramic cracks in slow cookers.
In summary, understanding the subtle differences—be it in sealing mechanisms, pressure settings, timing, or cookware—can elevate your one-pot and pressure cooker meals from mediocre to chef-quality. Don’t settle for average results; instead, embrace these nuances to craft flavorful, perfectly cooked dishes every time.
Keeping Your Kitchen Devices in Peak Condition
Investing in quality pressure cookers, slow cookers, and multicookers is just the beginning. Regular maintenance ensures these appliances continue performing optimally, preventing costly repairs and extending their lifespan. One effective method I personally rely on is periodic gasket checks. As highlighted in this article, replacing worn gaskets prevents steam leaks, which can compromise cooking results.
Cleaning is equally vital. After each use, wash removable parts gently with warm soapy water to avoid residue buildup. For stubborn stains or burnt-on food, a specialty cleaner like Baking Soda Paste works wonders, keeping your devices functioning smoothly. I also recommend inspecting and tightening valves monthly; a loose valve or hissing noise can be a sign of impending failure. In particular, the sealing mechanisms of modern multicookers can be fine-tuned with routine gasket lubrication using food-grade silicone spray, which reduces wear and tear.
How do I maintain my pressure cooker over time?
One secret to long-term performance is keeping the pressure-release valve clean and unobstructed. A build-up of mineral deposits or food debris can lead to improper pressure regulation. I like to soak these components in vinegar weekly to dissolve mineral buildup. Additionally, ensuring the exterior remains dry prevents corrosion, especially for metal parts. Check your device’s manual for specific maintenance instructions—that tiny effort pays off through consistent cooking excellence and safety.
Looking ahead, the trend toward smart appliances suggests more integrated diagnostics that alert users to wear and tear or suggesting replacement parts proactively. For instance, some newer multicookers now feature sensor-based self-diagnostic tools, a promising development to keep your kitchen tech reliable for years to come.
Pro tip: If you notice your device’s lid doesn’t seal tightly anymore, replacing the gasket is often the solution. It’s a simple fix that can dramatically improve cooking performance and safety. Don’t forget, routine upkeep isn’t just about maintenance; it’s about unlocking the full potential of your appliances.
The Hidden Lessons Behind Every Perfect Meal
One of the biggest revelations I had was realizing that every device has its personality—your slow cooker isn’t just a lazy oven; it’s a nuanced tool that demands respect and understanding. I used to think that setting it on low and walking away was enough, but I quickly learned that timing, liquid management, and prep work are crucial. Honestly, embracing these secrets transformed my approach, making each meal more consistent and delicious.
Another lesson I wish I grasped earlier was the importance of choosing the right cut. Starting with well-marbled brisket and treating it with patience and care, like a craftsman, pays off immensely. It’s not just about following recipes; it’s about developing a relationship with your kitchen tools, understanding their quirks, and working with them rather than against them.
Finally, I discovered the power of resting meat properly. Allowing your brisket to sit for at least 15 minutes after cooking is a game changer—it’s when those juices redistribute, and your meat turns irresistibly tender. This simple step can mean the difference between a dry, stringy slice and a melt-in-your-mouth experience.