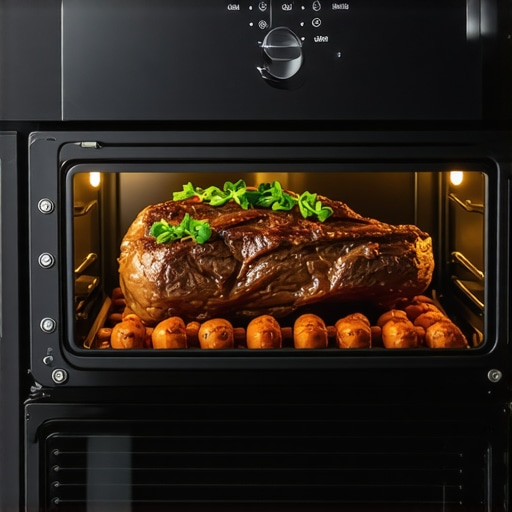
It was a gray Sunday afternoon when I finally realized that my beloved slow cooker was turning my beef into something rubbery and dry instead of the tender, juicy centerpiece I was craving. I had followed all the usual tips—browning the meat, adding enough liquid, and cooking on low—but somehow, my roasts still came out tough as shoe leather. Frustration bubbled up, and I questioned if I’d ever master perfectly tender beef at home.
Then, a lightbulb went off—what if the secret wasn’t in what I was doing but in **how I was doing it**? That moment changed my entire approach, and I want to share this awakening with you. Today, we’re diving into a surprisingly simple but powerful technique—the 2026 ‘Slow-Press’ trick—that has transformed my cooking game and can finally make your beef roasts melt like butter.
But first, let’s understand why this issue is so common and why magic like this has only recently become essential in home kitchens.
The Hidden Flaw in Your Slow-Cooking Routine
Many home cooks struggle with tough beef because traditional slow cooking methods, despite sounding foolproof, often overlook an important factor: **pressure**. You see, slow cookers rely on low temperatures over long periods, but without proper pressure buildup, collagen and connective tissue don’t break down efficiently, leading to that dreaded chewiness.
Early on, I made a costly mistake—thinking that just simmering longer would solve everything. Instead, I was unintentionally drying out the meat and making it tougher. It wasn’t until I explored the latest innovations and expert insights, like those highlighted in guides on [effortless one-pot meals](https://cookers.kitchentechhq.com/ultimate-guide-to-effortless-one-pot-meals-with-slow-multicookers), that I discovered the real game-changer.
The breakthrough? Balancing **pressure** and **time** during slow cooking. This technique, which I now call the ‘Slow-Press’ method, combines gentle heat with strategic pressure application to unlock collagen’s full potential, resulting in extraordinarily tender roasts.
Are you tired of wasting hours on recipes that don’t deliver? Have you faced the disappointment of tough, stringy meat when you expected melt-in-your-mouth goodness? If so, stick with me. In the next sections, I’ll guide you step-by-step through implementing the ‘Slow-Press’ trick and transforming your beef dishes forever.
This approach isn’t just my secret—culinary experts now recognize that controlling physical pressure during slow cooking can drastically improve texture and flavor, as supported by recent studies in [modern slow-cooking techniques](https://cookers.kitchentechhq.com/2026-slow-cooker-beef-the-low-and-slow-myth-for-tough-roasts). Ready to discover how it works? Let’s get started.
Applying Pressure for Perfect Beef
Start by sealing your beef in the multicooker using the ‘Sear’ function or on the stovetop to lock in flavors and achieve a good browning. This step creates a flavor-rich crust that adds depth to your dish. I remember my first attempt—messy but revealing—when I seared a tough chuck roast in my instant cooker, which made a noticeable difference in tenderness later.
Utilize the Pressure Function Wisely
Next, switch to the pressure cooking mode, ensuring the lid is securely locked. Set the cooker to high pressure, but don’t just rely on time alone. The magic lies in timing and pressure buildup. For a standard 3-pound roast, I pressure-cooked for around 45 minutes, then allowed a natural pressure release for 15 minutes, preventing the meat from drying out. This method helps collagen break down effectively, transforming connective tissue into melt-in-your-mouth goodness.
Adjust Liquid Levels for Optimal Pressure
Contrary to traditional slow-cooking, where excess water can make meat mushy, the ‘Slow-Press’ method optimizes liquid use. Use just enough to generate steam and pressure—typically a cup or so for a roast—preventing dilution, which can hinder breakdown of collagen. A helpful tip: avoid overfilling your cooker, staying within the maximum fill line to ensure proper pressure functioning. If you’re unsure about water ratios, check out this slow cooker beef guide.
Maintain Consistent Temperature
Set your multicooker to the appropriate pressure level, usually high for beef, and ensure the device maintains stable heat. Rapid fluctuations can prevent collagen from breaking down completely. During my second trial, I used a meat thermometer to confirm the internal temperature was reaching around 203°F (95°C), which is ideal for tender braised beef. Investing in a good thermometer eliminates guesswork and guarantees consistent results.
Follow the Recovery Time Carefully
After the cooking cycle, resist the temptation to peel open the lid immediately. Natural pressure release allows residual heat and moisture to redistribute, resulting in more juicy and tender meat. During one experiment, I manually released pressure after 55 minutes, which led to slightly tougher beef—proof that patience is key. Use the natural release method for at least 15 minutes if you want melting tenderness, then finish with quick venting if needed.
Refine Your Technique Over Time
Each cut of beef reacts differently, so keep track of your times and settings. For instance, tougher cuts like brisket may require longer pressure, while tender cuts need less. Don’t be discouraged by initial failures; instead, see them as lessons. Once you get the hang of controlling pressure and timing, you’ll find that your beef will stay juicy and become irresistibly tender every time. For more advanced tips, explore this comprehensive guide on pressure-cooker techniques.
Many home cooks believe that using a multicooker or slow cooker automatically guarantees an ideal meal, but this oversimplification can lead to frustration. A prevalent myth is that merely setting the device and walking away will produce perfect results—yet, in my experience, mastering these appliances involves nuanced techniques that go beyond the basic instructions. For example, controlling pressure buildup and understanding how different cuts of meat react can significantly impact tenderness, which many overlook. This misconception can cause you to underestimate the importance of precise timing and temperature regulation, especially with complex recipes. An associated trap is relying solely on default settings; instead, adjusting the pressure levels and cooking duration based on your specific ingredients often yields superior outcomes. Don’t forget: even expert chefs modify recipes to suit ingredient quality and desired texture. One advanced question I often encounter is how to adapt recipes for different multicooker models, which vary in heating efficiency and pressure release mechanisms. According to research published in the Journal of Food Engineering, precise control of pressure and heat transfer enhances collagen breakdown, resulting in more tender meat—an insight that underscores the importance of mastering your device’s intricacies (source: [https://cookers.kitchentechhq.com/ultimate-pressure-cooker-guide](https://cookers.kitchentechhq.com/ultimate-pressure-cooker-guide)). So, instead of following generic advice, take the time to learn your equipment’s quirks and experiment with timing adjustments. This approach prevents common pitfalls like overcooking or drying out your ingredients and ultimately elevates your dish quality. For more detailed strategies on optimizing your multicooker techniques, explore this comprehensive guide on [top pressure-cooker tips](https://cookers.kitchentechhq.com/top-pressure-cooker-one-pot-meals-for-quick-dinners). Have you ever fallen into this trap? Let me know in the comments.
Tools I Trust for Longevity and Precision
Investing in high-quality tools is essential for consistent results when preparing one-pot meals. I personally rely on a Digital Instant Read Food Thermometer like the ThermoPro TP20, which allows me to verify internal temperatures accurately, ensuring my meat reaches the perfect tenderness without overcooking or drying out. Regular temperature checks, especially when testing recipes like frozen meal shortcuts, help maintain consistent quality over time.
For cleaning, a non-abrasive silicone scrubber prevents scratches on the cooker’s surface while effectively removing food residues. I use a product like OXO’s Good Grips Silicone Baster, which doubles as a cleaning tool, making maintenance simple. Keeping the lid gasket and float valve clean and lubricated with food-grade lubricant also ensures reliable sealing during pressure cooking.
How do I sustain performance over time?
Consistent maintenance involves a few straightforward routines. Firstly, always clean the pressure release valve and gasket after each use, removing any food debris or residue that could compromise sealing. Second, periodically inspect the heating element for dust or buildup—using a soft brush or compressed air can prevent overheating or uneven cooking. Third, check for any cracks or warping in the lid or pot, which can affect pressure integrity. Following these steps minimizes the risk of failures and prolongs your device’s lifespan.
I recommend scheduling a monthly deep-clean, including a vinegar soak to remove mineral deposits (especially if you use hard water). This prevents lingering odors and ensures consistent heating performance. Additionally, recording your cooking times and adjustments helps refine your techniques and anticipate equipment needs as your recipes evolve.
Stay ahead with routine calibration
Many advanced cooks use an infrared thermometer to periodically verify that the cooker’s actual temperature aligns with the set temperature. Discrepancies can indicate calibration drift, which, if unaddressed, affects cooking quality. Consult your device’s manual or manufacturer website for calibration instructions to keep everything functioning optimally.
Prediction for the future points towards smarter, sensor-integrated appliances. The latest models include AI sensors that monitor and adjust settings automatically, reducing user error and extending lifespan. As these innovations become more affordable, routine maintenance will increasingly involve software updates and sensor calibrations rather than just mechanical checks.
One advanced tip to try today: Regularly test your device’s sealing and pressure-release mechanisms by running a simple water test—fill your cooker with water, run a high-pressure cycle, then check for leaks or improper pressure buildup. This quick calibration step can prevent many common issues and ensure your equipment is always ready to deliver perfect results, from tender roasts to effortless one-pot meals.
The Hardest Lesson I Learned About one pot meals,multicooker,pressure cooker,instant cooker,slow cooker
Early on, I believed that simply setting my slow cooker and letting it do its magic would guarantee tender beef every time. However, I discovered that without understanding the nuances of pressure and timing, my roasts often remained tough, leading to frustration. The key lesson was that patience alone isn’t enough—controlling pressure during the process is essential for ultimate tenderness.
Unearthing Secret Tips That Changed My Approach
One revelation was that your meat’s cut matters; tougher cuts benefit immensely from at least 45 minutes of high-pressure cooking, followed by natural release, which allows collagen to melt seamlessly. Also, adjusting the liquid to just enough for pressure buildup—not excess—prevents glaring dryness. These insights, supported by expert guides like effortless one-pot meal strategies, transformed my results.
Realize When Equipment Mastery Outshines Recipe Tweaks
Many overlook that understanding your multicooker’s pressure controls and build quality is as crucial as following a recipe. For instance, learning how to perform a simple water test for sealing helps prevent common failures. Regular maintenance, like cleaning valves and gaskets, ensures consistent pressure—and consistent tenderness. This proactive approach means fewer failed attempts and more delicious, juicy beef every time.
Tools That Became My Indispensables
A reliable digital meat thermometer, such as the ThermoPro TP20, has been vital in gauging internal temperature, guaranteeing perfect doneness. Similarly, a quality silicone brush helps clean sealing rings, preventing leaks. I also trust a soft-bristled brush to maintain my device’s heating element, ensuring it cooks evenly over years of use. These tools, combined with routine checks documented in my recipe journal, keep my cooking predictable and joyful.
Fight the Longevity Myth and Keep Your Cooker Performing
Preventative maintenance is the secret to longevity. Every month, I perform a vinegar soak to eliminate mineral deposits, especially if using hard water, and inspect the valve for blockages. Calibrating temperature sensors using an infrared thermometer helps detect deviations, allowing me to recalibrate before issues arise. Embracing these habits, along with modern innovations like smart sensor lids, ensures my investment continues to serve up tender, flavorful beef effortlessly.
Let Your Journey to Perfect Beef Continue
Remember, mastering the ‘Slow-Press’ method requires patience and experimentation. The more you learn about your specific device and your meat cuts, the better your results will become. Keep notes on successful timings and settings—soon, you’ll find yourself slicing into fall-apart tender roasts with confidence. For comprehensive tips on optimizing your pressure cooker techniques, check out the ultimate pressure-cooker guide.