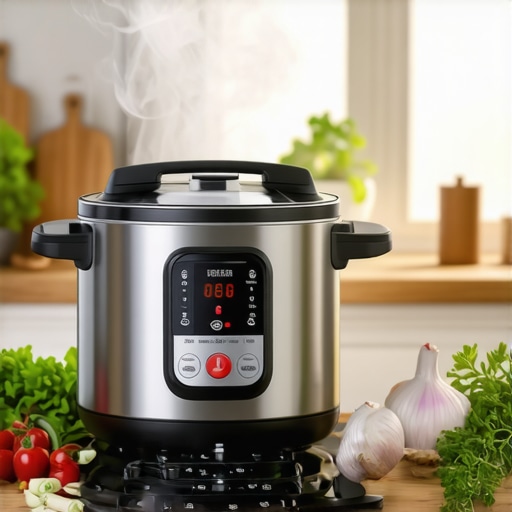
Ever found yourself staring into the fridge after a long day, only to feel overwhelmed by the thought of cooking something that’s both quick and satisfying? I’ve been there. There was a time when I thought pressure cookers and multicookers were just fancy gadgets that promised fast meals but rarely delivered on flavor or ease. My first attempt ended with a burnt mess and a lot of frustration, making me doubt whether these kitchen tools were worth the hype. But then I discovered the secret to turning these appliances into my best friends in the kitchen—simple tips, reliable recipes, and a little patience to learn the ropes.
Why Quick, Tasty Meals Matter More Than Ever
Let’s face it. Modern life is busy. Between work, family, and everything in between, time is a luxury. The idea of spending hours in the kitchen is almost laughable for many of us. That’s where a good pressure cooker or multicooker can be a game-changer. It’s not just about saving time; it’s about making meals that actually taste good without the fuss. According to a study published by the USDA, home-cooked meals significantly improve nutritional intake and overall health, yet many people avoid cooking because it feels like a chore. That’s where these appliances shine—they make it easy to whip up healthy, hearty meals in a fraction of the time.
But here’s the catch: Without the right tips, you might feel like you’re just throwing ingredients into a device and praying for the best. Believe me, I’ve been guilty of that mistake early on. I thought more pressure meant better food, but I ended up with overcooked veggies or underwhelming stews. The truth is, mastering your pressure cooker or multicooker takes a little know-how, which I’m eager to share with you today. Whether you’re after quick one-pot dinners, tender meats, or flavorful soups, I’ll guide you through the essentials to make your meals consistently delicious and effortless.
Do you ever worry that pressure cooking might be complicated or unreliable? You’re not alone. Many beginners fear that these tools could turn their meals into disasters. But I promise, with a few simple hacks, you’ll be making perfect dishes every time. And if you’re looking for tried-and-true recipes, I’ve got you covered. Check out these top pressure cooker recipes for inspiration to get started.
So, if you’re ready to banish kitchen stress and embrace the joy of quick, tasty, and nutritious meals, let’s dive into the practical tips that will transform your cooking experience. You don’t need to be a chef—just a little patience and the right guidance, and you’ll be surprised at what you can achieve with your pressure or multicooker.
Start with the Right Setup
Before diving into cooking, familiarize yourself with your appliance. Whether it’s a pressure cooker, slow cooker, or multicooker, read the manual thoroughly. I remember the first time I used my multicooker without reading the instructions—I ended up with a soggy, undercooked stew. Now, I always take 10 minutes to understand the basic functions and safety tips. This foundation prevents mishaps and ensures consistent results. For more detailed guidance, check out these expert multicooker tips.
Perfect Your Ingredient Prep
One-pot meals thrive on simple, well-prepared ingredients. Cut vegetables evenly to ensure they cook uniformly. Brown meats first to develop flavor—this step is crucial even in pressure cooking, where flavor can be locked in quickly. I once overcooked chicken because I skipped this step, resulting in dry meat. Always season ingredients adequately before adding them to the cooker. This small step boosts flavor without extra effort later.
Master the Timing and Pressure
Understanding how long and at what pressure to cook different ingredients is key. For example, tough cuts of beef need a longer cook time at high pressure, while vegetables require just a few minutes. Think of pressure as a fast-forward button—set it right, and you get tender results in minutes. I once threw everything in and set the timer randomly, ending with overcooked potatoes and underdone beef. Now, I use a trusted recipe as a guide and adjust based on texture preferences. For specific timings, explore these tried-and-true recipes.
Layer Flavors with Liquid and Seasonings
Liquid is essential—not just for creating steam but also for infusing flavors. Use broth, wine, or even a splash of soy sauce depending on the recipe. Add seasonings early enough to develop depth, but avoid over-salting—remember, flavors concentrate as pressure builds. I learned this the hard way when my stew tasted bland until I adjusted seasoning after cooking. A reliable tip is to use the instant cooker tips to balance seasoning perfectly.
Get Comfortable with Quick Releases
Knowing when and how to release pressure impacts your meal’s texture. Quick release (venting steam rapidly) is ideal for delicate items like seafood or vegetables to prevent overcooking. Natural release (letting pressure subside gradually) suits tougher cuts like roasts, allowing flavors to meld. I once used quick release on a beef stew, which caused the sauce to splatter everywhere—lesson learned. Practice makes perfect, and you can find detailed hacks in these expert hacks.
Finish and Serve with Confidence
Once the pressure drops, open the lid carefully—avoid hot steam burns. Check the texture; if it’s not quite right, you can simmer the dish using the sauté function if available. I often finish with a quick stir and a fresh herb garnish. Remember, the beauty of these appliances is their versatility—use the same pot to sauté, cook, and serve. For ideas on finishing touches and recipes, visit these recipes. Mastering these steps transforms your one-pot meals from trial-and-error to reliable, delicious dishes every time.
Many home cooks believe that simply tossing ingredients into a pressure cooker, slow cooker, or multicooker guarantees a delicious meal. However, this common misconception can lead to disappointing results. In reality, understanding the nuanced differences and the subtle pitfalls is essential for mastering these appliances. For instance, a frequent mistake is assuming that all recipes are interchangeable across devices. While a recipe designed for a slow cooker might work in a pressure cooker, the cooking times and processes vary significantly, and ignoring these differences can result in overcooked or undercooked dishes. To get the most out of your equipment, check out these expert recipes for guidance.
One of the biggest myths I encountered was the idea that you don’t need to pre-season or brown ingredients when using these appliances. This is a trap because skipping this step can lead to bland, flavorless meals. Searing meats and sautéing vegetables upfront develop depth of flavor that pressure and slow cooking alone can’t replicate. A common oops is to add too much liquid, thinking it will make the dish more tender. Actually, excess liquid can dilute flavors and make dishes watery, especially in slow cookers where evaporation is minimal. Use just enough to create steam and develop flavors, and for more tips, explore these hacks.
How can advanced cooks optimize pressure and slow cooking times for complex recipes?
For sophisticated dishes, precise timing and pressure control are key. Adjusting pressure levels and cooking durations based on the ingredients’ texture and size can make or break the meal. For example, tougher cuts of meat require longer, high-pressure cooking, while delicate vegetables benefit from quick releases. Rushing the process with quick pressure release can cause loss of flavor and texture, so understanding when to release pressure naturally or manually is crucial. As noted by culinary experts, these small adjustments significantly improve dish quality. To fine-tune your technique, consider reading these detailed tips.
Another advanced nuance is the importance of layering flavors correctly. Many underestimate the value of seasoning early and how it impacts the final taste. Adding herbs and spices at the right stage—either before sealing the lid or during the final minutes—can dramatically enhance the dish. Also, be mindful of the pressure cooker’s heat and steam retention; a common mistake is opening the lid prematurely, which can spoil the dish and cause safety hazards. Always follow safety guidelines and optimal release methods, as outlined in these expert guides.
Lastly, many overlook the importance of cleaning and maintenance. Residual food particles can affect sealing and cooking performance, leading to inconsistent results. Regularly inspecting and cleaning your appliance ensures it performs at its best for every meal. Remember, mastering the subtle distinctions and avoiding common pitfalls will elevate your one-pot cooking game from good to exceptional. Have you ever fallen into this trap? Let me know in the comments.
Owning a pressure cooker or multicooker is only half the battle; keeping it in prime condition ensures your meals stay delicious and your appliance lasts for years. I’ve learned through years of experience that regular maintenance, the right tools, and a few simple habits can dramatically improve your cooking outcomes and extend the lifespan of your equipment. Today, I’ll share my personal favorite methods and tools I recommend for maintaining your kitchen workhorses effectively.
Invest in Quality Cleaning Tools for Long-Term Performance
One of the most overlooked aspects of appliance upkeep is proper cleaning. I swear by a soft-bristled brush and a microfiber cloth for regular cleaning. The brush helps remove stuck-on food particles from crevices and sealing rings without damaging delicate parts, while the microfiber cloth ensures a streak-free surface. For tougher grime, I use a non-abrasive sponge combined with a mild dish soap. Avoid harsh chemicals or abrasive scrubbers, which can damage seals and surfaces, leading to leaks or malfunctioning. Regular cleaning after each use prevents buildup and keeps your appliance functioning smoothly.
Use OEM Parts and Replacement Kits for Safety and Longevity
When it comes to replacing parts like sealing rings, valves, or pressure regulators, I always recommend OEM (Original Equipment Manufacturer) parts. These are designed specifically for your model, ensuring a proper fit and optimal safety. I keep a few spare sealing rings and valves on hand, especially since these can wear out over time, leading to pressure loss or safety hazards. For example, a worn sealing ring not only affects cooking times but can also cause dangerous leaks. Regularly inspecting these parts—at least every 6 months—is a habit I strongly suggest. Check out these essential hacks for more detailed guidance on maintenance routines.
Schedule Periodic Deep Cleanings and Descale
In areas with hard water, mineral deposits can accumulate inside your appliance, impairing function and safety. I use a descale solution or a mixture of vinegar and water to run a cleaning cycle once every few months. This process helps remove mineral buildup from the heating element and internal components, ensuring consistent performance. It’s a simple step that significantly prolongs the life of your device. Additionally, inspecting the lid’s gasket and cleaning it thoroughly prevents odors and leaks. For step-by-step instructions, I recommend consulting this comprehensive guide.
How do I maintain my pressure cooker or multicooker over time?
The key to longevity lies in regular inspections and proactive care. Always follow the manufacturer’s instructions for cleaning and replacement schedules. Keep an eye on the sealing ring’s condition—if it becomes cracked or loses elasticity, replace it immediately. Use the right tools, like a soft brush and non-abrasive cloth, to keep all parts clean. Additionally, avoid over-tightening the lid or forcing the pressure valve, as this can cause damage over time. A well-maintained appliance not only performs better but also keeps your safety a priority. For advanced tips, check out these expert hacks. I challenge you to implement a weekly cleaning routine with these tools—you’ll notice a difference in your appliance’s performance and your peace of mind. Remember, investing a little time now saves money and stress later, making your pressure, slow, or multicooker your reliable partner in creating effortless, delicious meals.
Lessons That Changed My Approach to Pressure Cooking
- Realized that rushing the pre-searing step can lead to bland dishes—taking those extra minutes to brown ingredients makes a huge difference in flavor.
- Discovered that adjusting pressure levels based on ingredient toughness yields much better results than following generic timings—each recipe benefits from personalized tweaks.
- Learned that regular maintenance, like replacing seals and cleaning valves, prevents unexpected failures and keeps the appliance running smoothly for years.
- Found out that layering flavors with proper seasoning early on creates depth that simple cooking can’t achieve—this transforms a basic meal into something special.
Tools and Resources That Truly Make a Difference
- My trusted go-to is the Ultimate Guide to Multicooker for Effortless One-Pot Meals—it’s packed with expert advice that saved me countless times.
- I rely on OEM replacement kits for parts like sealing rings and valves—these ensure safety and longevity, preventing leaks and pressure loss.
- For recipe inspiration, these pressure cooker recipes have been my lifesaver, especially on busy weeknights.
- And don’t forget the importance of a soft brush and microfiber cloth—simple tools that keep my appliance in top shape, ensuring consistent performance.
Ignite Your Cooking Journey Today
Now that you know these insider secrets, it’s your turn to embrace the magic of pressure and multicooker meals. With patience and the right tips, you’ll find yourself creating delicious, nutritious one-pot dishes that save time and energy. Remember, every mistake is just a step toward mastery—so don’t be afraid to experiment and refine your skills. The future of effortless cooking is in your hands, and these tools and techniques will make every meal a success. Ready to start your journey? Share your experiences or questions below—I’d love to hear how your pressure cooker adventures unfold!
Reading this post really resonated with my own journey into mastering pressure cookers. I remember the initial frustration of overcooking or burning ingredients because I wasn’t familiar with the right timing. Now, I always start by reading the manual thoroughly, which sounds simple but makes a huge difference. I’ve also learned that layering seasonings at different stages—sometimes before sealing, sometimes during the final simmer—really boosts the flavor profile of my dishes.
One challenge I often face is knowing when to release pressure naturally versus quick release, especially with delicate ingredients like fish or greens. How do others decide which method is best, particularly in recipes where timing is critical? I’d love to hear additional tips from experienced cooks here. Also, maintaining equipment—like replacing seals and cleaning valves—has definitely extended my appliance’s life and improved my cooking results. Would you be interested in sharing your own routine for upkeep and troubleshooting? Overall, this post offers fantastic insights to take the guesswork out of pressure cooking and make kitchen time much more enjoyable.
This post really hits home for me, especially the part about mastering timing and pressure adjustments. Initially, I underestimated how crucial it is to match the pressure level and cooking time to the ingredients. I’ve found that tougher cuts of meat do benefit from longer high-pressure cycles, while delicate veggies need quick releases to avoid mushiness. It’s all about balancing the pressure to preserve flavor and texture.
I also agree with the importance of layering flavors early—browning meats and sautéing vegetables beforehand really elevates the final dish. One tip I swear by is using a simple kitchen thermometer to check the internal temperature of meats directly, especially when cooking larger cuts, to ensure safety and perfect doneness.
For anyone struggling with maintaining their appliance, I’ve adopted a routine of cleaning the gasket regularly and inspecting valves for wear. What’s been your go-to maintenance step that really extended your cooker’s lifespan? I’d love to learn more about how others keep their devices running like new.