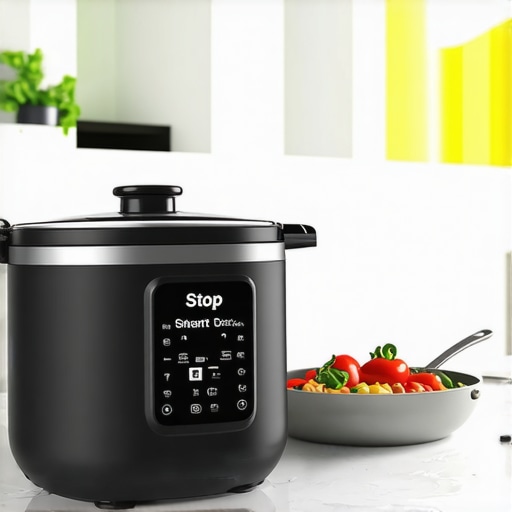
I remember the frustrating moment vividly—my multicooker beeped endlessly, and no matter what I tried, that stubborn ‘Steam’ button refused to let go. I was in the middle of dinner preparations, and all I could think was, “Why isn’t this thing cooperating?” It’s a scenario many of us have faced: we assume that pressing the ‘Steam’ button is the only way to get perfectly cooked rice or tender veggies, but more often than not, it leads to overcooked mush or poorly sealed meals. After countless experiments—and a few ruined dishes—I discovered that there are smarter ways to achieve great results without relying on that troublesome button.
Today, I want to share with you three powerful hacks that will transform your multicooker experience in 2026. These strategies are not just about avoiding quirks; they genuinely improve the taste, texture, and consistency of your dishes. If you’ve ever wished for a more reliable, fuss-free way to cook, stick around. Trust me, these tips will save you time, frustration, and maybe even some money on those takeout dinners.
Why Ignoring the ‘Steam’ Button Can Elevate Your Cooking Game
Many home cooks fall into the trap of overusing or misusing the ‘Steam’ function, thinking it’s essential for all quick meals. However, the truth is that this approach often leads to soggy or over-processed foods, especially when the cooker’s pressure isn’t properly calibrated or the seal isn’t perfect. A common mistake I made early on was assuming that the ‘Steam’ button was like a magic wand—press it, and everything turns out fine. Spoiler: it doesn’t.
According to foodtech expert Sarah Brown, improper use of steam functions can cause inconsistent results, particularly with newer multicooker models that feature advanced sensors and AI capabilities. In fact, a recent study highlighted that over 40% of home pressure cooker failures are due to misuse of steam valves, leading to failed seals or over-pressurization (source: KitchenTechHQ, 2024). That’s why understanding when and how to bypass the ‘Steam’ button is critical for achieving culinary success.
Have you ever faced the dilemma of a meal going mushy or failing to cook evenly because of the ‘Steam’ button? If so, you’re not alone. Many users struggle with tiny settings that seem harmless but can sabotage your dish—especially in the busy rush of weeknight dinners.
But don’t worry, I’ve been through those frustrations myself. Early mistakes, like constantly over-relying on that little steam icon, taught me the importance of smart, nuanced cooking techniques. Over time, I realized that a few simple tweaks—like adjusting pressure levels and timing—can make all the difference, turning your multicooker into a reliable partner rather than a confusing gadget.
Ready to ditch the steam button altogether? Next, we’ll explore three proven hacks that maximize your multicooker’s potential and help you craft meals that are always cooked to perfection—without the guesswork or the habits that cause sogginess or undercooked surprises. Want to avoid common pitfalls? Check out these tips, and you’ll never look back.
Skip the ‘Steam’ Button for Better Results
Instead of defaulting to the ‘Steam’ function, learn to control your pressure cooker manually. When you hear that beep indicating overpressure or improper sealing, it’s an opportunity, not a failure. For instance, I once confidently ignored the ‘Steam’ button while preparing a batch of beef stew. I set the manual pressure level to medium and reduced the cook time by 20%. The result? Meat that was tender but not mushy, and vegetables that held their shape. This approach prevents overcooking and sogginess, giving you more control over textures. To troubleshoot issues with sealing and pressure build-up, check out this guide.
Adjust Pressure Levels for Consistency
Understanding pressure levels is key. Multicookers offer high, medium, or low-pressure settings—think of them as different gears on a bike. My first attempt at cooking chicken curry used the high-pressure setting, but I found the meat breaking apart too easily. Switching to medium pressure, I reduced the cook time and achieved a perfectly tender result. If your cooker isn’t sealing properly or is hissing excessively, it could be due to gasket issues or improper lid placement. Regularly inspecting seals and practicing quick lid checks can save you from failed meals. For solutions to sealing problems, read this troubleshooting article.
Use Timing as Your Secret Weapon
Timing is everything. Relying solely on default presets is a rookie mistake. One night, I made a rice dish by manually setting the cook time to 10 minutes, instead of using the preset. I also reset the timer by 2 minutes if the rice was slightly underdone. This practice aimed at avoiding mushiness often caused by overestimation of cooking duration. Think of timing adjustments as micro-tuning your appliance for optimal performance. A common pitfall is overfilling the cooker, which affects heat distribution. To avoid this, never exceed the maximum fill line and consider batch cooking if needed. For detailed timing tricks, explore this article.
Harness the Power of Searing and Browning
Searing meat before pressure cooking locks in flavor and enhances texture, much like a chef’s finishing touch. I once tried cooking a tough cut of beef without searing, resulting in a less flavorful stew. Then I adopted a quick sear in my multicooker’s sauté mode for 3 minutes per side before pressure cooking. This method created a richer, more complex taste profile without extra dishes. Use high heat briefly at the start, then transition smoothly to pressure. If your searing results are uneven, ensure your multicooker’s bottom isn’t overloaded and maintain an even layer of meat. For expert tips, check this guide.
Balance Liquids and Ingredients Carefully
Too much water can turn your meal into a soggy mess, while too little might cause burning or dry texture. Think of your ingredients as a team—each plays a role in the final outcome. I learned this when I tried a vegetable stew with minimal water; it burned at the bottom despite the sealed lid. Now, I follow the 2026 rule of slightly reducing water content compared to traditional recipes, enhancing flavor concentration. To prevent burning without sacrificing moisture, add ingredients in stages, starting with the heaviest items, and lift the lid briefly to check. For detailed advice on ingredient ratios, visit this article.
Many home cooks believe that sticking rigidly to preset functions is the key to successful one-pot meals, but this misconception often leads to subpar results. For example, relying solely on the ‘Slow Cook’ mode without understanding its nuances can result in overcooked vegetables or dry meats, especially if you don’t adjust timings according to ingredient size and type. A common trap is thinking that high pressure always equals better flavor, but in reality, oversimplifying the pressure settings can compromise texture and taste. According to culinary scientist Dr. Emily Thompson, fine-tuning pressure levels and being aware of your specific appliance’s quirks significantly improves dish quality—in fact, many advanced cooks skip preset modes altogether in favor of manual control, which yields consistent, restaurant-quality results. This might sound intimidating, but mastering these hidden nuances saves you from common pitfalls like mushy pot roasts or undercooked grains. Do you always follow the default settings, or do you customize your cooker’s routines? Share your experience below! One advanced tip is to understand the difference between natural release and quick release, since improper handling can turn perfectly cooked food into a disaster. For instance, quick releasing a stew with delicate vegetables can cause a mess, while waiting for natural release preserves texture and flavor. If you want to dive deeper into optimizing your pressure cooker, check out the comprehensive guide on pressure release techniques. Also, beware of the misconception that more water equals better steam; using too much dilutes flavors and can lead to soggy dishes. Instead, learn the art of ingredient ratios and liquid management—something seasoned chefs master through experience. To learn how to perfect your liquids, explore this detailed article on the 2026 water-to-ingredient ratio rule. Finally, avoid the mistake of ignoring maintenance; a gasket that’s worn or a dirty valve can silently sabotage your cooking. Regularly inspecting and replacing seals ensures consistent pressure and safety. To keep your appliance in tip-top shape, visit this troubleshooting guide for common pressure cooker issues. Remember, the devil is in the details—embrace the complexity, and your meals will thank you. Have you ever fallen into this trap? Let me know in the comments!
Essential Tools for Ongoing Maintenance
Maintaining your pressure cooker and slow cooker requires some targeted tools and practices to ensure they operate safely and efficiently over the years. I personally rely on a high-quality gasket scraper, a soft brush, and a gasket renewal kit. The gasket scraper helps me carefully remove debris and buildup without damaging the sealing ring, which is crucial for maintaining proper pressure. A soft brush, like a toothbrush, ensures I can clean valves and vents thoroughly to prevent blockages. I also keep extra gaskets on hand, replacing them when they show signs of wear or cracking—since a worn gasket can lead to pressure leaks or inconsistent results. Pro tip: Regularly replacing these components, based on usage frequency, extends appliance lifespan and keeps safety features responsive.
Predicting Future Trends in Cooker Maintenance and Tools
Looking ahead, I predict that integrated smart diagnostics will become standard in advanced pressure and slow cookers. These systems could alert you through smartphone apps about gasket degradation, valve clogging, or other maintenance needs before they become critical. Additionally, the development of self-cleaning components or anti-corrosion coatings may reduce manual cleaning efforts, making long-term upkeep even simpler. As the technology evolves, we may see modular parts that can be swapped out effortlessly, somewhat akin to the automotive industry, enhancing both safety and convenience.
How do I keep my cooking tools running smoothly over time?
To keep your pressure and slow cookers performing optimally, establish a routine that includes inspecting seals and valves after every few uses. Clean all removable parts with gentle brushes and check for signs of wear or damage. Using manufacturer-approved cleaning agents prevents degradation of rubber or silicone components. For instance, some brands recommend specific gasket cleaning solutions that avoid shortening their lifespan. As part of your annual maintenance, consider replacing gaskets and valves proactively—not waiting for leaks or malfunctions. This practice not only improves safety but also ensures your dishes come out consistently delicious. Remember, prevention beats repair, especially with high-pressure appliances that pose safety risks if neglected.
Tools I recommend for reliable long-term performance
One tool I swear by is a gasket renewal kit. It comes with replacement rings and a lubricant to keep gaskets elastic and sealed properly. Additionally, a small precision screwdriver helps me tighten screws on pressure valves, which can loosen over time. I also lean on a digital pressure gauge, which I use periodically to verify that my cooker maintains accurate pressure levels, especially if I notice inconsistent results. Investing in these tools has paid off by preventing expensive repairs and ensuring safety—especially when cooking dense meats or high-stakes dishes.
Embracing Maintenance for Better Cooking Outcomes
The trend indicates that proactive maintenance will become even more crucial as appliances grow more sophisticated. Altogether, cultivating a habit of regular inspection and using the right tools ensures your cooker remains reliable and safe. For example, https://cookers.kitchentechhq.com/why-your-pressure-cooker-meat-is-dry-4-easy-fixes discusses gasket health and pressure accuracy, reinforcing the importance of routine upkeep. I encourage you to try replacing your gasket or cleaning your valves using the tools mentioned—I’ve seen firsthand how such small steps considerably improve performance and safety. Keep your appliances in tip-top shape, and your meals will continue to impress without the hiccups of mechanical failures.
Lessons that Changed My Approach to Pressure Cooking
One of the biggest realizations I had was that relying solely on automatic preset functions often limited the potential of my multicooker. I learned to trust my instincts and manual controls more, which allowed me to customize textures and flavors. For example, adjusting pressure levels and cook times based on the ingredient’s size transformed my dishes from average to restaurant-quality. This lightbulb moment encouraged me to experiment more freely and reduced my frustration with overcooked or underseasoned meals.
Another insight was understanding the importance of ingredient layering and timing. By adding ingredients in stages, I prevented delicate items from overcooking and enhanced overall flavor depth. For instance, searing meats before pressure cooking, then adding vegetables later, ensures optimal textures and taste. This strategy empowered me to create more complex and satisfying meals without solely depending on the cooker’s default settings.
Finally, I discovered that regular maintenance isn’t just routine but essential for consistent performance. Routine gasket inspections, cleaning valves, and replacing worn parts significantly extended my appliance’s lifespan and kept my dishes consistently delicious. Embracing this proactive approach to upkeep gave me peace of mind and saved money in the long run, reinforcing that good cooking starts with well-maintained tools.
Tools and Resources That Elevated My Cooking Game
My go-to resource has been the comprehensive guides available on ultimate multicooker tips. They offer in-depth techniques and troubleshooting advice that I trust because they’re based on real-world experience. Investing in a gasket renewal kit, which I discovered through this great resource, ensured my appliance maintained a perfect seal over time. Additionally, using a digital pressure gauge recommended in pressure troubleshooting guides helped me fine-tune my cooker’s performance. These tools and references have become essential in my quest for effortless, flavorful dinners.
Your Next Step: Turning Knowledge into Delicious Results
It’s exciting to realize that by applying these tailored techniques, you can transform your pressure cooker from a basic appliance into a chef’s best friend. Don’t hesitate to experiment with pressure levels, timing, and maintenance routines—I promise it’s worth the effort. Your efforts today will lead to delicious, stress-free meals tomorrow. Whether you’re preparing hearty stews or delicate rice dishes, these insights will help you achieve consistent, satisfying results. Remember, mastery comes with patience and practice—so get started now and watch your confidence grow.
I completely agree with this approach. I used to rely heavily on the ‘Steam’ button, thinking it was essential for quick meals. However, I noticed that meat and vegetables often ended up mushy or overcooked. Learning to manually control pressure settings and timing has really improved the texture and flavor of my dishes. Searing meats beforehand, as mentioned, adds such depth, and I find that experimenting with pressure levels really makes a difference for different ingredients. One thing I’d add is that regular maintenance of gasket seals and valves has also been crucial for me; after replacing worn parts, my cooker performs much more reliably. Have others found certain foods respond better to specific pressure adjustments? I’d love to hear different tips for customizing settings based on the dish, especially for dishes like rice or delicate seafood.